
Ensuring Your Android App's Quality With Firebase Crashlytics
Firebase Crashlytics provides an extremely powerful automatic crash reporting tool for Android (and iOS) apps. In addition to providing a full stack trace for all crashes, it also tracks all ANRs (App Not Responding) in your app. All crashes / ANRs come with lots of metadata about the device, operating system, and can be enhanced with custom data
This data is then aggregated, and widespread issues can be quickly identified and prioritised. Unlimited Crashlytics usage is provided for free, and basic integration can be completed in a couple of minutes.
This post is part of The Complete Guide to Firebase. Throughout this tutorial, you’ll need access to the Firebase Crashlytics dashboard, and the official documentation may be useful.
Implementation
As always, the entire Firebase Reference Project is open source, and there is a pull request for adding Firebase Crashlytics if you just want to see the code changes required. This tutorial assumes you already have Firebase added to your project.
In this tutorial, you’ll learn how to implement Crashlytics into your existing app. You’ll also learn how to customise these crash reports, receive crash reports through various platforms, and view your crashes online.
Setting up Crashlytics
Web interface
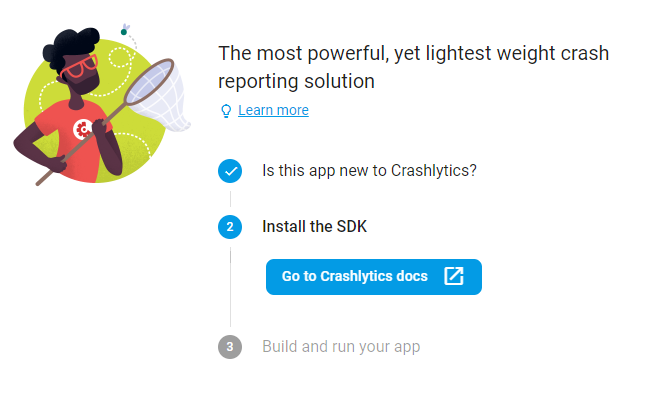
On the Crashlytics web interface, click “Set up Crashlytics”, then select “This app is new to Crashlytics” and press next. That’s it, Crashlytics is now listening for crashes, time to make your app send them!
Project-level build.gradle
In your project-level build.gradle, add the following inside buildscript -> repositories:
maven {
    url 'https://maven.fabric.io/public'
}
And inside buildscript -> dependencies:
classpath 'com.google.gms:google-services:4.2.0'
classpath 'io.fabric.tools:gradle:1.26.1'
Finally, inside allprojects -> repositories:
maven {
    url 'https://maven.google.com/'
}
App-level build.gradle
At the top of the file, add:
apply plugin: 'io.fabric'
Finally, inside dependencies:
implementation 'com.google.firebase:firebase-core:16.0.4'
implementation 'com.crashlytics.sdk.android:crashlytics:2.9.6'
Now, perform a Gradle sync. Crashlytics is enabled! You can test this by throwing any exception, or using the built-in Crashlytics.getInstance().crash().
Enabling & disabling crash reporting
By default, Crashlytics will run automatically. However, if you want to disable crash reporting until a certain time (e.g. the user accepts their crash data being shared), it can be enabled on demand. Note that crash reporting cannot be turned off programmatically, the user must restart the app. First, disable Firebase in your AndroidManifest.xml:
 <meta-data
      android:name="firebase_crashlytics_collection_enabled"
      android:value="false" />
Now, at whichever point in the user flow you want to enable Crashlytics, you need to initialise it:
Fabric.with(this, new Crashlytics());
All crashes / ANRs will now be recorded.
Adding custom logs & data to Crashlytics
Logging
If you are already using Firebase Analytics, any screen view events in there will appear under the “Logs” tab of your crash.
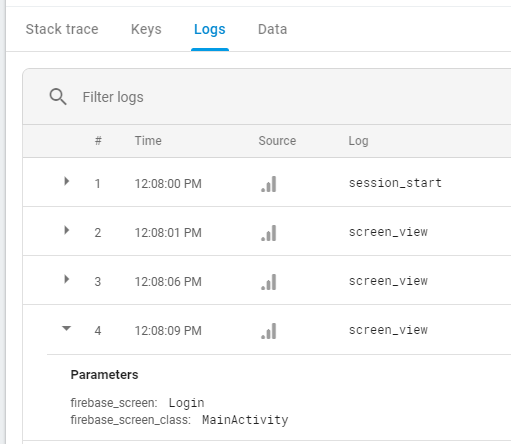
You can also add your own events to this log manually. These can be added with Crashlytics.log("Your log message"), and will then show up in your logs.
Keys
You can also add custom “keys” to your crashes. This is useful for recording the current state of a user when the crash occurred, for example if they are a new or returning user. This is done using Crashlytics.setString, .setBool, setDouble, setFloat, or setInt. These functions all take a key string (e.g. “isNewUser”), and a value (e.g. “true”). These can be overwritten at any time.
Identifiers
It is often useful to know exactly which user experienced the crash, so you can work towards reproducing and eventually fixing the issue. This is done by calling Crashlytics.setUserIdentifier("user1234").
Receiving Crashlytics alerts
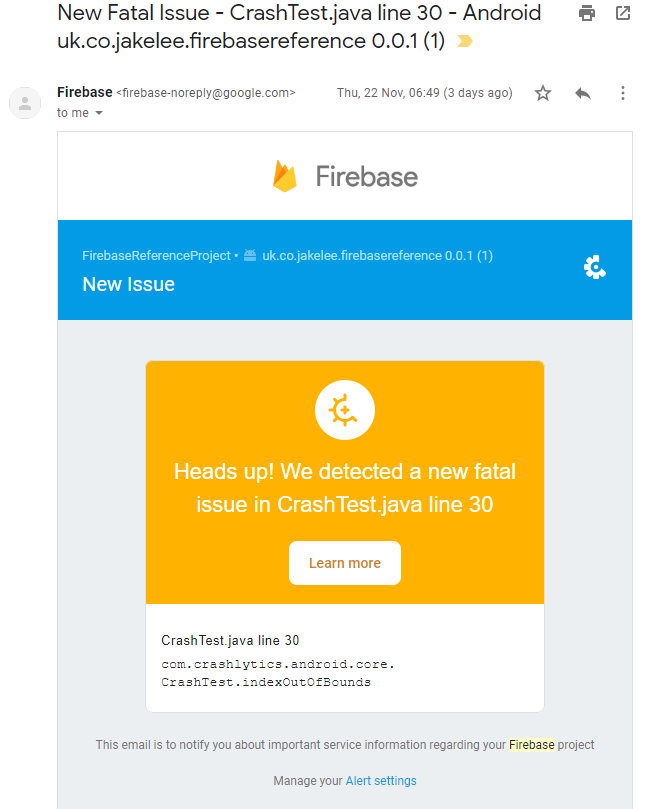
By default, you will receive email warning (shown below) of all fatal crashes with your app, so that you can respond as soon as possible.
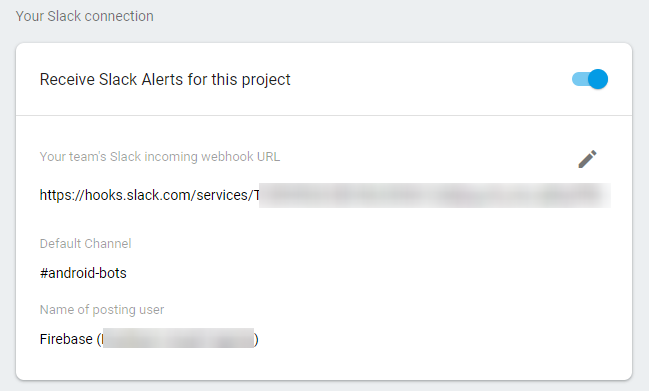
Additionally, you can add Slack integration to Crashlytics, as well as Jira, BigQuery, and more. These integrations can be managed via the settings icon in the top left, then “Project settings”, and the “Integrations” tab. Once this has been configured, you can receive instant notifications of all crashes (or only fatal issues) in your chosen Slack channel. This can be extremely useful for teams that tend to not monitor their email too closely, as it means any issue can immediately be investigated.
Additional Crashlytics functionality
Crashlytics’ core functionality of bug reporting is very powerful by itself, but it can be improved with additional functionality. For example, all new issues can be responded to in Firebase Cloud Functions via the crashlytics.issue().onNew() trigger. Additionally, regressed (onRegressed()) and large issue volume increases (onVelocityAlert()) are available to listen to. An official Firebase guide is available for this.
To allow Crashlytics to automatically deobfuscate your ProGuarded stack traces, make sure to remove -printmapping mapping.txt from your ProGuard config, and add:
-keepattributes SourceFile,LineNumberTable        # Keep file names and line numbers.
-keep public class * extends java.lang.Exception  # Optional: Keep custom exceptions.
Web interface
Crashlytics’ web interface is a dashboard showing a record of all recent crashes, and how many users are encountering them. A summary of all encountered crashes is also shown.
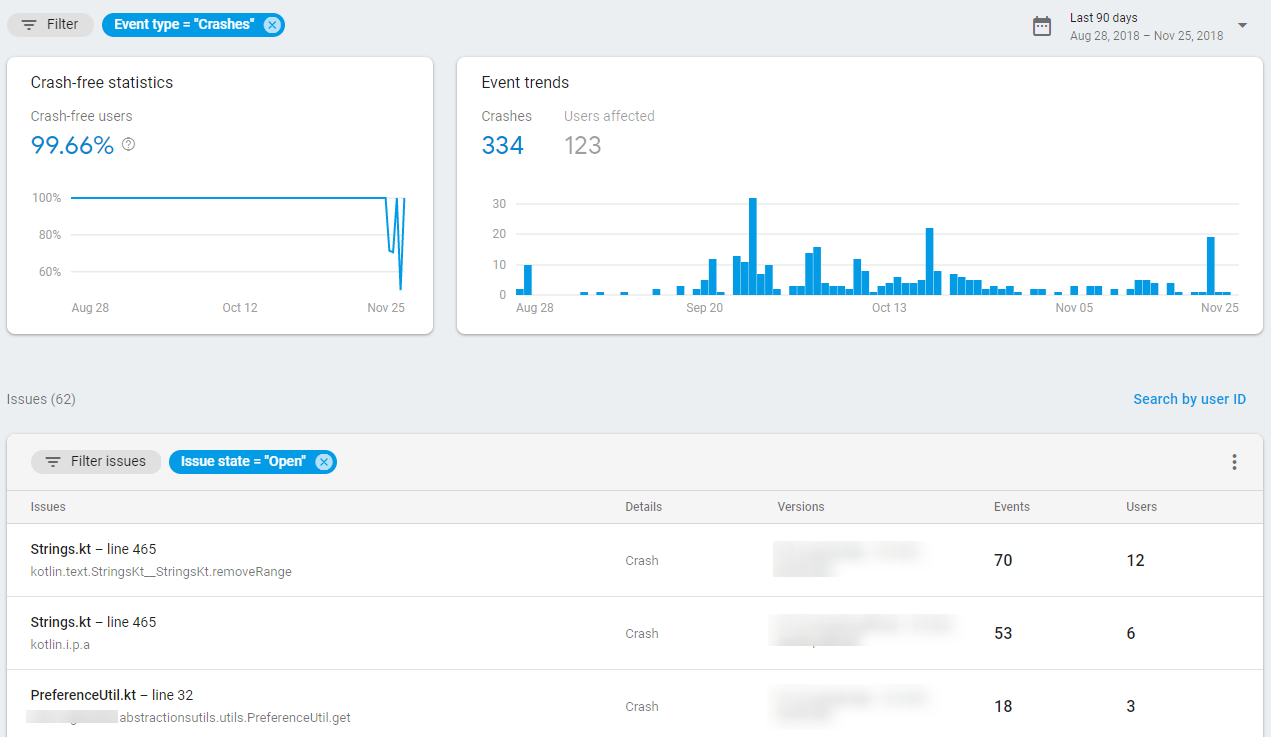
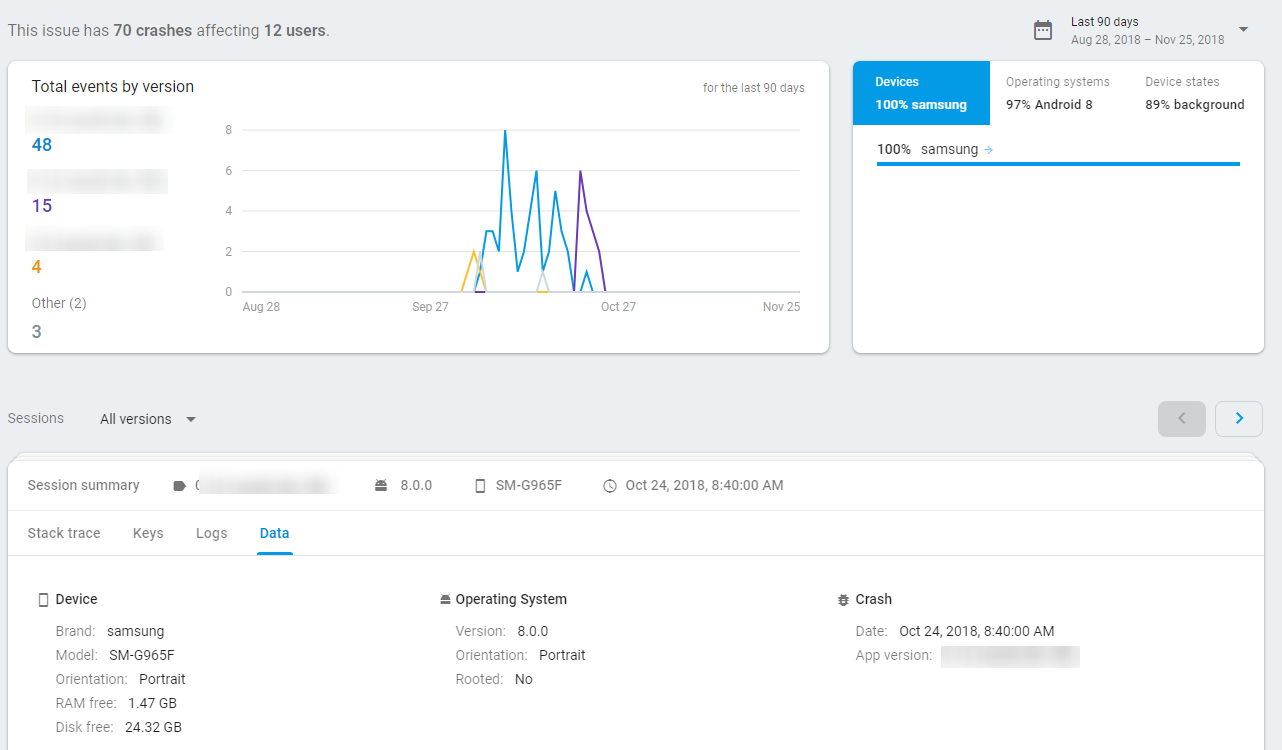
The rest of the page is dedicated to listing all encountered crashes. Clicking any of these will provide metadata such as app versions that are crashing, devices encountering it, and detailed information about the crash. This detailed information consists of a full stack trace, information about the user’s devices, and any custom logs / data that has been added.
Conclusion
Firebase Crashlytics is an extremely powerful automatic crash reporter, and is unlikely to be surpassed by any alternatives. Due to the unlimited free usage, simple integration, and ability to integrate with third party systems, it’s hard to see any major drawbacks. In 2015, it was used in 42% of the top 200 apps, and this figure has only grown since then. As such, the system has a very reliable history, and should almost always be the choice for crash monitoring.
It’s worth noting that the product has a rather complex history. Unlike most Firebase services which are developed in-house by Google, Crashlytics was originally a start-up (2011), then owned by Twitter (2013), then became a part of Fabric (2014), and is now owned by Google (2017)! The final transition is due to Fabric shutting down, with support ending in mid-2019. Migration is simple with Fabric / Google’s guide, hopefully Crashlytics has a permanent home now!