Adding Firebase to an Android Project
Considering the vast array of features included in Firebase, adding it to your project is surprisingly easy. Later versions of Android Studio even include an assistant that analyses the current project and provides fixes for common integration mistakes.
This guide however, will focus on the very straightforward steps required to integrate Firebase manually.
Prerequisites
- An existing Firebase project
- An existing Android Studio project (an example project is available)
Google Services file
The next step is obtaining a google-services.json file, so that the app knows which Firebase project to talk to. This can be done by visiting the project overview and clicking the Android icon.

This will bring up the “Add Firebase” wizard:
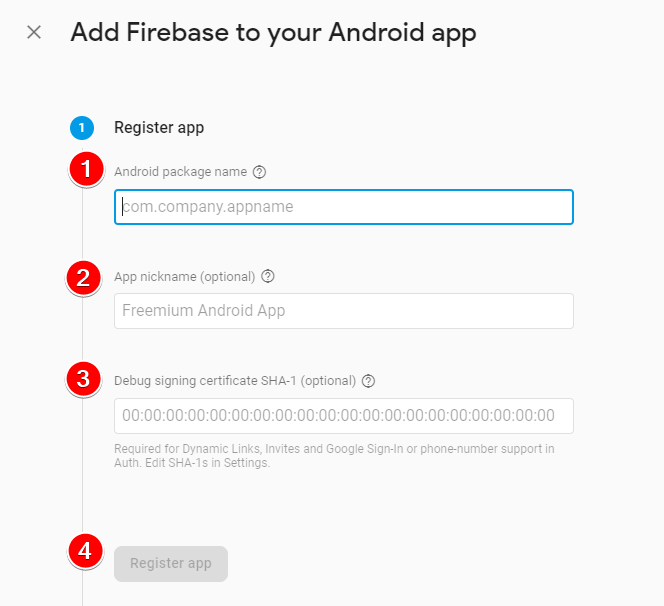
- Android package name: The only required part of this form, this is the package name used when creating your app. It will be visible in the
AndroidManifest.xmlfile aspackage="com.example.test". - App nickname: This is an optional “friendly” name you can use to better summarise the app.
- Debug signing certificate: This is not needed for most aspects of Firebase, but a guide does exist.
Once 1-3 of the fields have been filled in, the app can now be registered (4). Clicking this button will provide a download link for your google-services.json file, as well as instructions on where to put it. Switch to “Project” view in the left Android Studio sidebar, then put the downloaded file inside the “app” folder.
Firebase SDK
Next, the Firebase library needs to be added to your project. Doing this is just 4 simple steps:
- Add
classpath 'com.google.gms:google-services:4.0.1'inside thedependenciessection of your project levelbuild.gradle(file will have “(Project: yourappname)” next to it). - Add
implementation 'com.google.firebase:firebase-core:16.0.3'inside thedependenciessection of your app levelbuild.gradle(file will have “(Module: app)” next to it). - Also add
apply plugin: 'com.google.gms.google-services'to the bottom of the app levelbuild.gradle. - Finally, press “Sync now” in the yellow bar at the top.
Note: As of writing, 16.0.3 is the latest Firebase version, and 4.0.1 the latest Google services version. If these are outdated, Android Studio will prompt you to update.
Final steps
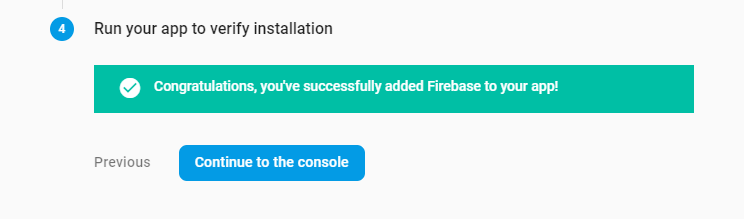
Finally, just run your app, and the “Add Firebase” wizard will confirm Firebase has been set up correctly:
That’s it, Firebase is fully set up! Your project settings (e.g. name) can be changed later if necessary.
Previous: Creating A New Firebase Project
Next: Developing Android Apps With Firebase Authentication