Did you know Google offers a Cybersecurity Professional Certificate? They do! I recently completed it, and wanted to share the good, the bad, and the confusing parts.
Before diving into the review, it’s worth mentioning that the learning platform used for this (Coursera) has a very rewarding referral program, but referral links are NOT used in this article. This way, the review is guaranteed to be impartial.
Want to skip alllllll the words and detail? Skip to the conclusion!
Overview
A few useful links before going into detail:
I won’t cover all the basic information around the objectives of each module, or the areas covered, since this is all available on the official site. Instead, I’ll cover all the things that aren’t discussed, far more interesting! However, it is worth referencing Google’s summary of the certificate objectives:
- Understand the importance of cybersecurity practices and their impact for organizations.
- Identify common risks, threats, and vulnerabilities, as well as techniques to mitigate them.
- Protect networks, devices, people, and data from unauthorized access and cyberattacks using Security Information and Event Management (SIEM) tools.
- Gain hands-on experience with Python, Linux, and SQL.
Duration
The description of Google’s Cybersecurity Professional Certificate states “6 months at 7 hours a week”. This simply isn’t close to accurate, and is many times higher than the actual time required, regardless of experience levels.
Each of the 8 courses consist of 4 “modules”, in theory a week of work. In reality each module will take around an hour of work, perhaps two for the very technical modules for complete newcomers. This gives a total time of around 32 hours (8 x 4), rounded down to 30 due to the last course containing far less detail. Nowhere near the ~180 estimated!
32 hours is roughly a work week, and I can see from my notes that I completed the course in 16 days (20th March - 5th April). During this time I was also working on an unrelated university project (and have a job!), so my personal estimate with a lot of relevant existing knowledge is around 20 hours.
In conclusion, 20 - 40 hours to complete is more accurate, depending on experience.
Pricing
The certificate is served on Coursera, and whilst you can pay for access to the certificate itself ($49/month), it costs about as much as a month of “Coursera Plus” ($59/month) which provides access to the certificate and hundreds of others.
As such, Coursera Plus seems to make far more sense if you intend on completing any additional courses whatsoever, otherwise you’ll end up with overlapping $49/month subscriptions!
You also get a 7-day free trial with Coursera Plus, and can also apply for financial aid, although I’m not sure how that process works. There’s lots more info on pricing on Coursera’s site, or r/Coursera.
My background / aims
As hinted at earlier, I knew that this course would have quite a bit of overlap with my existing knowledge. I’ve worked as a software engineer for 10+ years, and have a personal interest in cybersecurity, encryption (my BSc Computer Science dissertation was on this!), and similar topics.
However, as with a lot of my tangential knowledge, it’s been picked up at random through articles, conversations, and experiences at work or on side projects. This left me suspecting there might be some fundamental gaps in my knowledge, and this certificate confirmed that!
I’d estimate around 30% of the course was new to me. Whilst the Python (Course 7), SQL (Course 4), and web portions were more of a refresher than anything new, the areas around incident detection and response (Course 6), and assets / threats / vulnerabilities (Course 5) were completely new information, with the other modules being a mixture.
With all that preamble finished, on with the actual review!
The Good
Varied, high quality content
People have different preferred learning styles, and I sometimes “bounce off” training courses because I don’t particularly enjoy videos, and far prefer reading or interactive activities. As such, I was very impressed with the variety of formats, and how it was all extremely consistently excellent.
For example, whilst core information is often provided in a video, it’s almost always expanded on in far more detail in text / graphic form in the next activity. This serves as a recap, clarifies any misunderstandings, and lets you absorb a bit more surrounding information.
In total, the formats offered, in approximate order of frequency, are:
Videos
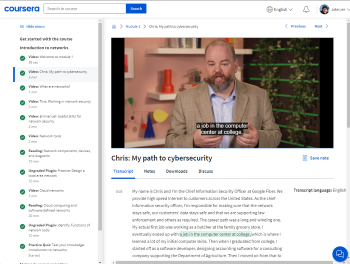
Typically 2-8 minutes long, with a relevant Google employee on camera, there are so many of these that it adds up to around 14 hours in total! These videos often include animations, diagrams, or code when helpful, and are clearly filmed and edited professionally. More on these in Videos.
Note that these are also all available on YouTube for free.
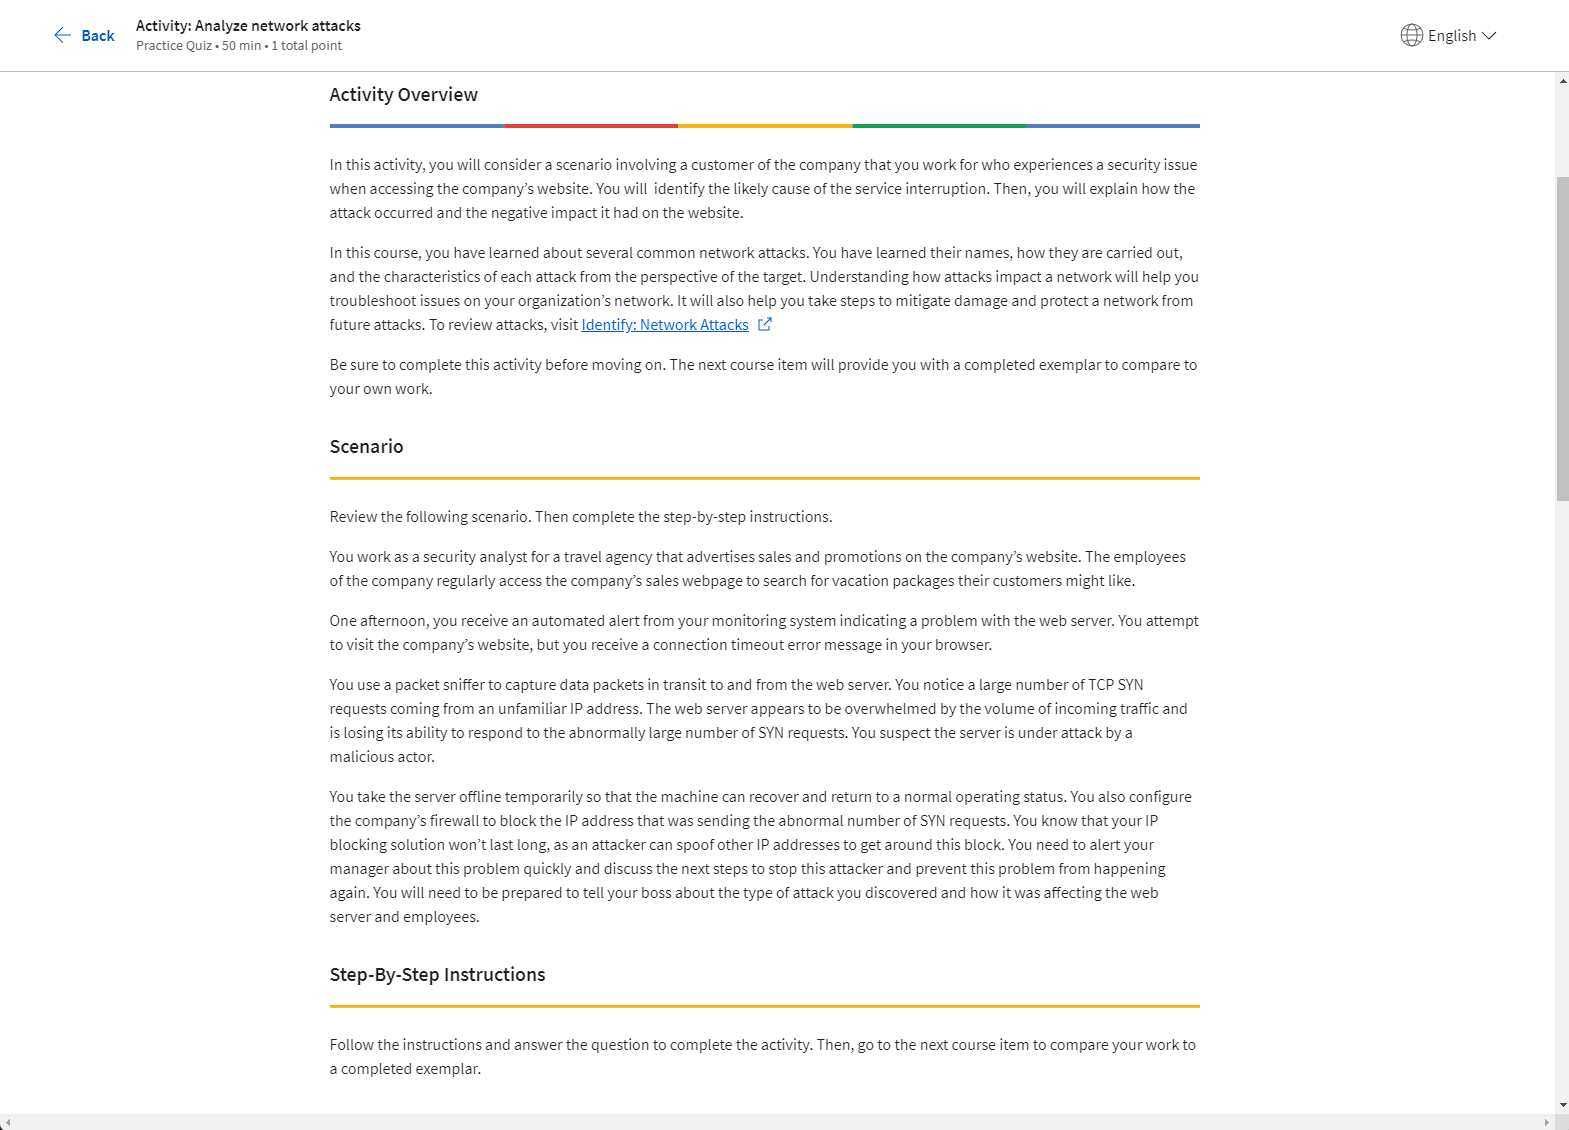
Readings
Usually 100-800 words, with relevant diagrams and links. The writing is very high quality, easy to understand, yet also accurate. In fact, despite usually finding plenty, I didn’t spot a single spelling mistake throughout the entire certificate! I wish these readings were provided as standalone content, as they’re some of the best summaries I’ve ever seen.

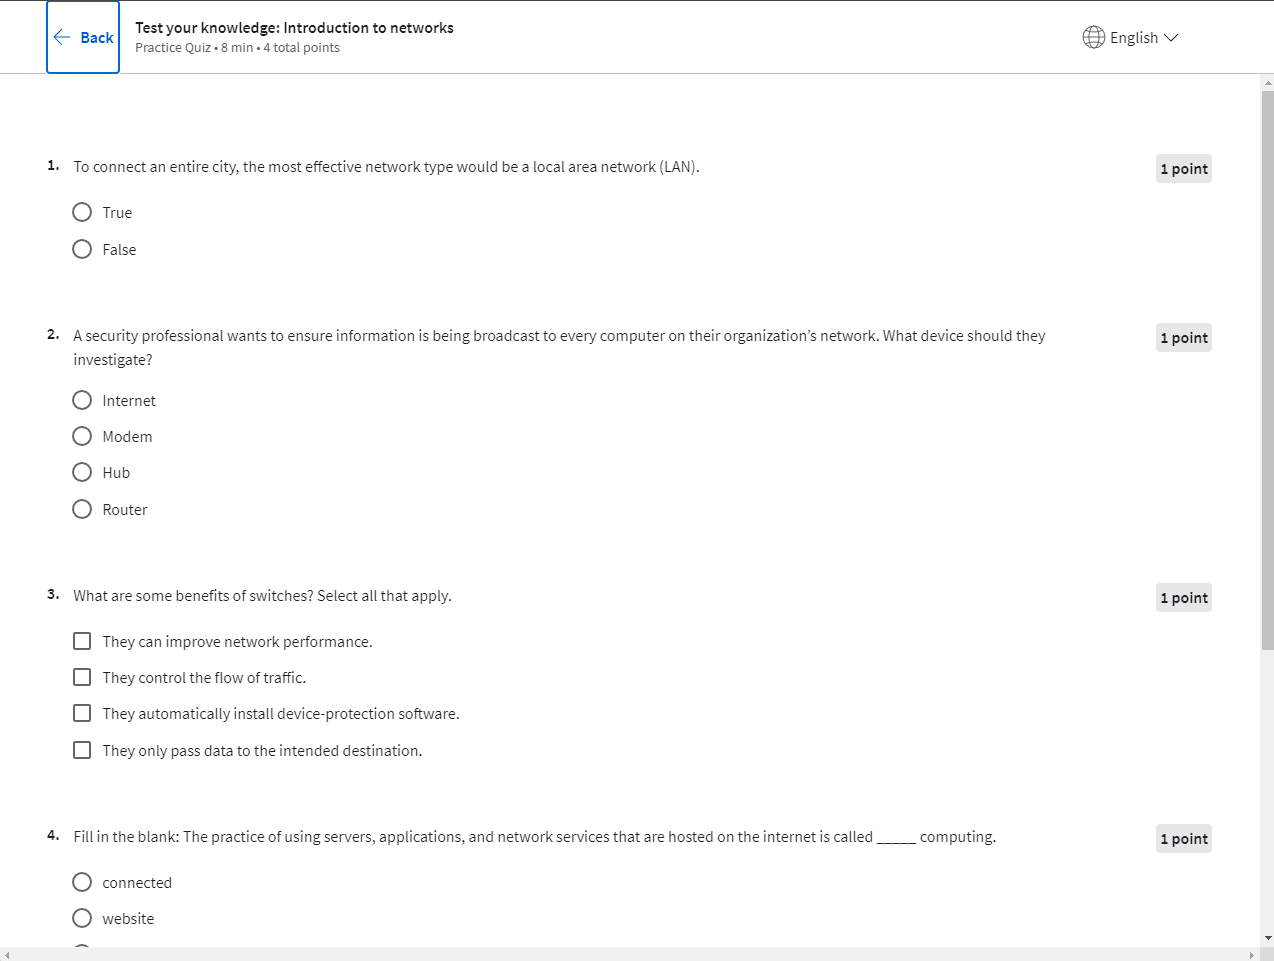
Quizzes
These are short, 4-8 question multiple choice quizzes around recently covered content. They’re quite easy, usually require a 75% pass rate, and can be retaken if failed.

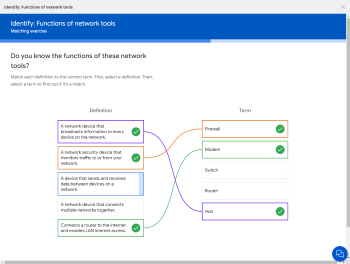
Flashcards / Plugins
There’s a few formats of these, but they all revolve around clicking to view summaries of information learned. They all contain high quality artwork, and are useful recaps.
Portfolio builders
After learning about a new type of documentation (e.g. incident report), there’ll be a self-marked assignment to create an example of this documentation, with an example provided afterwards. I admittedly skimmed these activities usually, since they were quite a lot of paperwork that I’ve completed in the real world before.

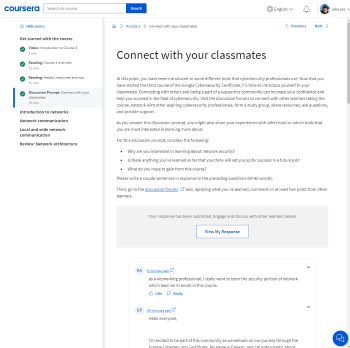
Discussions
The only weak content type, “Discussions” give you a few prompts, and encourage you to answer in a few sentences, then reply to other student’s answers. These are typically open-ended questions such as “Why are you interested in learning about network security?”. Unfortunately these are almost entirely ignored (see “Discussions are pointless”), fortunately they are completely optional!
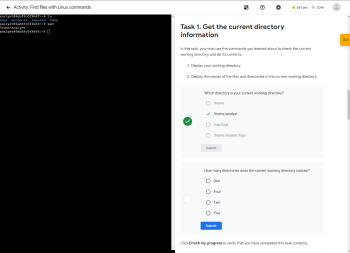
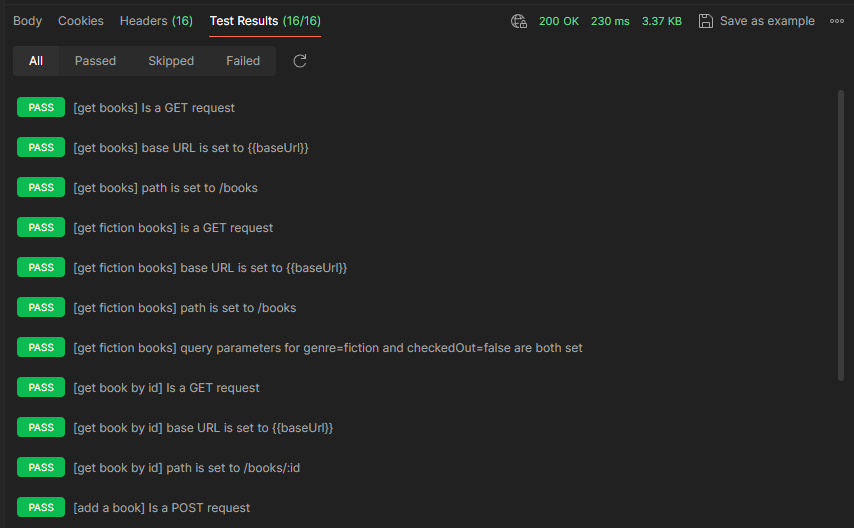
Lab activities
Some technical content, such as learning Linux, Python, or SQL, had an interactive lab activity available via “Qwiklabs”. The Linux labs especially were very well-structured, more on those in Linux labs.
Video features
Whilst playing back a video should be easy, it’s startling how awful some non-YouTube video players can be (and even YouTube’s sometimes). Luckily, this isn’t the case for Coursera, with the player containing education-specific features in addition to the basics. The full list of features offered, in order of usefulness is:
- Playback speed is adjustable in 0.25x increments, from 0.75x - 2.00x. This is essential due to the slow talking speed.
- Subtitles in English, with automatic alternatives for Spanish, French, Portuguese, and Chinese.
- A full, accurate transcript below the video, with the sentence being spoken highlighted. Clicking a sentence skips to that part in the video.
- The ability to make notes at timestamps in the video. Clicking “Save note” saves a clip, and the relevant transcript, and allows you to add your own comments. These can then be viewed in a central place for the course.
- The video (or transcript / subtitles) can be downloaded in low or high quality for offline revision.
- Some videos are interrupted by a multiple choice question halfway through, checking your understanding of the content so far.

Ambitious scope
This certificate will teach you a lot, even if you’ve already had plenty of related experience.
It’s quite unusual for a single program to teach you languages like SQL and Python, how to use Linux, almost all the knowledge both technical and procedural involved in an entry level technical job, plus advice on preparing a resume and interviewing!
This scope means there’s a necessarily a quite fast pace, and I imagine most students will speed through some areas, then take extra days or weeks for additional independent study if this is their first time learning a technical topic.
Still, this broad focus, delivered in a structured and high quality way, makes it an easy recommendation for anyone trying to get into cybersecurity.
Recurring host
Each course of 4 modules (so, 1/8th of the entire certificate) has a main host presenting the content. They introduce themselves, share some of their background, and present almost all of the content, with a few guest speakers scattered throughout.
Having a single person recurring in video after video on a topic helps you focus on the content itself and not the individual, and get used to their style of speaking. Additionally, each of these host speakers has a very relevant job at Google, such as the CISO of Google Fiber, a Technical Program Manager, or a mid-level Security Engineer.
Knowing that the speakers work for Google in technical roles, not in video creation, gives the content extra authority, since the person speaking about it has real life experience. There’s a lovely video surprise at the end of the lab featuring these hosts, I won’t spoil it here!
Linux labs
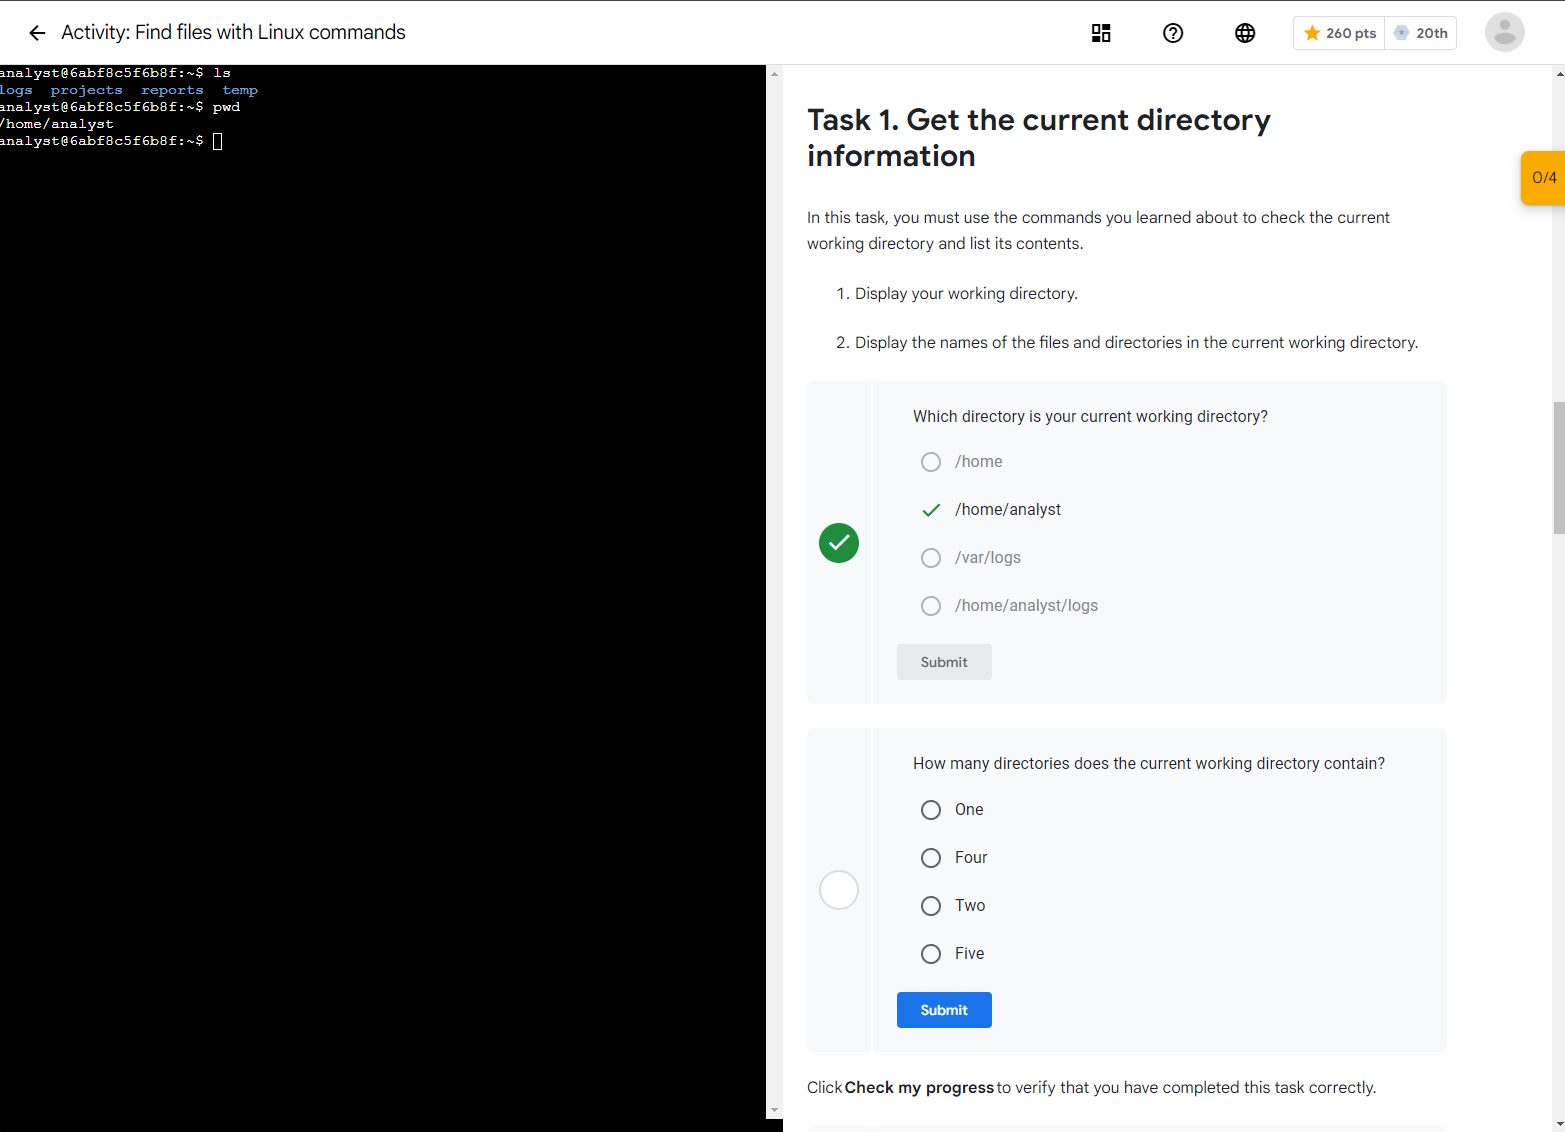
During some modules, especially the Linux one, the course makes heavy use of “Qwiklabs”. This is an online virtual machine based learning platform with various cloud related courses available, and combines a terminal, instructions, and checking your work.
Whilst this tasks start off very basic, and tell you exactly what to type, later on they’ll require actual understanding. The instructions will ask you to change permissions for a user, but you’ll need to remember the command’s functionality and syntax to actually complete it.
Importantly, the labs strike a good balance between requiring you to type new commands to become familiar, whilst letting you copy and paste repeated or lengthy commands. This is accompanied by a very reliable progress checker, that offers hints if you’ve completed a task incorrectly. Sometimes a multiple choice question will be shown instead.
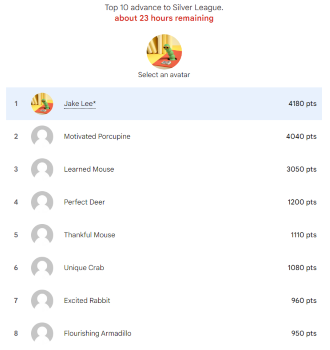
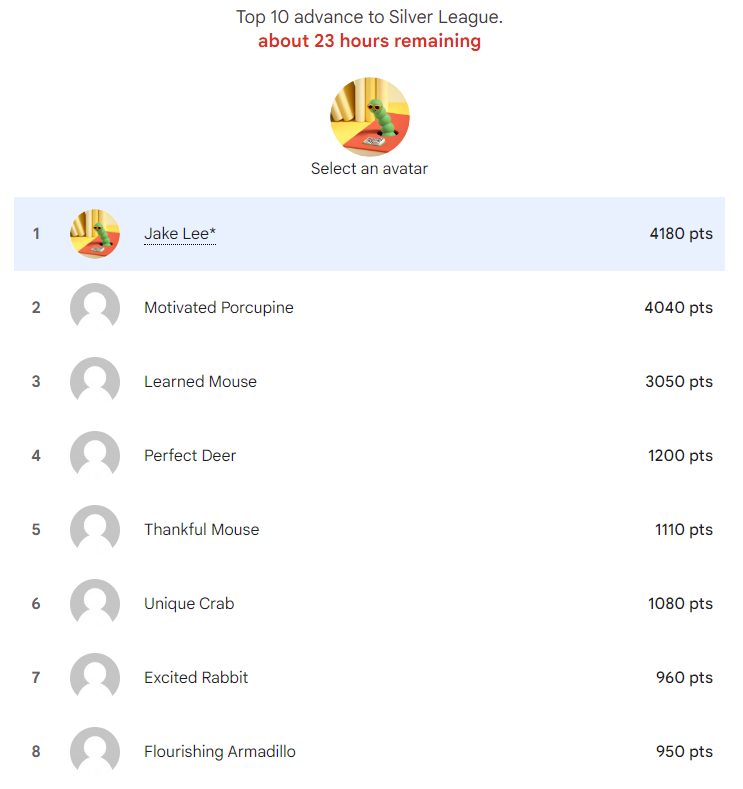
Finally, Qwiklabs also has a gamified “League” system, where you get put into a group of other students and promoted / demoted through leaderboard rankings. This is more relevant for longer term learning, since I unsurprisingly shot to the top of my group after completing every Linux lab in the certificate!
Connected modules
All of the modules within a course make sense together, and build on each other logically. Given the density of content I was concerned each video might end up being a standalone topic, but they’re all woven together well.
For example, each section will mention why the new content is related to the previous content, and an end of module (and course) wrap-up ties all the details together.
Realistic external sites
Finally, the references to external sources are up-to-date and realistic. Instead of referencing text books or mailing lists, sites like Reddit or Unix Stack Exchange are mentioned as far more realistic places to give & receive help.
This also applies to the training on specific tools. Google’s products are mentioned when they are relevant and widespread, not focused on exclusively. For example, when talking about log analysis tools a tutorial on the industry standard “Splunk” was provided, in addition to Google’s “Chronicle” alternative.
Surprisingly, this even applied when Google clearly has the superior option, such as free spreadsheet creation. Google Sheets is mentioned, but LibreOffice is also suggested as a possible alternative.
Considering this course is taught entirely by Google, I’m very impressed they resisted the urge to exclusively mention the products they presumably use (or work on) internally!
Public videos
Whilst I personally found the videos OK, but only when enhanced with surrounding readings and activities, I know other people prefer them. Luckily, Google have provided all videos from the course on YouTube, for free!
This is a great gesture to give people a taste of the course, whilst also encouraging actually signing up to experience the course properly.
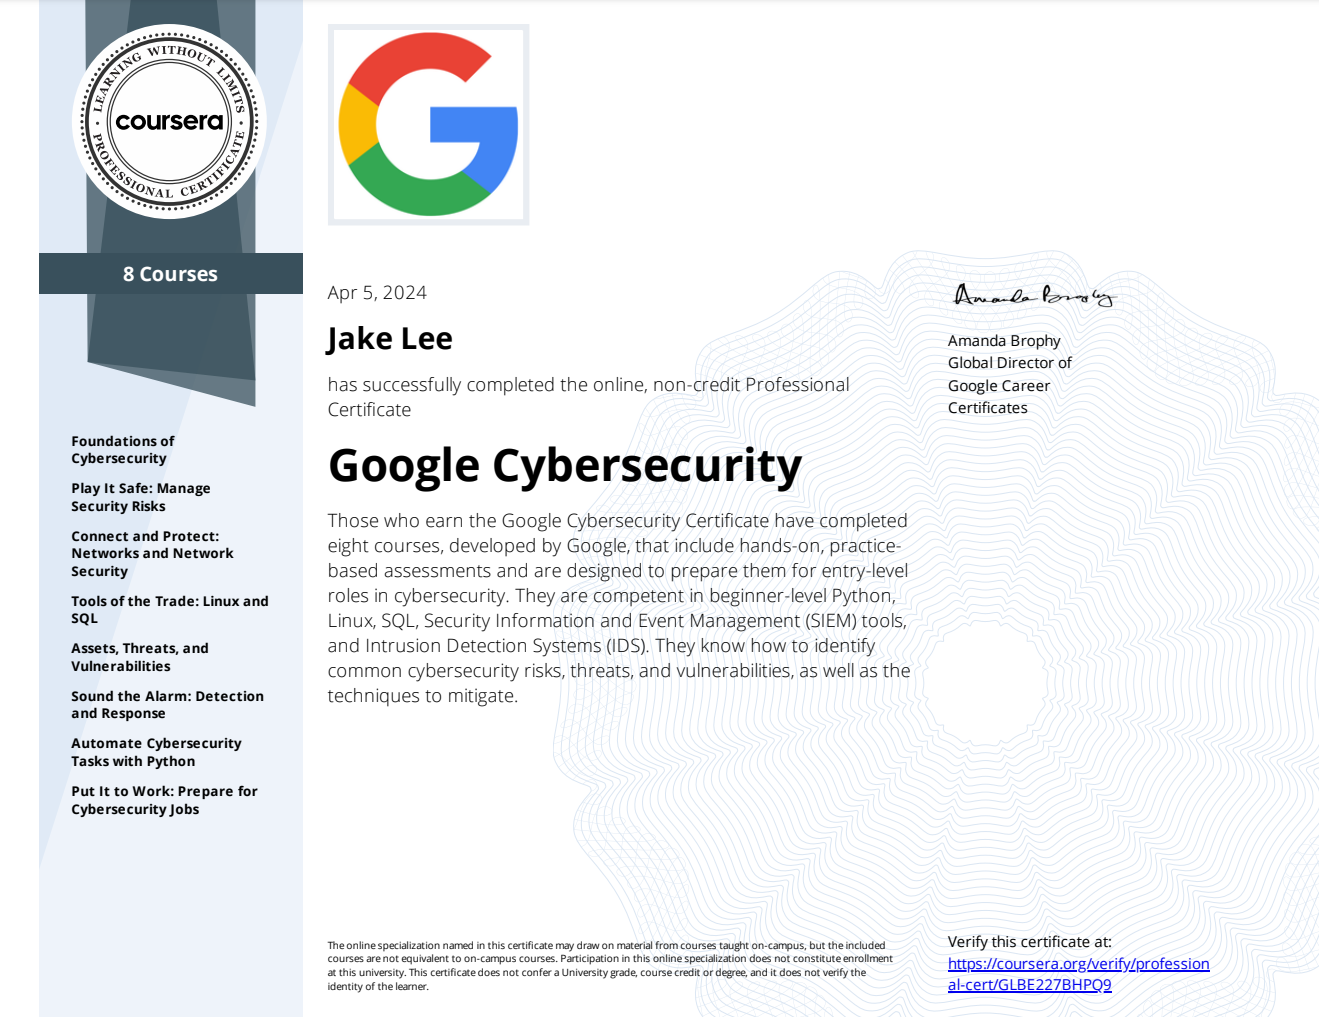
Prestigious certificate
Due to Google’s heavy branding, and the emphasis on “Cybersecurity Professional” instead of a specific topic, the final certificate actually looks and sounds quite impressive. I’ve interviewed plenty of software engineers, and to me it would look good on a CV / resume, although this of course might vary by industry.
I’d definitely recommend adding the final certificate to LinkedIn, but I’d skip the 8 courses inside as they’re clearly just small single topic courses.
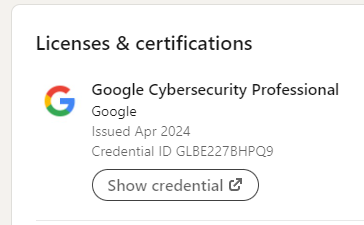
The course states that you’ll receive an email from Credly that lets you claim the certificate on Acclaim, a more independent badge platform I’ve used in the past. Assuming this comes through, I’ll likely add this to LinkedIn instead, as a more widely known and used platform than Coursera.
The Bad
Very easy
Most of this certificate can be skimmed through if you’re just interested in passing and not in actually learning. I was hoping there’d be some element of coursework or peer review, but it is entirely automatic marking of multiple choice quizzes or self-marking of documentation pieces.
As such, it requires discipline to actually do what is requested of you. I admit I skipped most of the lengthy documentation practices, since they were often essentially doing lab work again, but writing additional words around the actions.
I’m not certain what the completion requirements are for a course, but I believe every video / activity needs to be marked as completed, and the quizzes correct above a certain percentage. This won’t be a problem if you’re actually paying attention to the material, and the occasional mistake (e.g. forgetting an acronym, misreading a question) is totally fine.
Whilst being easy may sound positive, this has the downside of devaluing the certificate somewhat. If a “6 months” course can actually be skimmed through in a few days by cheating on quizzes, it’s far less valuable on a resume!
Focus on individuals
This is perhaps just due to the focus of the course being complete newcomers to cybersecurity, but I was amazed how many individuals were sharing their personal career stories. These were all non-traditional (e.g. ex-military, originally in physical security, etc), and very obviously intended to highlight how “anyone can work in cybersecurity”.
The message itself is fine, but the constant emphasis was bizarre. Similarly, the importance of diversity and different backgrounds for new viewpoints etc was emphasised at least once per course, usually every other module. I don’t disagree, but I’m not sure if it needs to be constantly stated halfway through learning a new programming language!
Length
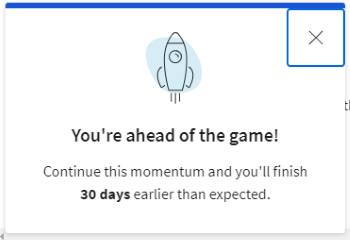
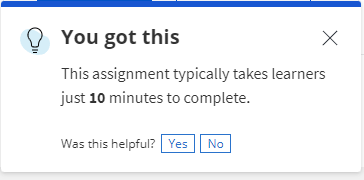
The estimated time on every single activity is multiple times higher than reality. For example, a 10 question multiple choice quiz is estimated at 45 minutes, but ends up taking 6-7. Similarly, reading a few paragraphs about a new topic, even with note-taking, takes students an average of 10 minutes… but is estimated at 30 minutes!
This also applies to the courses as a whole, with every module completed prompting a pop-up telling you how absurdly far ahead of the unrealistic estimates you are.
| Course estimate |
Quiz estimate |
 |
 |
Coursera navigation
Whilst the navigation within each course is OK, I found actually trying to get around the Coursera site relentlessly difficult. I resorted to just bookmarking the next module to work out, since navigating from the Coursera homepage takes many, many clicks on confusing buttons.
Similarly, now I’ve completed my certificate, the site seems unsure how to tell me this. Sometimes it will say congratulations, sometimes it will ask me to verify my ID (not necessary for this course). In the screenshot below, the larger “Google Cybersecurity Professional” takes me to a random in-course module, whilst the smaller one takes me to the certificate frontpage!
This isn’t a deal-breaker, since the actual learning sections have different navigation, it’s just a confusing aspect.
Discussions are pointless
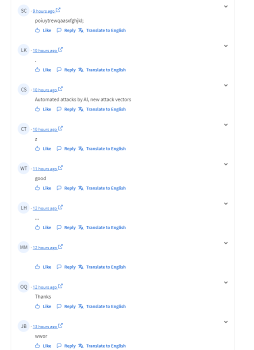
Most modules have an optional discussion prompt, asking a few questions and encouraging you to reply to others. Unfortunately, this is optional, and there’s no benefit whatsoever to putting effort in.
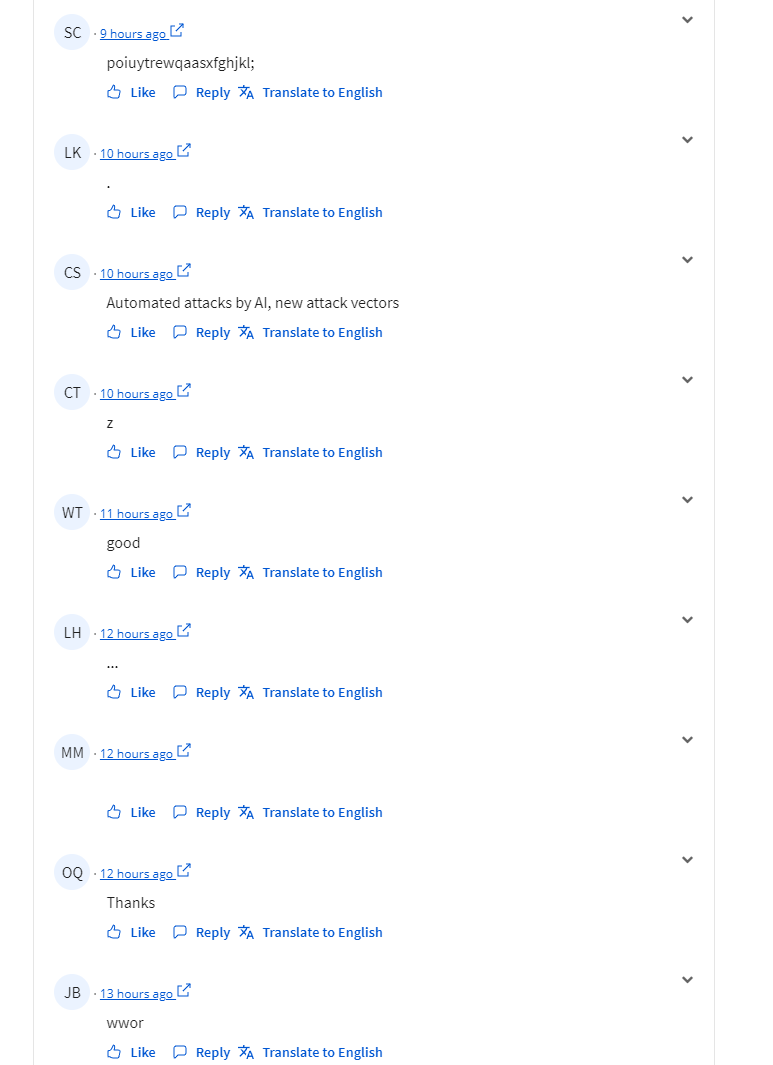
As such, the discussions are pages upon pages of spam 1 letter / word posts & replies, with the occasional actual answer. If the quality of these was higher, they could become useful resources for students, I’d recommend Coursera:
- Allow the current replies to be seen before posting, to encourage discussion not just shouting into the void.
- Add a minimum character count, even 50-100 would encourage useful answers.
- Add a task early on in the certificate to set a name and profile picture. Currently, people are partially anonymous, and clearly don’t feel connected to their answers.
Learning Python
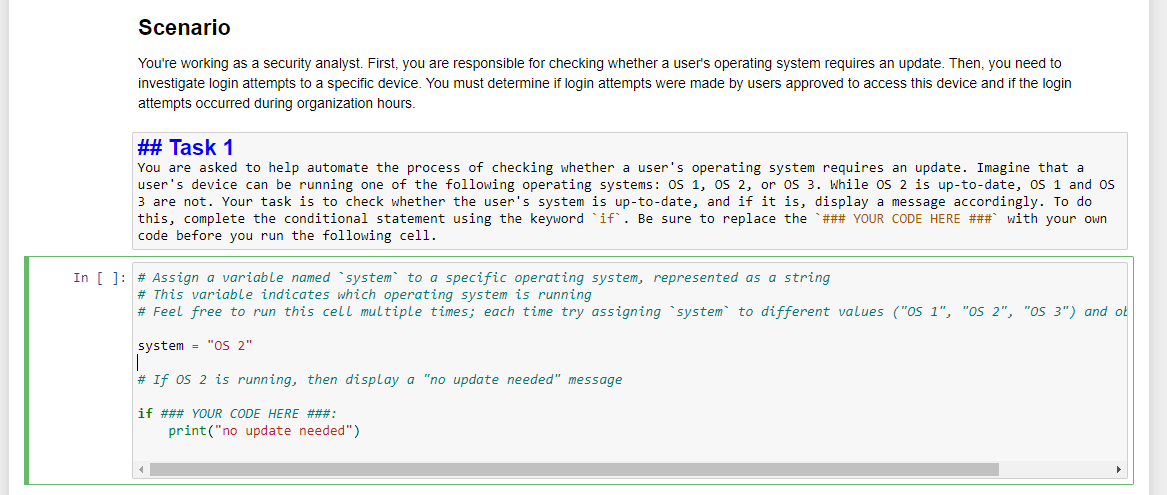
This is a minor complaint, I’m not sure learning Python in a Jupyter notebook worked very well. Because it’s a mixture of Markdown and Python, the instructions and coding areas all overlap, making it relatively easy to accidentally delete the instructions!
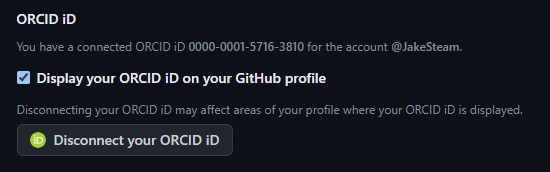
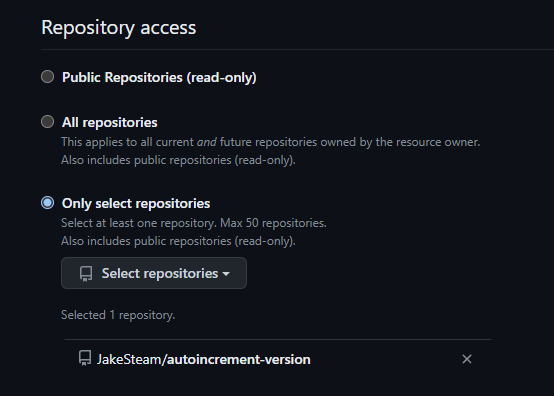
Admittedly setting up a local environment would be too much work, but I’d have liked to see GitHub’s Codespaces used for an instant, realistic environment. Codespaces have a free usage quota, so this could have been a good opportunity to encourage users to make a GitHub account too.
Wireshark tutorial
Short and sweet, the Windows Qwiklabs for Wireshark training took a couple of minutes to allocate the resources and open, then would disconnect as soon as I changed tab (e.g. to look at the instructions)!
Luckily I already have some Wireshark knowledge, otherwise this part would have been unfinishable without installing it locally and hoping I’ve configured it as the guide expects.
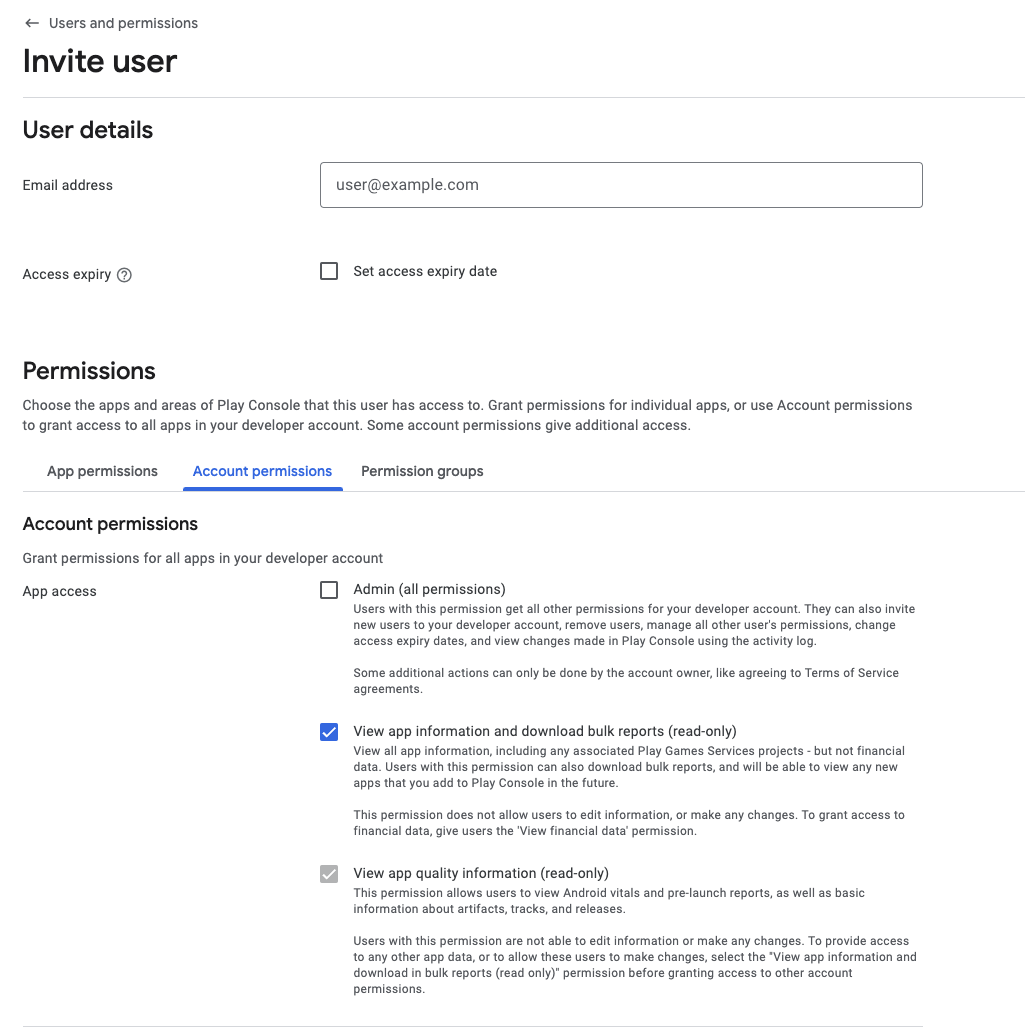
Limited career help
Whilst the course pitches itself as including resume advice, interview training, and similar steps, in reality these are more like free resources or post-completion trials. You’ll finish the certificate with a resume, an elevator pitch, connections within cybersecurity communities, but this is all things you could do yourself reading any “how to get a job” guide.
The provided resume review is actually just a template, and the AI interview training is free anyway. I didn’t try it personally, as it’s AI driven with no human reviews. There is a free year’s membership to “Big Interview”, but this also seems to just record your videos and not have any human feedback given.
American graduates get access to “CareerCircle”, and all graduates get a 30% discount off the expensive CompTIA Security+, a pretty good deal (although other offers are often available).
All that being said, I’m not sure what more Google could actually do! Graduates have far more resources than non-graduates, perhaps an improvement would be a dedicated LinkedIn group of verified graduates to connect and share job opportunities.
The Confusing
Talking speed
This is one of the most puzzling things I’ve ever seen in a video guide. The vast majority of people speak ridiculously slowly, far slower than a normal speaking speed, and with every word and gesture clearly carefully scripted.
I usually listen to audiobooks and podcasts at 1.0x or 1.1x depending on the speaker, but I had every video in this certificate at 1.5x! What makes this even more bizarre is there were 2-3 clearly unscripted interviews that are at a normal speed, and due to the 1.5x video speed persisting they only serve to remind you how weird the other videos are.
The certificate’s videos are all available on YouTube, try listening to one and see how much more natural 1.25x or 1.5x sounds!
Tone of voice
Perhaps simply a cultural difference, the very upbeat and enthusiastic tone of voice of the hosts never feels like a natural thing. The phrases are obviously intended to encourage you to continue, and be proud of yourself, but instead they just make me feel somewhat infantilised. A few examples of phrases that will crop up during videos:
- “You did a fantastic job adding new knowledge to your security analyst toolkit … Keep up the great work!”
- “Wow, well done!”
- “I really enjoyed debugging this code with you”
Distracting cast
Being careful about how I phrase this, the diversity within videos and activities is distracting.
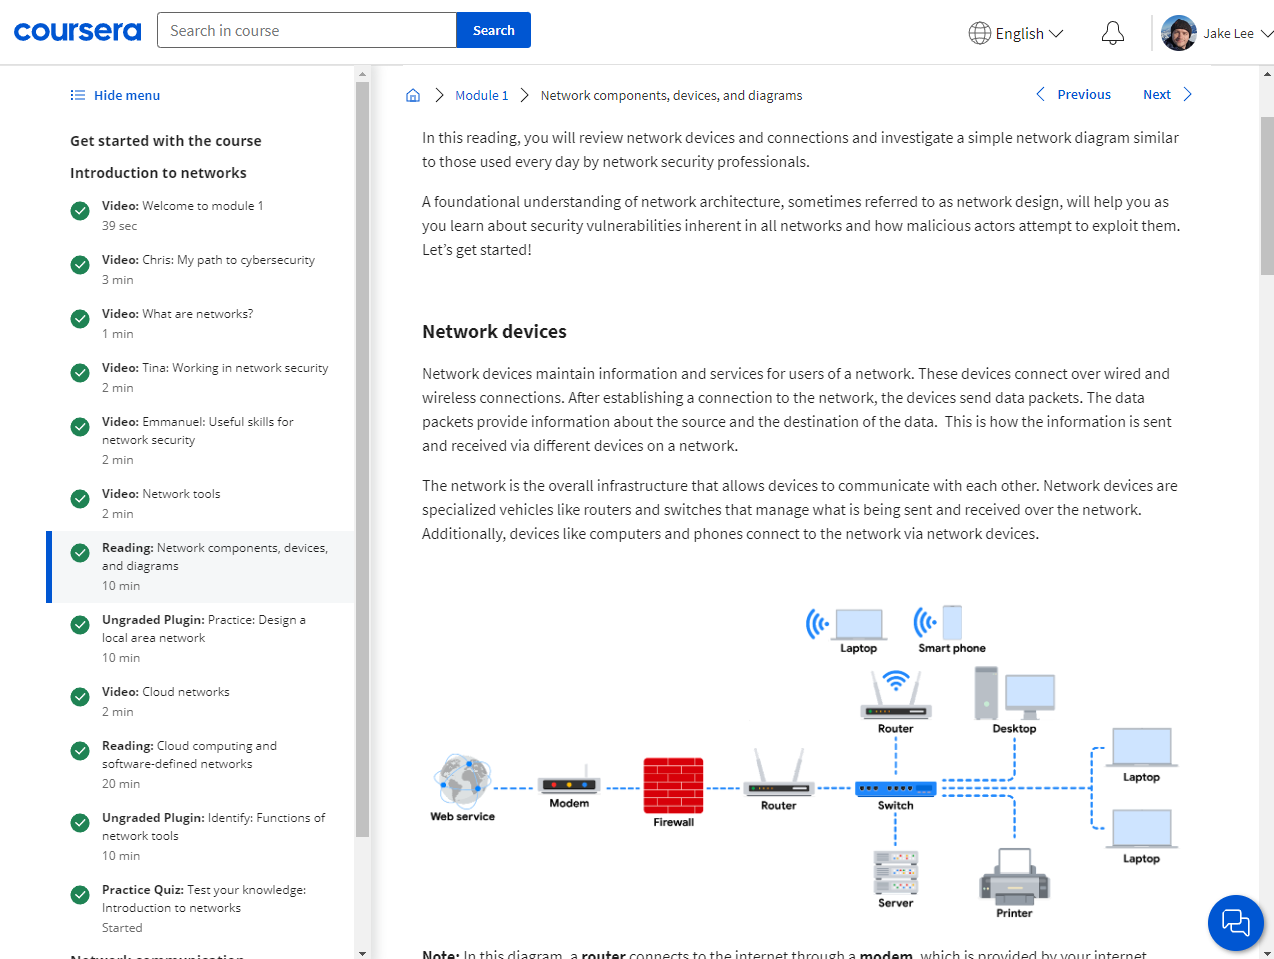
To clarify, diversity and inclusion is obviously a positive, and many of the speakers give great justification for it. Similarly, those from non-typical computer science backgrounds may be reassured that career paths aren’t necessarily linear lines. However, this is the first time I’ve ever explicitly noticed the focus. The course hosts are exactly 50% male and 50% female, no problem with that. Instead, my confusion comes in the activities and interviews.
In a background image showing a typical workplace, when the 3 characters are a person with a hearing aid, a person in a wheelchair, and a person in a Hijab, this is an unusual combination in any culture or setting. It unfortunately distracts from the content itself, and overshoots the mark from “include representations besides stereotypical white men” into “include as many rarely represented groups as possible”.
Perhaps the point where this is most noticeable is during a one-sided speech by… a deaf and aphasic (unable to speak) person using sign language, necessitating a voiceover by somebody else. Whilst it is theoretically possible that someone deaf has made it this far into the course, this doesn’t make sense for a video interview.
Of course, if this person was sharing information they are an expert on, it’s obviously fine. However, they are only here to share their background story, making it (and others) feel like a token inclusion.
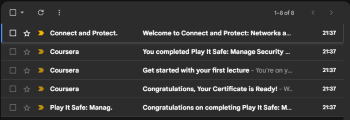
Unneeded emails
We’re getting petty with the complaints, sorry! Considering the clearly linear path through the certificate, with each module and course linking to the next, do I need to be sent quite so many emails when I progress between the courses?
I presume this is just due to technically finishing a standalone course and entering another, but it’s all a bit unnecessary.
Conclusion
I really, really enjoyed Google’s Cybersecurity Certificate, both the contents and how it was presented. Despite the targeting towards newcomers, I’d actually recommend it to anyone who has worked in technology for a few years and wants to brush up on the basics, it’s a great way to ensure a basic understanding of the key topics involved.
Whilst I’ve raised a few negatives above, after spending the equivalent of a full work week with the course it would be strange if I didn’t have improvement suggestions! It’s an excellent course, and I’m looking forward to trying out the similar Google UX Design Professional Certificate next.
Finally, if you’ve got any questions about any aspect of the course before purchasing, feel free to leave a comment below (or contact me on any of the social links at the bottom). I know I had a few questions beforehand that I found hard to get simple answers to, especially around whether I should pay for the standalone certificate or Coursera Plus!
Hopefully this review has given you a better understanding of what to expect from Google’s Cybersecurity Certificate via my first-hand experience, and what a useful (if expensive) resource it is.
As a bonus, here’s how the final certificate looks:
]]>


