Exploring pull requests with GitHub's rich diff functionality
Like many developers, I spend a surprisingly large amount of time reviewing other people’s code. In fact, according to GitHub that’s around 20% of my day!
When reviewing pull requests, code changes are very easy to review and approve. However, comparing images can be much harder to check, since by default GitHub only shows an unintuitive “Binary file not shown” message. Luckily, I recently discovered the rarely mentioned “rich diff” feature that makes this so, so much easier. I’ll briefly run through the functionality it offers, all screenshots in this post are from my Rich Diff repo.
Overall
First of all, how do you access rich diff? Simple, click the “page” icon next to many file types! Once clicked, this will compare the two files in a much more helpful way. If no “page” icon is visible, rich diff is not available.

Image rich diff
Images are probably the best use cases for rich diff. I created a collection of test images (SVG, PNG, JPG, GIF, BMP), committed them, and then committed new versions of each.
I found SVGs, PNGs, JPGs, and GIFs can use rich diff, but BMPs cannot. For the compatible file types, there are 3 options for the rich diff:
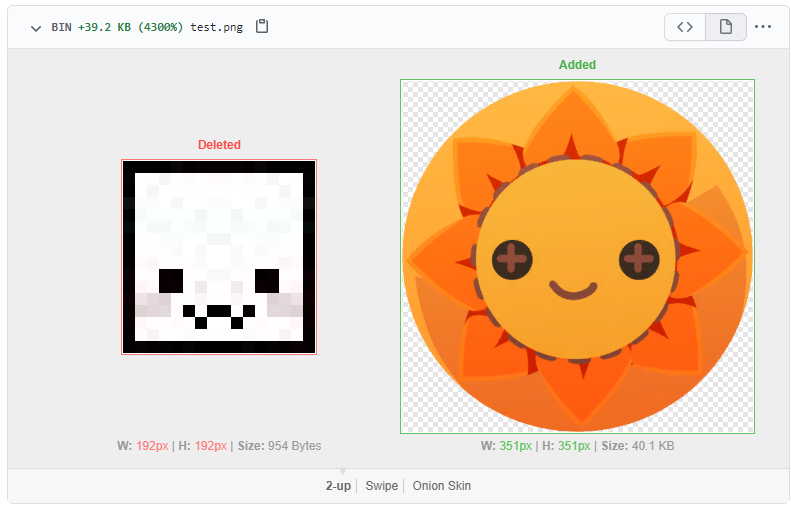
2-up
This mode displays the images side by side, as well as their width, height, and file size. This is a great way to notice an image has slightly changed dimensions, since this might not be noticeable with the naked eye.
Unfortunately, this mode does not help when identifying small visual changes within the image itself, the other modes are better for that.
Swipe
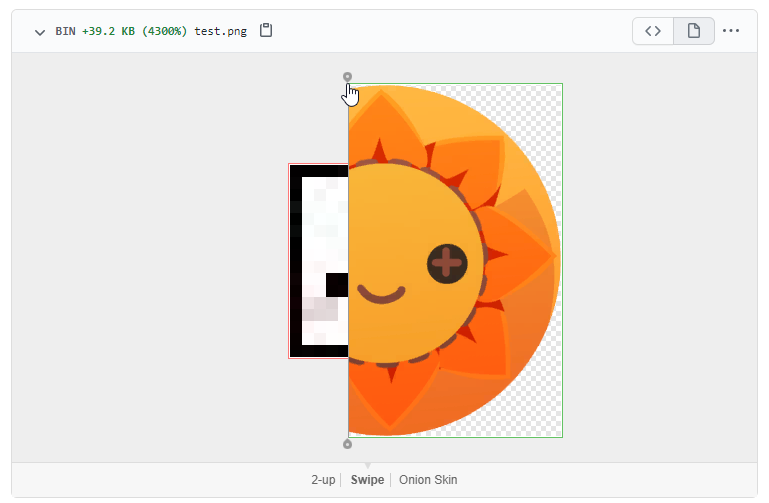
This mode displays the two versions of the image with a left to right slider over the top.
This is an excellent way of noticing small changes within an image, whilst still keeping track of the overall image.
Onion Skin
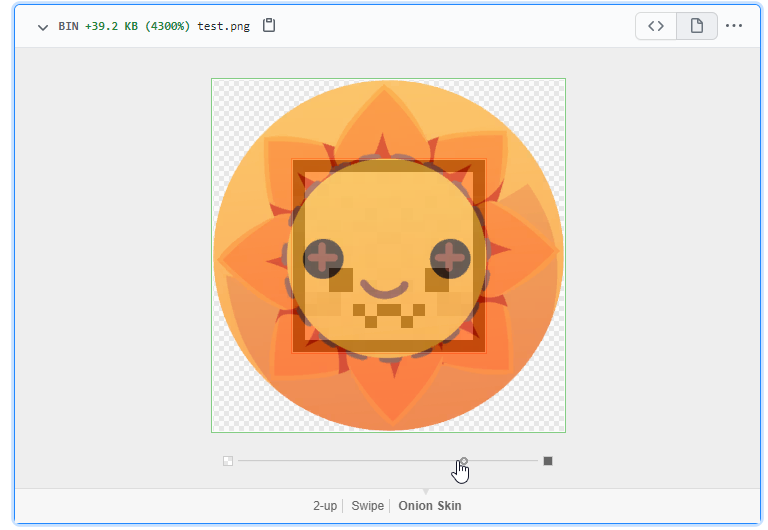
This mode overlays the new image over the old one, and lets you control the transparency.
Just like “Swipe”, this lets you easily see small changes, whilst also being able to see the entirety of both images at all times.
Document rich diff
Whilst images performed well, I was curious if common document types would work. In a word… no.
As before, I created & updated a selection of common formats (DOC, DOCX, HTML, PDF, RTF, MD), and only MD (markdown) had rich diff. The RTF and HTML files did show the code changes, but this isn’t particularly helpful for a verbose format like RTF!
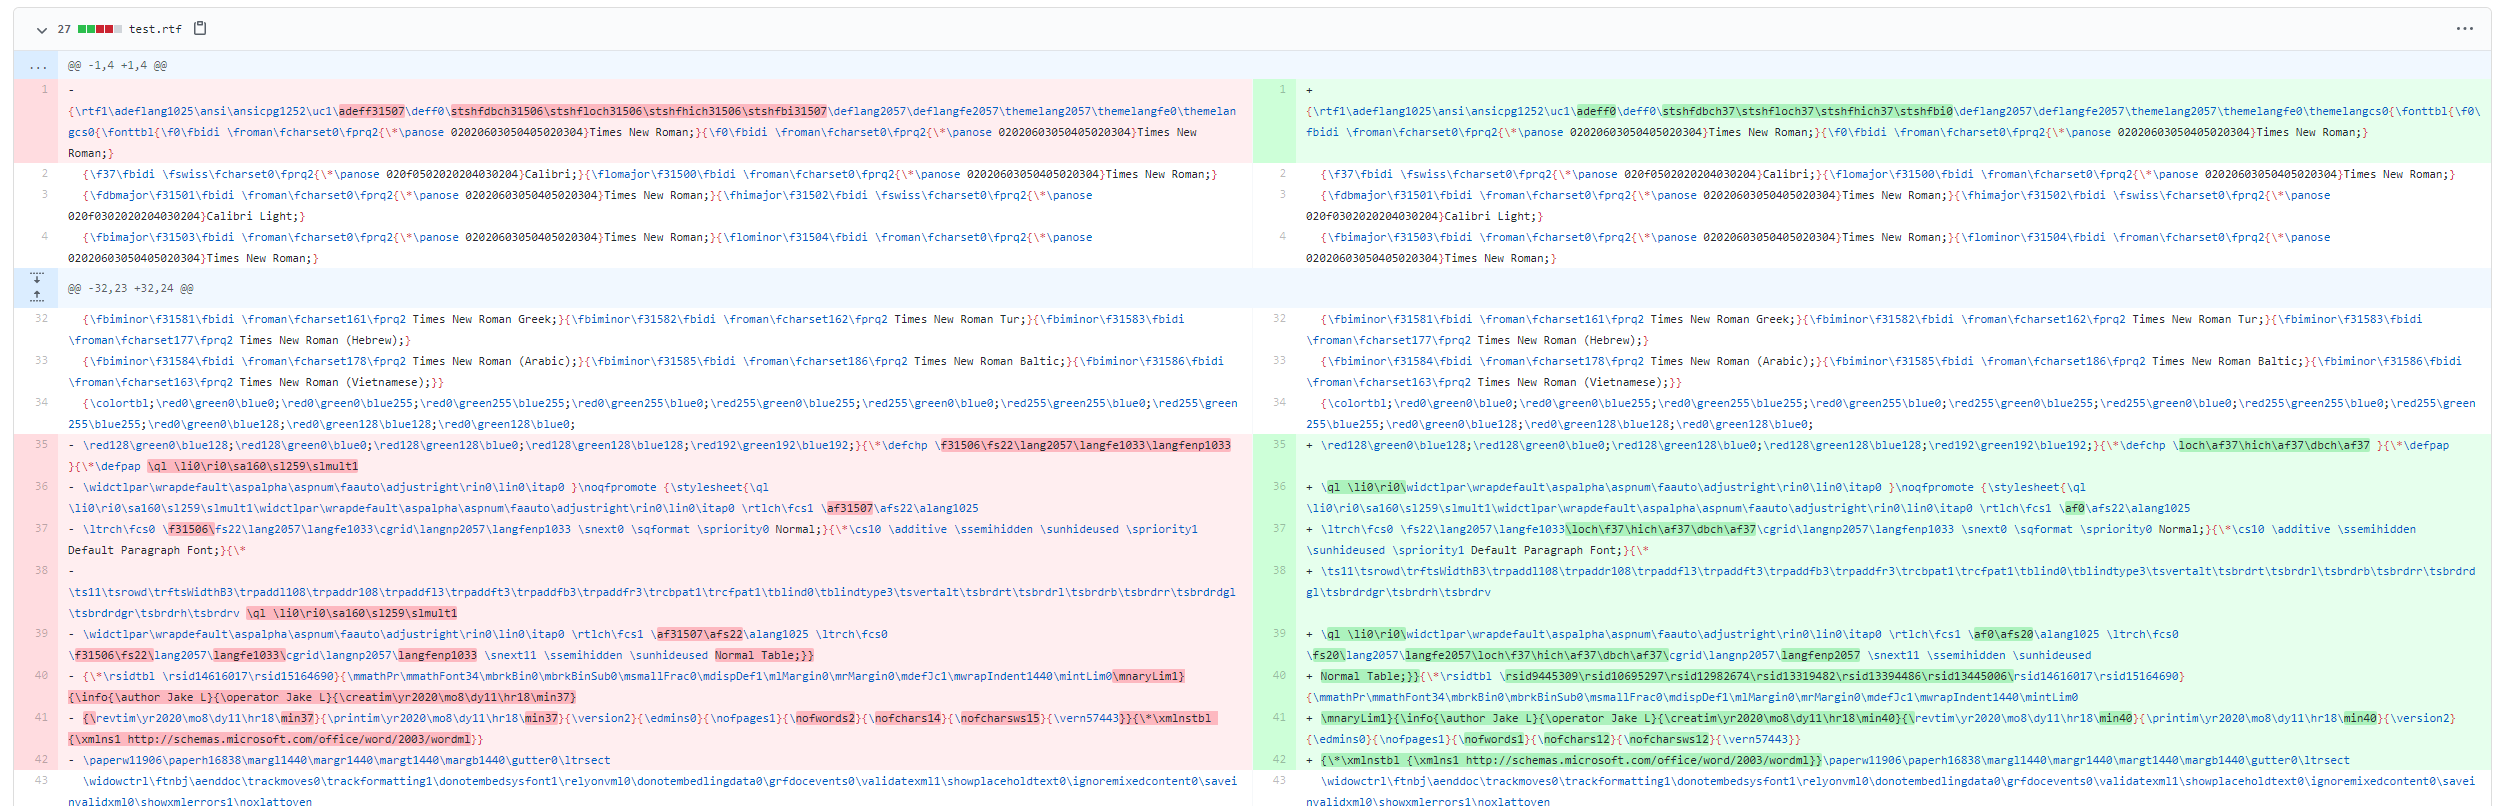
The Markdown file fared much better, showing a very helpful visual indicator of what has been added and removed.
The coloured bars on the left indicate the line status (first line changed, second line added). The coloured highlights in the changed line indicate the removed and added sections, in an easy to understand format.
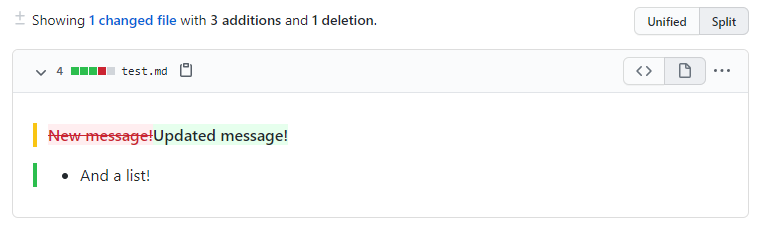
Whilst this indicator usually works well, in some commits it instead shows an entire section as changed instead of only the specific lines.
Summary
In summary, rich diff is an extremely powerful feature that is nowhere near as well known as it should be. However, the inability to enable it by default, or to set a default image comparison type both make it a bit awkward to use.
One likely reason for the feature not being heavily promoted is the extra processing time on GitHub’s side required for a rich diff. At least in 2016, larger Markdown files could take up to 5 seconds, which is GitHub’s rich diff timeout.
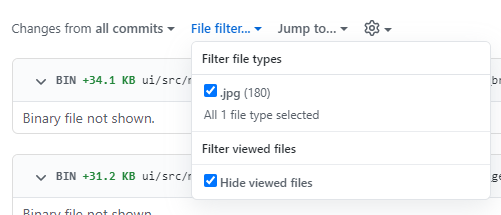
Hopefully this post helps you next time you need to compare changed images in a GitHub pull request. It was a lifesaver when I recently needed to look at a colleague‘s PR containing 180 JPGs!