Sharing internal / cache images (with text) to other Android apps
Often, users of your app will want to share images from it. Whether this is their own content, their friend’s content, or content published by you to your users, sharing can massively help your app’s popularity. This can be a little tricky if you’re displaying images from inside your app’s directory, since these files aren’t accessible from other apps! This means that when a user tries to share the image, the app it is shared to will be unable to access it.
The solution to this is creating a FileProvider that makes your images’ directory accessible. Then, forming an intent that grants the app that was shared to permission to view the image.
The code used in this tutorial was used to add image sharing to my upcoming Astronomy Picture of the Day app. All code used is also available as a GitHub Gist, if you just want to skip to copy and pasting code!
Configuring file paths XML
First, a file needs to be created to define which internal files should be shared. The XML below should be saved as filepaths.xml inside /res/xml/, and makes the /cache/images/ directory available:
<?xml version="1.0" encoding="utf-8"?>
<paths>
    <cache-path name="shared_images" path="/images/"/>
</paths>
Note that if you are using .filesDir and not .cacheDir in your sharing code, <files-path must be used instead of <cache-path.
Adding FileProvider to manifest
The FileProvider library needs to be added to your project. If you are using AndroidX, it is included already. If you are not, make sure to add the following dependency to your app-level build.gradle:
compile 'com.android.support:support-v4:28.0.0'
Now that our directory to share has been defined, it has to be added to the AndroidManifest.xml, inside the <application> tag. Note that this example uses AndroidX, for non-AndroidX projects the name should be set to android.support.v4.content.FileProvider instead.
<provider
    android:name="androidx.core.content.FileProvider"
    android:authorities="${applicationId}.fileprovider"
    android:grantUriPermissions="true"
    android:exported="false">
    <meta-data
        android:name="android.support.FILE_PROVIDER_PATHS"
        android:resource="@xml/filepaths" />
</provider>
Adding image sharing function
To actually share the image, first the file’s URI is retrieved using the previously defined authority and getUriForFile. Next, an intent is created with the following parameters set:
setAction: Determines the intent is for sending content.addFlags: Gives the receiving app permission to view the attached image.setDataAndType: This set the image’s URI, as well as the filetype (e.g. PNG / JPG).putExtra(Intent.EXTRA_STREAM: This adds the URI as a streamable data source.putExtra(Intent.EXTRA_TEXT: This sets the text to be shared alongside the image (where supported).
This intent is then passed to Intent.createChooser, along with a string which may be shown (depending on device).
fun shareImage(file: File) {
    val authority = "${BuildConfig.APPLICATION_ID}.fileprovider"
    FileProvider.getUriForFile(context, authority, file)?.let {
        val shareIntent = Intent()
            .setAction(Intent.ACTION_SEND)
            .addFlags(Intent.FLAG_GRANT_READ_URI_PERMISSION)
            .setDataAndType(it, context.contentResolver.getType(it))
            .putExtra(Intent.EXTRA_STREAM, it)
            .putExtra(Intent.EXTRA_TEXT, "I'm sharing this image!")
        context.startActivity(Intent.createChooser(shareIntent, "Share image to:"))
    }
}
Sharing the image
To share your image, all you need is a File object of it to be passed to the shareImage function. This can be done using the File(directory, child) constructor:
val imageCache = File(context.cacheDir, "images")
shareImage(File(imageCache, "myimage.png"))
Note that I’m using the cache directory in this example, .filesDir can be used instead (make sure to change your filepaths.xml too!).
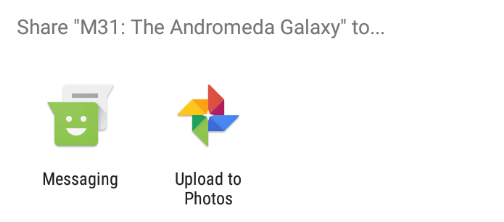
When your image sharing function is called, the user will receive a popup suggesting many, many locations to share their content to. A screenshot from newly created emulator is below, real devices will have many pages of options instead!
All code in this tutorial is available as a Gist.
