Scheduling A Repeating Background Task On Android, With Power / Internet Requirements
Whilst developing Android apps, performing a scheduled task at set intervals is a very common requirement. Despite this, there are a surprisingly high number of solutions, each with their own advantages and disadvantages. This tutorial will focus on using Firebase JobDispatcher, a library that uses Google Play services to provide a backwards compatible (API 14+) job scheduling library. This makes it an attractive option for those that need to support older devices, and know their users will have Google Play installed:

This tutorial will walk you through the simple steps needed to implement Firebase JobDispatcher, as well as the customisation options available. A minimal example project of this tutorial’s implementation is available as a repository, or as a Gist. Kotlin is used, but all code is straightforward and can be converted to Java.
Checking scheduled jobs
Throughout this tutorial, the ability to check the currently scheduled tasks / jobs is extremely useful. As there is no GUI for this, it must be done by running the following in the “Terminal” tab of Android Studio (replacing uk.co.jakelee.scheduledjobs with your app’s package name):
adb shell dumpsys activity service GcmService --endpoints uk.co.jakelee.scheduledjobs
This will return a lot of information, most of it not useful (e.g. every saved WiFi network!). The first of the important parts is the task count, showing the number of registered jobs:

The second is the pending & past executions list. This shows your tasks, their internet / scheduling requirements, and their execution history:
Pending:
(scheduled) uk.co.jakelee.scheduledjobs/com.firebase.jobdispatcher.GooglePlayReceiver{u=0 tag="uk.co.jakelee.scheduledjobs.job" trigger=window{start=15s,end=30s,earliest=-369s,latest=-354s} requirements=[NET_ANY] attributes=[RECURRING] scheduled=-384s last_r
un=N/A jid=N/A status=PENDING retries=0 client_lib=FIREBASE_JOB_DISPATCHER-1}
Not yet run.

Past executions:
[cost:100%] (finished) [uk.co.jakelee.scheduledjobs/com.firebase.jobdispatcher.GooglePlayReceiver:uk.co.jakelee.scheduledjobs.job,u0]
successes: 60 reschedules: 0 failures: 0 timeouts: 0 invalid_service: 0 total_elapsed_millis: 2842 total_uptime_millis: 2848
[NET_ANY] shows that any internet connection type is acceptable, [RECURRING] shows that I’ve set it to repeat, window{start=15s,end=30s ... } shows that I’ve scheduled it to repeat very frequently.
Adding Firebase JobDispatcher library
First, add the Firebase JobDispatcher library to your app-level build.gradle:
implementation 'com.firebase:firebase-jobdispatcher:0.8.5'
Next, add a service for the JobScheduler to your AndroidManifest.xml. The .JobScheduler doesn’t exist yet, but you’ll be making it in the next step!
<service
    android:name=".JobScheduler"
    android:exported="false">
    <intent-filter>
        <action android:name="com.firebase.jobdispatcher.ACTION_EXECUTE" />
    </intent-filter>
</service>
Create JobScheduler class
JobScheduler.kt is the class that handles the actual scheduling. The rest of this tutorial will describe the implementation process, but there is also a Gist of the implementation.
First, create the class, making sure to extend JobDispatcher’s JobService:
class JobScheduler : JobService() {
Next, create a companion object with a tag for your job, so you can identify it later:
companion object {
    private const val SIMPLE_JOB_TAG = "uk.co.jakelee.scheduledjobs.job"
}
When a scheduled task starts, onStartJob is called. This method is overridden to trigger the intended job. We’ll cover setting the tag later, but for now just check it has been correctly set and pass the JobParameters object to simpleJob. Note that this method returns a boolean determining whether it has more work to do. This should almost always be false.
override fun onStartJob(job: JobParameters): Boolean {
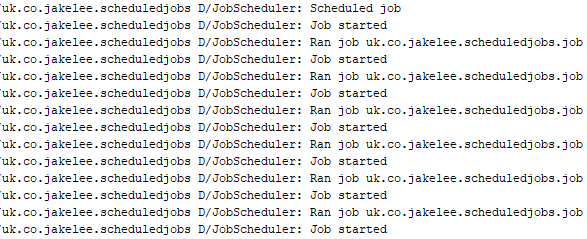
Log.d("JobScheduler", "Job started")
when (job.tag) {
SIMPLE_JOB_TAG -> simpleJob(job)
else -> return false
}
return true
}
Next up is actually creating the job function. This can do anything you want (that doesn’t require an activity), in this example it just writes a line to the log and finishes the job. Note that jobFinished needs to be passed the JobParameters object initially passed to onStartJob, as well as a boolean for whether the task needs to be retried (usually false).
private fun simpleJob(job: JobParameters) {
    Log.d("JobScheduler", "Ran job ${job.tag}")
    jobFinished(job, false)
}
Finally, onStopJob must be overridden. Just like onStartJob, this also has to return a boolean, this time determining whether to retry the job (usually true). onStopJob is called when your job stops during execution, usually because it is taking too long to complete. The normal maximum execution time is 10 minutes, but this can vary, so try to complete your task much quicker than the limit.
override fun onStopJob(job: JobParameters?) = true
Scheduling a job
Scheduling a recurring job is luckily very simple, and has a lot of customisable options:
fun scheduleJob(context: Context) {
    val dispatcher = FirebaseJobDispatcher(GooglePlayDriver(context))
    val exampleJob = dispatcher.newJobBuilder()
        .setService(JobScheduler::class.java)
        .setTag(SIMPLE_JOB_TAG)
        .setRecurring(true)
        .setLifetime(Lifetime.FOREVER)
        .setReplaceCurrent(true)
        .setRetryStrategy(RetryStrategy.DEFAULT_EXPONENTIAL)
        .setConstraints(Constraint.ON_UNMETERED_NETWORK, Constraint.DEVICE_CHARGING)
        .setTrigger(Trigger.executionWindow(5, 10))
    dispatcher.mustSchedule(exampleJob.build())
    Log.d("JobScheduler", "Scheduled job")
}
In this example, the following parameters apply:
setServicedetermines the class called when this job triggers. This is sometimes another class, but it’s often easier to trigger the same class as the scheduling occurs in.setTagsets the job’s tag, used when the job starts to check which job it is.setRecurringsets whether a job should repeat or not.setLifetimedetermines if the job scheduling should lastUNTIL_NEXT_BOOTorFOREVER.setReplaceCurrentdecides if this job should replace existing tasks with the same tag, or leave them.setRetryStrategylets you set custom retry strategies if a job fails, or use the built-inEXPONENTIAL/LINEAR.setConstraintsallows you to set requirements for the job to run. This is used to only allow the task to run on an unmetered network (e.g. WiFi) whilst charging.setTriggerlets you either execute a job now (JobTrigger.NOW) or schedule the task. The 2 numbers are the earliest and latest times (since last execution or job scheduling) that the job should be executed. In this example, the task should be run every 5-10 seconds.
Cancelling a job
Once you have a JobDispatcher instance with FirebaseJobDispatcher(GooglePlayDriver(context)), you can either unschedule all jobs (.cancelAll()), or unschedule individually (.cancel(tag)).
Conclusion
Firebase’s JobDispatcher library provides a simple way to schedule future tasks. I recently used this approach to implement an app “heartbeat”, where it sends a small message to a server every 24 hours. The time of the heartbeat was very flexible, so a large window of activation is provided (20-28 hours). Having this window (in setTrigger()) as large as possible helps reduce your app’s battery usage, as it allows the device to stay in Doze mode for as long as possible.
The only downside is the requirement on Google Play Services to centrally coordinate your job scheduling. If you distribute your app via the Play Store this isn’t an issue, but will cause serious problems for those distributing externally.
Note that this is just one of the many services Firebase offers, and there is an ongoing series covering each one.