Loco 1: String management for multi-platform & multi-locale projects
Loco is a translation management tool with a staggering array of features, and a very reasonable free plan. This series of guides will cover the basics of using Loco, starting with Part 1: Creating a project and adding strings.
These articles are not sponsored!
Creating an account
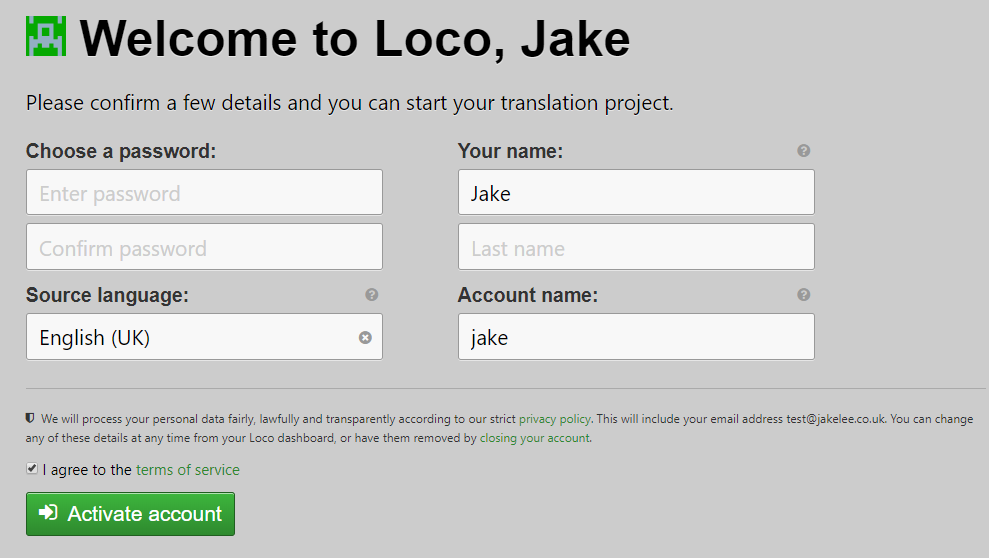
First, create an account with either your email, or using GitHub, Twitter, or Facebook login. Once your email has been confirmed / permission has been given, a super simple signup screen asks for a password and not much more.
Creating a project
A default project will be created for you upon signup, with customisable URL, name, and description. The URL for your project will be the very simple https://localise.biz/username/project.
Adding locales
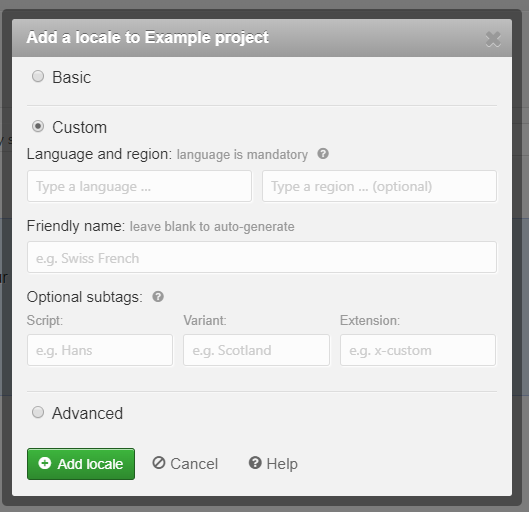
Next, add the locales / languages the strings should be translated into via the + button next to your default locale in the top left of the “Manage” tab. Locales can be anything from a simple language (e.g. French) into a fully custom identifier. A particularly useful feature is the ability to rename locales, which can be extremely useful when the same text needs to be translated into the same language multiple times (e.g. different brands within the same country).
Adding strings
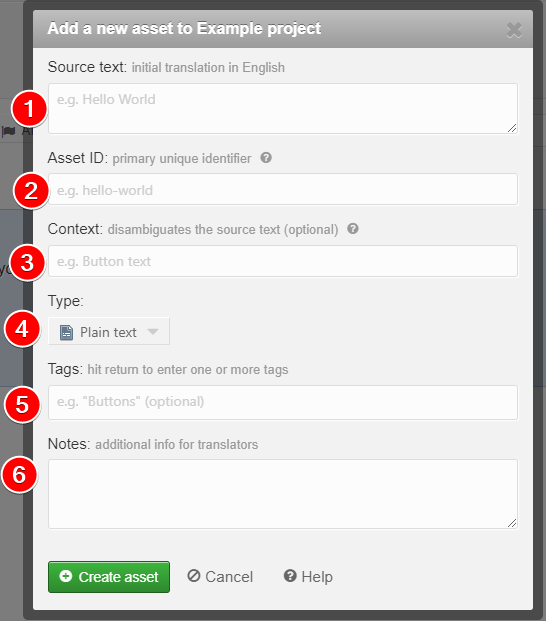
It’s finally time to start actually adding text to translate, or “Assets”. Click “New asset” and a popup will appear which can be a little overwhelming!
- Source text is the initial text to use, in the project’s native locale (e.g. English).
- Asset ID is the name used to reference the text in code. This will be something like
Dialog_Title_IncorrectPasswordordialog-title-incorrectpassworddepending on your preferred style. - Context is used when a text’s use is ambiguous, but is generally not needed for most use cases due to Notes.
- Type should almost always be “Plain text”, unless HTML is needed.
- Tags are a powerful way of categorising strings, as each string can have one or more. A common use case is adding a tag per screen (e.g. “Login”, “Registration”), so that all the strings for a specific screen can easily be viewed at once. Shared strings will have multiple screen tags.
- Notes are a way to provide extra information to translators, generally used if the Asset ID and Tags by themselves are not descriptive enough.
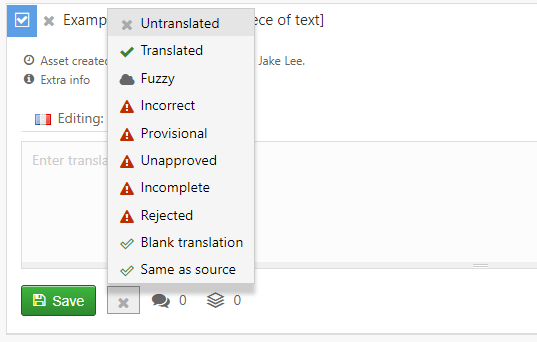
String statuses
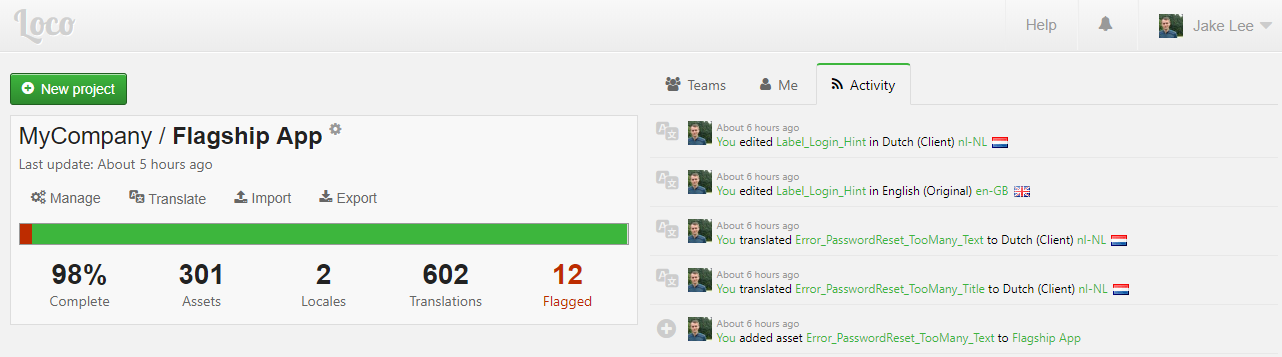
Once a string has been added, it will by default have the status of “Translated” in the original locale, and “Untranslated” in all other locales. These statuses can be changed at will, and feature 5 different “in progress” states to help collaboration between different project teams. For example, in a recent project new strings were marked as “Provisional” when they had been translated by developers, “Unapproved” when a professional translator had corrected mistakes, and “Translated” when a line manager had signed off a translation.
Plan pricing
Loco’s free plan is usually generous enough for almost all use cases, even for large projects with a few hundred assets, multiple languages, and many translators. At my company we went for the “Pro” plan, as we needed custom roles for certain individuals. This cost us a grand total of just £4.95/month (approximately $6.50)!
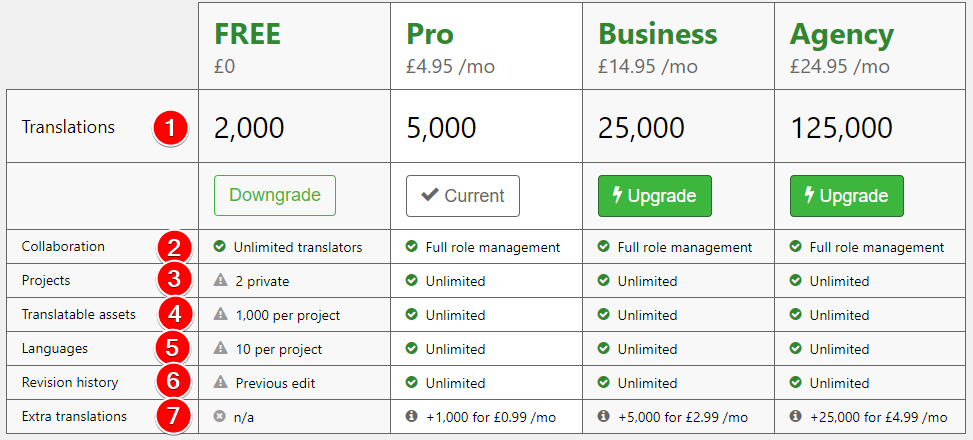
More information on these quotas are available on Loco’s help pages, and a brief explanation is below. It’s worth emphasising that only the project owner needs to pay, and all other project collaborators can benefit.
- Translations refers to the total number of translations used across the entire account. The default limit of 2,000 is equal to a project with 500 strings translated into 3 languages (plus original language). A relatively large app will likely have between 300-600 assets, keeping in mind common text (e.g. “OK”) can share the same asset.
- Collaboration refers to the roles that invited users can have. This will be covered in-depth in a later post, but essentially the free plan allows unlimited translators (can only edit translations), but no additional roles.
- Projects unsurprisingly refers to the number of projects that can be added to an account.
- Translatable assets refers to the number of assets that can be included in a single project. The free plan’s limits of 2 projects and 1,000 assets per project give the total of 2,000 available translations.
- Languages refers to the number of different locales / languages that can be added to a project.
- Revision history refers to the ability to see an asset’s history (e.g. who changed status, text, etc). Whilst the free plan’s “see previous version” is useful, being able to view a full history is essential for larger projects.
- Extra translations refers to the ability to purchase more translations if the very generous limits are reached.
Additional features
Individual strings can also have plurals and placeholders (e.g. %1$s for Android) configured, all changes logged, and comments with user tagging support.
In addition to Loco’s core features, a few free utilities are provided such as iOS Android string conversion, or conversion between all common formats.
Loco has such a massive set of features that only the very basics have been covered here. Collaboration, exporting, and command line interface will all be covered in later articles.