Creating a MVVM RecyclerView grid with quick drag and drop item swapping, Room / LiveData support, and more!
As part of my current project BocaBase, I needed a grid of items that could be swapped around easily. Whilst there were a few answers on StackOverflow, most of them resulted in flickering animations, didn’t work with Room / LiveData / MVVM, or were awful to use!
One of the biggest challenges is moving items when the items are loaded and sorted from a database. They must have their ordering changed in the database, moved within the RecyclerView’s adapter, AND visually be moved.
Whilst the solution in this post definitely isn’t perfect, it’s much better than snippets I could find already. There’s a video preview below, and a full Gist of the solution is available, this post is mostly to point out the interesting parts of it.
Note: The video also contains “merging” items together, which isn’t included in this tutorial.
XML (table_fragment.xml)
A RecyclerView with a GridLayoutManager is used to let us use more up-to-date Android technology. The important attributes are:
app:layoutManager="androidx.recyclerview.widget.GridLayoutManager": Use a grid instead of simple list.app:spanCount="5": Use a 5 column grid.android:overScrollMode="never": Disables the “overscroll” animations (the semi-circles of colour when you reach the start / end of a RecyclerView).
<androidx.recyclerview.widget.RecyclerView
    android:id="@+id/itemGrid"
    android:layout_width="0dp"
    android:layout_height="0dp"
    android:layout_marginVertical="8dp"
    android:overScrollMode="never"
    app:layoutManager="androidx.recyclerview.widget.GridLayoutManager"
    app:layout_constraintBottom_toTopOf="@id/testButton"
    app:layout_constraintEnd_toEndOf="parent"
    app:layout_constraintStart_toStartOf="parent"
    app:layout_constraintTop_toBottomOf="@id/reputation"
    app:spanCount="5"
    tools:listitem="@layout/board_item" />
Fragment (TableFragment.kt)
The fragment just sets up the adapter and RecyclerView, and observes a items LiveData from the ViewModel. The important parts are:
viewModel.items.observe ... setItems: Updates the UI if the grid items change for a non-drag and drop reason, and handles initial load.ItemAdapter( ... ): We pass in a reference to the ViewModel’s item click and item save functions, so the adapter can call them directlyadapter.itemTouchHelper.attachToRecyclerView: Adds the touch listener that we’ll set up later.setHasFixedSize(true): Lets the RecyclerView optimise for a fixed length of content.
class TableFragment : Fragment() {

    private var binding: TableFragmentBinding by autoCleared()
    private val viewModel: TableViewModel by viewModels()
    private lateinit var adapter: ItemAdapter

    override fun onCreateView(
        inflater: LayoutInflater, container: ViewGroup?,
        savedInstanceState: Bundle?
    ): View {
        binding = TableFragmentBinding.inflate(inflater, container, false)
        binding.viewModel = viewModel
        binding.lifecycleOwner = viewLifecycleOwner
        return binding.root
    }

    override fun onViewCreated(view: View, savedInstanceState: Bundle?) {
        super.onViewCreafted(view, savedInstanceState)
        setupRecyclerView()

        viewModel.items.observe(viewLifecycleOwner) {
            adapter.setItems(it)
        }
    }

    private fun setupRecyclerView() {
        adapter = ItemAdapter(
            viewModel::handleItemClick,
            viewModel::saveItems
        )
        adapter.itemTouchHelper.attachToRecyclerView(binding.itemGrid)
        binding.itemGrid.setHasFixedSize(true)
        binding.itemGrid.adapter = adapter
    }

}
ViewModel (TableViewModel.kt)
The ViewModel usually does most of the work, but in this example the adapter handles almost all of it. As such, it just needs the callbacks we passed to the adapter.
    fun handleItemClick(ownedItem: OwnedItem) {
        _textToShow.postValue(String.format("That's a %s at position %d!", ownedItem.item.name, ownedItem.position))
    }

    fun saveItems(items: List) {
        viewModelScope.launch(Dispatchers.IO) {
            itemRepository.insertItems(items)
        }
    }
Adapter (ItemAdapter.kt)
The Adapter is very simple, but quite lengthy due to using DiffUtil and ItemTouchHelper (covered next). It’s pretty much just a bare-bones adapter:
class ItemAdapter(
    private val itemClickListener: (OwnedItem) -> Unit,
    private val itemSaver: (List) -> Unit
) : RecyclerView.Adapter() {

    val items = ArrayList()

    fun setItems(newItems: List) {
        val result = calculateDiff(newItems)
        items.clear()
        items.addAll(newItems)
        result.dispatchUpdatesTo(this) // See DiffUtil later in this post
    }

    override fun onCreateViewHolder(parent: ViewGroup, viewType: Int): ItemViewHolder {
        val binding: BoardItemBinding =
            BoardItemBinding.inflate(LayoutInflater.from(parent.context), parent, false)
        return ItemViewHolder(binding, itemClickListener, itemTouchHelper::startDrag)
    }

    override fun getItemCount(): Int = items.size

    override fun onBindViewHolder(holder: ItemViewHolder, position: Int) =
        holder.bind(items[position])

}
ViewHolder (inside ItemAdapter.kt)
The ViewHolder is why we needed item touch and click listeners earlier! The touch listener triggers the drag as soon as you put your finger down on the item, which makes moving items much easier.
class ItemViewHolder(
private val itemBinding: BoardItemBinding,
private val itemClickListener: (OwnedItem) -> Unit,
private val itemTouchListener: (ItemViewHolder) -> Unit
) : RecyclerView.ViewHolder(itemBinding.root) {
private lateinit var ownedItem: OwnedItem
fun bind(ownedItem: OwnedItem) {
this.ownedItem = ownedItem
Glide.with(itemBinding.root).load(ownedItem.item.image).into(itemBinding.image)
if (ownedItem.item != Item.NONE) {
itemBinding.root.setOnTouchListener { v, event ->
if (event.actionMasked == MotionEvent.ACTION_DOWN) {
itemTouchListener.invoke(this)
}
false
}
itemBinding.root.setOnClickListener {
itemClickListener.invoke(ownedItem)
}
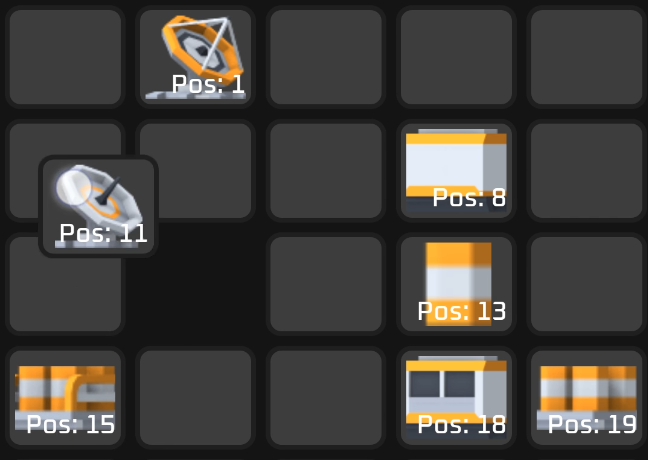
itemBinding.tier.text = "Pos: ${ownedItem.position}"
} else {
itemBinding.tier.text = ""
}
}
}
DiffUtil (inside ItemAdapter.kt)
Using a DiffUtil essentially enables clever animations when data changes, just by telling it how to compare items! Nothing unique here, the code will be very similar to all other DiffUtils.
    private fun calculateDiff(newItems: List) = DiffUtil.calculateDiff(object : DiffUtil.Callback() {

        override fun getOldListSize() = items.size

        override fun getNewListSize() = newItems.size

        override fun areItemsTheSame(oldItemPosition: Int, newItemPosition: Int): Boolean {
            return items[oldItemPosition] == newItems[newItemPosition]
        }

        override fun areContentsTheSame(oldItemPosition: Int, newItemPosition: Int): Boolean {
            val newProduct = newItems[newItemPosition]
            val oldProduct = items[oldItemPosition]
            return newProduct.id == oldProduct.id
                    && newProduct.item == oldProduct.item
                    && newProduct.board == oldProduct.board
                    && newProduct.position == oldProduct.position
        }
    })
ItemTouchHelper (inside ItemAdapter.kt)
This is probably the most complicated part of the entire setup, since it handles the actual swapping.
onMove is triggered as you drag an item over another, hence why we update the newPosition. Similarly, oldPosition is updated inside onSelectedChanged when the item is “picked up”.
These two positions are then “swapped” when the item is “dropped” (ACTION_STATE_IDLE), with the following steps:
- Get the old and new object to be swapped.
- Set their internal positions to each other (so that when the data is reloaded from database it will be ordered correctly).
- Swap their positions within the adapter’s list of items (so that the adapter is currently correct).
- Save the items from step 2 (this
itemSaveris theviewModel::saveItemspassed inside the adapter constructor, that inserts them into the database!)
    val itemTouchHelper = ItemTouchHelper(object : ItemTouchHelper.SimpleCallback(
        ItemTouchHelper.UP or ItemTouchHelper.DOWN or
                ItemTouchHelper.LEFT or ItemTouchHelper.RIGHT, 0
    ) {
        var oldPosition = -1
        var newPosition = -1

        override fun onMove(
            recyclerView: RecyclerView,
            viewHolder: RecyclerView.ViewHolder,
            target: RecyclerView.ViewHolder
        ): Boolean {
            newPosition = target.adapterPosition
            return false
        }

        override fun onSwiped(viewHolder: RecyclerView.ViewHolder, direction: Int) {}

        override fun onSelectedChanged(viewHolder: RecyclerView.ViewHolder?, actionState: Int) {
            super.onSelectedChanged(viewHolder, actionState)
            when (actionState) {
                ItemTouchHelper.ACTION_STATE_DRAG -> {
                    viewHolder?.adapterPosition?.let { oldPosition = it }
                }
                ItemTouchHelper.ACTION_STATE_IDLE -> {
                    if (oldPosition != -1 && newPosition != -1 && oldPosition != newPosition) {
                        val old = items[oldPosition] // Step 1
                        val new = items[newPosition]

                        old.position = newPosition // Step 2
                        new.position = oldPosition
                        items[oldPosition] = new // Step 3
                        items[newPosition] = old

                        itemSaver.invoke(listOf(old, new)) // Step 4
                        notifyDataSetChanged()
                        oldPosition = -1
                        newPosition = -1
                    }
                }
            }
        }
    })
Summary
This is a bit of a weird post, since the code is essentially combining disparate StackOverflow answers into one useful whole. However, I struggled finding anything similar already existing, so this will hopefully save a few people many, many hours!
There’s also quite a few parts that I intend to improve upon. For example, it shouldn’t be necessary to call notifyDataSetChanged inside onSelectedChanged, since we know the exact positions changed. However, notifying just the changed items plays an unwanted and confusing animation that I couldn’t figure out how to disable. I’ll update this post when I inevitably decide to spend a few days deep diving RecyclerView animations, I’m not quite that far gone yet though..!
If you found this post helpful, please go upvote the StackOverflow questions & answers below. They’re quite old, mostly in Java, and deserve far more attention.
References
- Basic RecyclerView info: https://developer.android.com/guide/topics/ui/layout/recyclerview
- Core swapping functionality, albeit a quite buggy looking one: https://stackoverflow.com/a/62147429/608312
- Dragging items immediately, instead of waiting for long press: https://stackoverflow.com/a/50058957/608312
- Dragging items outside the RecyclerView’s bounds: https://stackoverflow.com/a/41071941/608312
- Disabling RecyclerView’s scrolling animations: https://stackoverflow.com/a/27724949/608312
- MVVM RecyclerView: https://medium.com/@ali.muzaffar/android-recyclerview-using-mvvm-and-databinding-d9c659236908