Uploading an app bundle to Google Play Internal App Sharing from Travis CI
In a post towards the end of last year, I explained how to generate app bundles on your CI server (in my case Travis). Now they’re being generated, the next step is to send them somewhere!
Google Play Internal App Sharing is my chosen destination, since that allows QAs to easily download and test the app bundle.
Update: If using Gradle plugin 3.5.0+, the app bundle will be generated at app-<variant>.aab (e.g. app-debug.aab) instead of app.aab. The following tutorial has been left unchanged, make sure to edit your script if using a later Gradle plugin version!
This post assumes you already have a custom bash script running on your CI, and are already generating app bundles. If that isn’t the case, please read the previous post in the series (or view the end code). You can view the end result of this post as a gist.
Whilst the uploading process is simple, the biggest challenge is actually authenticating with Google! We’ll cover that before diving into the code itself.
Creating a Google service account
To create a service account, you’ll need access to Google Play Console and Google Developers Console. On Google Play Console, you’ll need to make a service account. There are official instructions, but there’s a few steps missing.
- Go to Settings -> Developer account -> API access, and click “Create service account” (screenshot).
- Click the “Google API console” link (screenshot), then click “Create service account” again(screenshot).
- Fill in the basic details, to help remember what the account is for (screenshot).
- Give your new account the “Firebase App Distribution Admin” role (screenshot).
- Create a key for the new account, and download it in JSON format (screenshot). This will download a JSON file (screenshot).
- Finally, your new service account will show up on Google Play Console, press “Grant access” (screenshot).
Next, we need to prepare our JSON file for our CI server.
Encrypting your config file with Travis CI
Since our JSON file contains sensitive information, we don’t want it to be stored directly in our repo. Whilst this is essential for a public repository, it’s a good habit for private repos too. Luckily, Travis has built-in support for file encryption!
These instructions are for a Mac, but a similar process will work on a Windows machine. Assume the service account config has been renamed to serviceaccount.json and placed in /scripts/:
- Install Travis command line with
gem install travis. - Log in to your GitHub account via Travis. You can either do this by entering your username, password, and 2FA code using
travis login, or by using an application password. - Make sure your Terminal is in your project root (so Travis knows which account to store the file against), then enter
travis encrypt-file /scripts/serviceaccount.json. - This will make a new file
/scripts/serviceaccount.json.enc, and output the decryption command to add to thebefore_installpart of your.travis.yml. It will look something like:
openssl aes-256-cbc -K $encrypted_def446eb3abc_key -iv $encrypted_def446eb3abc_iv -in scripts/serviceaccount.json.enc -out scripts/serviceaccount.json -d
That’s it! Make sure to delete your original file and commit your encrypted file.
Once that’s done, sending the app bundle itself is pretty easy. To start off with and help explain the overall flow, here’s the main function.
Preparing overall script structure
For this script, the overall control is handled by uploadToInternalAppSharing, which calls a few functions we’ll be defining shortly. There’s also a parameter check at the very start (as with all other functions in this post) and a few comments, just to help out any future maintainers.
function uploadToInternalAppSharing {
    if (($# != 2)); then echo "Please pass the bundle path and service account JSON location!"; exit 2; fi
    BUNDLE_LOCATION="${1}app.aab"
    AUTH_LOCATION="${2}"

    # Parse service account JSON for authentication information
    SERVICE_ACCOUNT_CONFIG=$(<${AUTH_LOCATION})
    AUTH_SERVER=$(echo ${SERVICE_ACCOUNT_CONFIG} | jq -r '.token_uri')
    AUTH_EMAIL=$(echo ${SERVICE_ACCOUNT_CONFIG} | jq -r '.client_email')
    AUTH_KEY=$(echo ${SERVICE_ACCOUNT_CONFIG} | jq -r '.private_key')
    echo "Retrieved service account from JSON!"

    # Generate JWT from authentication information
    JWT=$(getJwt "$AUTH_SERVER" "$AUTH_EMAIL" "$AUTH_KEY")
    echo "Generated JWT!"

    # Use JWT to authenticate with Google and retrieve an access token
    ACCESS_TOKEN=$(getAccessToken "$AUTH_SERVER" "$JWT")
    echo "Generated access token!"

    # Use access token to upload app bundle to Google Play Internal App Sharing
    URL=$(uploadBundle "$ACCESS_TOKEN" "$BUNDLE_LOCATION")
    echo "Uploaded app bundle to ${URL}"
}
Now that’s in place, we need to actually implement the functionality! The rest of this post will walk through the above function, and the calls it makes.
Decrypt your encrypted file
Inside your .sh script (triggered in your .travis.yml), specify your decrypted auth file’s location:
AUTH_LOCATION=${TRAVIS_BUILD_DIR}/scripts/serviceaccount.json
Next, pass this (and your bundle’s location) into uploadToInternalAppSharing so the file can be read:
SERVICE_ACCOUNT_CONFIG=$(${AUTH_LOCATION})
Next, retrieve the necessary variables from this file. In this case, that’s the token URI, email, and private key:
AUTH_SERVER=$(echo ${SERVICE_ACCOUNT_CONFIG} | jq -r '.token_uri')
AUTH_EMAIL=$(echo ${SERVICE_ACCOUNT_CONFIG} | jq -r '.client_email')
AUTH_KEY=$(echo ${SERVICE_ACCOUNT_CONFIG} | jq -r '.private_key')
We now pass these 3 variables into our getJwt function, storing the result: JWT=$(getJwt "$AUTH_SERVER" "$AUTH_EMAIL" "$AUTH_KEY").
Create JWT
Whilst the following block of code does look a bit intimidating, it’s just performing the necessary manipulations to make a JWT (JSON Web Token). You can find more information about JWTs and validate their contents at jwt.io. We’ll be using them to prove to Google that we are allowed to act on the behalf of the service account we created
The output of this function should be a fairly lengthy string of characters, which can be used for the next step. Note that the EOF must be without any indentation, no matter how tidy you usually keep your code!
function getJwt {
    if (($# != 3)); then echo "Please pass the auth server, auth email, and auth key!"; exit 2; fi
    AUTH_SERVER=$1
    AUTH_EMAIL=$2
    AUTH_KEY=$3

    # Create JWT header
    JWT_HEADER=$(echo -n '{"alg":"RS256","typ":"JWT"}' | openssl base64 -e)

    # Create JWT body
    JWT_BODY=$(cat <<EOF
    {
        "aud": "${AUTH_SERVER}",
        "iss": "${AUTH_EMAIL}",
        "scope": "https://www.googleapis.com/auth/androidpublisher",
        "exp": $(($(date +%s)+300)),
        "iat": $(date +%s)
    }
EOF
    )
    JWT_BODY_CLEAN=$(echo -n "$JWT_BODY" | openssl base64 -e)

    # Create complete payload
    JWT_PAYLOAD=$(echo -n "$JWT_HEADER.$JWT_BODY_CLEAN" | tr -d '\n' | tr -d '=' | tr '/+' '_-')

    # Create JWT signature
    JWT_SIGNATURE=$(echo -n "$JWT_PAYLOAD" | openssl dgst -binary -sha256 -sign <(printf '%s\n' "$AUTH_KEY") | openssl base64 -e)
    JWT_SIGNATURE_CLEAN=$(echo -n "$JWT_SIGNATURE" | tr -d '\n' | tr -d '=' | tr '/+' '_-')

    # Combine JWT payload and signature
    echo ${JWT_PAYLOAD}.${JWT_SIGNATURE_CLEAN}
}
Once we have our JWT, it can be passed to our getAccessToken function, again saving the result: ACCESS_TOKEN=$(getAccessToken "$AUTH_SERVER" "$JWT")
Retrieve auth token
We now need to make a call to the auth server we retrieved from our service account config earlier. We’re going to send it our JWT, and hopefully get back a token we can use to send content for the next few minutes. Notice the same jq -r technique as earlier used again.
function getAccessToken {
    if (($# != 2)); then echo "Please pass the auth server and JWT!"; exit 2; fi
    AUTH_SERVER=$1
    JWT=$2

    # Send JWT to auth server
    HTTP_RESPONSE=$(curl --silent --write-out "HTTPSTATUS:%{http_code}" \
      --header "Content-type: application/x-www-form-urlencoded" \
      --request POST \
      --data "grant_type=urn%3Aietf%3Aparams%3Aoauth%3Agrant-type%3Ajwt-bearer&assertion=$JWT" \
      "$AUTH_SERVER")

    # Parse auth server response for body and status
    HTTP_BODY=$(echo ${HTTP_RESPONSE} | sed -e 's/HTTPSTATUS\:.*//g')
    HTTP_STATUS=$(echo ${HTTP_RESPONSE} | tr -d '\n' | sed -e 's/.*HTTPSTATUS://')

    # Check response status for success, and retrieve access token if possible
    if [[ ${HTTP_STATUS} != 200 ]]; then
        echo -e "Create access token failed.\nStatus: $HTTP_STATUS\nBody: $HTTP_BODY\nExiting."
        exit 1
    fi
    echo $(echo ${HTTP_BODY} | jq -r '.access_token')
}
Finally we’re ready to actually send our bundle! We do this by sending our access token (and bundle location) to our new uploadBundle function. We keep track of the result as usual: URL=$(uploadBundle "$ACCESS_TOKEN" "$BUNDLE_LOCATION")
Upload to Internal App Sharing
This function is very similar to the access token fetching, except this time we’re posting our bundle instead of our JWT. We’re also going to use --progress-bar for a nice visual way of keeping track of upload process, very useful when a bundle gets into the 10s of MB. Don’t forget to use your own package name!
This will finally return the URL we’re after, which testers can use to download the app.
function uploadBundle {
    if (($# != 2)); then echo "Please pass the access token and bundle location!"; exit 2; fi
    ACCESS_TOKEN=$1
    BUNDLE_LOCATION=$2

    # Send app bundle and access token to internal app sharing
    PACKAGE="uk.co.jakelee.examplepackage"
    HTTP_RESPONSE=$(curl --write-out "HTTPSTATUS:%{http_code}" \
      --header "Authorization: Bearer $ACCESS_TOKEN" \
      --header "Content-Type: application/octet-stream" \
      --progress-bar \
      --request POST \
      --upload-file ${BUNDLE_LOCATION} \
      https://www.googleapis.com/upload/androidpublisher/v3/applications/internalappsharing/${PACKAGE}/artifacts/bundle?uploadType=media)

    # Parse internal app sharing response for body and status
    HTTP_BODY=$(echo ${HTTP_RESPONSE} | sed -e 's/HTTPSTATUS\:.*//g')
    HTTP_STATUS=$(echo ${HTTP_RESPONSE} | tr -d '\n' | sed -e 's/.*HTTPSTATUS://')

   # Check response status for success, and retrieve download URL if possible
   if [[ ${HTTP_STATUS} != 200 ]]; then
       echo -e "Upload app bundle failed.\nStatus: $HTTP_STATUS\nBody: $HTTP_BODY\nExiting."
       exit 1
   fi
   echo $(echo ${HTTP_BODY} | jq -r '.downloadUrl')
}
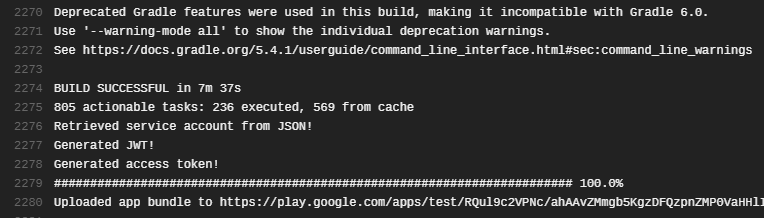
Now, when this script runs on your CI, you should see something like:
If anything didn’t quite work out, the gist of this post may help! Otherwise, feel free to leave a comment and I’ll help out.
Adding uploaders and testers
Before these internal apps can actually be used, we need to set up permissions for them. This is done from the application’s page on Google Play Console, then Development Tools -> Internal App Sharing.
On this page, select any other groups of people you’d like to be able to upload bundles manually, and any groups of QA / other testers (screenshot).
Now, when one of your testers clicks the link generated above on an account with app sharing enabled, they’ll be prompted to install the app. For information on enabling app sharing and more information on the system, Google’s documentation is pretty helpful.
Next steps
Whilst it’s excellent that testers can now download the app by looking at Travis logs, obviously this isn’t an ideal solution. The next post in this series will cover notifying QA that a new build is available (likely through Slack, or email).
A possible improvement would be notifying developers if a part of the process fails, and perhaps retrying any failed attempts. However, in my experience the steps have been very reliable so this hasn’t been necessary.
It’s also very important to remember these builds will only be available for 60 days, and won’t natively mention anything about which branch they’re from, who made them, etc. As such, this has to be handled via alternative systems for now.
References
- Encrypting files: https://docs.travis-ci.com/user/encrypting-files/
- Share app bundles and APKs internally: https://support.google.com/googleplay/android-developer/answer/9303479?hl=en-GB
- Internal app sharing artifacts: https://developers.google.com/android-publisher/api-ref/internalappsharingartifacts
- Google PlayStore internal app sharing: https://www.brightec.co.uk/blog/google-playstore-internal-app-sharing
- Google PlayStore and automated deployment: https://www.brightec.co.uk/blog/google-playstore-and-automated-deployment
- Google PlayStore automated deployment with AAB: https://www.brightec.co.uk/blog/google-playstore-automated-deployment-aab