Developing Android Apps With Firebase ML Kit
Machine Learning is, at its core, a way of letting programs learn how to do things by example. It can be used to get a program to self-learn how to play Mario, or how to walk. In this tutorial, Firebase’s Machine Learning Kit (commonly known as ML Kit) will be used to retrieve text, faces, barcodes, and objects from an image.
Firebase’s API provides “models” (knowledge based on data sets) for common actions such as identifying faces or objects in images. Firebase also provides the ability to utilise custom models (via TensorFlow), but only the built-in models will be covered in this tutorial. Additionally, only on-device APIs will be utilised, as cloud APIs require paid plans.
This post is part of The Complete Guide to Firebase. Throughout this tutorial, the official documentation may be useful.
Implementation
As always, the entire Firebase Reference Project is open source, and there is a pull request for adding Firebase ML Kit if you just want to see the code changes required. This tutorial assumes you already have Firebase added to your project.
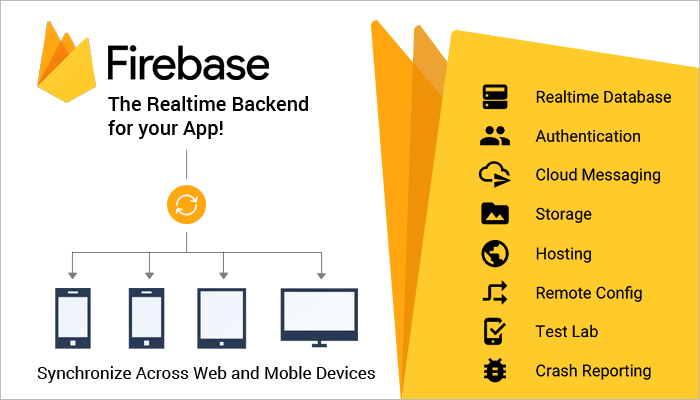
In this tutorial, an image will be picked from a file selector, then analysed using ML Kit for relevant information. This image can also be provided via a video stream or a camera, but using an existing file is the simplest to demonstrate the core concepts. For each ML Kit model, a raw image and analysed screenshot is provided too.
Setting up Firebase ML Kit
First, add the ML Kit library to your app-level build.gradle:
implementation 'com.google.firebase:firebase-ml-vision:18.0.1'
Next, add the models you’ll be using to your AndroidManifest.xml as a meta-data entry. This allows your app to automatically download the model when your app is installed, instead of waiting until they are actually needed. The following example includes all models used in this tutorial:
<meta-data
    android:name="com.google.firebase.ml.vision.DEPENDENCIES"
    android:value="ocr,face,barcode,label" />
Obtaining a target picture
For the example app, we first define a request code for each of the 4 potential ML Kit actions to be performed (Text, Face, Barcode, or Object). These can be any number under 65535, and are used to distinguish requests:
private val TEXT_RESPONSE = 3331
private val FACE_RESPONSE = 3442
private val BARCODE_RESPONSE = 4443
private val LABEL_RESPONSE = 4143
Next, a button is created for each ML Kit identifying API demonstrated (Text, Face, Barcode, Object). Example XML is available, but the layout doesn’t matter. Each of these buttons then has an onClickListener set, which opens the system’s file picker, filtered to images only:
textButton.setOnClickListener {
    startActivityForResult(
        Intent(Intent.ACTION_GET_CONTENT).setType("image/*"), TEXT_RESPONSE)
}
faceButton.setOnClickListener {
    startActivityForResult(
            Intent(Intent.ACTION_GET_CONTENT).setType("image/*"), FACE_RESPONSE)
}
barcodeButton.setOnClickListener {
    startActivityForResult(
            Intent(Intent.ACTION_GET_CONTENT).setType("image/*"), BARCODE_RESPONSE)
}
objectButton.setOnClickListener {
    startActivityForResult(
            Intent(Intent.ACTION_GET_CONTENT).setType("image/*"), LABEL_RESPONSE)
}
Once the user picks an image, onActivityResult is then called. Once the resultCode has been checked, an Uri of the image can be created using Uri.parse(data!!.dataString). This Uri can then be passed to FirebaseVisionImage.fromFilePath(context, uri) to obtain the image in the required format.
This image (after updating the layout’s preview) is then passed to the appropriate function based on the desired ML Kit operation to be performed:
override fun onActivityResult(requestCode: Int, resultCode: Int, data: Intent?) {
    super.onActivityResult(requestCode, resultCode, data)
    if (resultCode != RESULT_OK) return
    val uri = Uri.parse(data!!.dataString)
    val image = FirebaseVisionImage.fromFilePath(activity!!, uri)
    imagePreview.setImageBitmap(image.bitmapForDebugging)
    output.text = ""
    when (requestCode) {
        TEXT_RESPONSE -> retrieveText(image)
        FACE_RESPONSE -> retrieveFace(image)
        BARCODE_RESPONSE -> retrieveBarcode(image)
        LABEL_RESPONSE -> retrieveLabels(image)
    }
}
Using ML Kit on target picture
For all of the following code examples, image is the FirebaseVisionImage passed from onActivityResult.
Retrieving text from an image
First, make sure ocr is in your DEPENDENCIES meta-data in your AndroidManifest.xml.
Next, calling firebase.onDeviceTextRecognizer.processImage(image) performs an OCR task using ML Kit. The added success listener contains a FirebaseVisionText object. This object (and all text objects below it) all have a .text available that will provide the extracted text. Additionally, all child objects have boundingBox / cornerPoints (the area scanned for this object), confidence (certainty in the text result), and recognizedLanguages (the identified languages).
Inside this overall summary object, there are blocks containing lines containing words containing letters. The following function loops through every word to create a count of all blocks, lines, words, and letters.
private fun retrieveText(image: FirebaseVisionImage) {
    FirebaseVision.getInstance()
            .onDeviceTextRecognizer
            .processImage(image)
            .addOnSuccessListener { textObject ->
                var blocks = 0
                var lines = 0
                var words = 0
                val letters = textObject.textBlocks.sumBy { block ->
                    blocks += 1
                    block.lines.sumBy { line ->
                        lines += 1
                        line.elements.sumBy { word ->
                            words += 1
                            word.text.length
                        }
                    }
                }
                output.text = String.format(getString(R.string.mlkit_text_data),
                        blocks, lines, words, letters, textObject.text)
            }
            .addOnFailureListener { output.text = it.localizedMessage }
}
| Input | Output |
|---|---|
 |
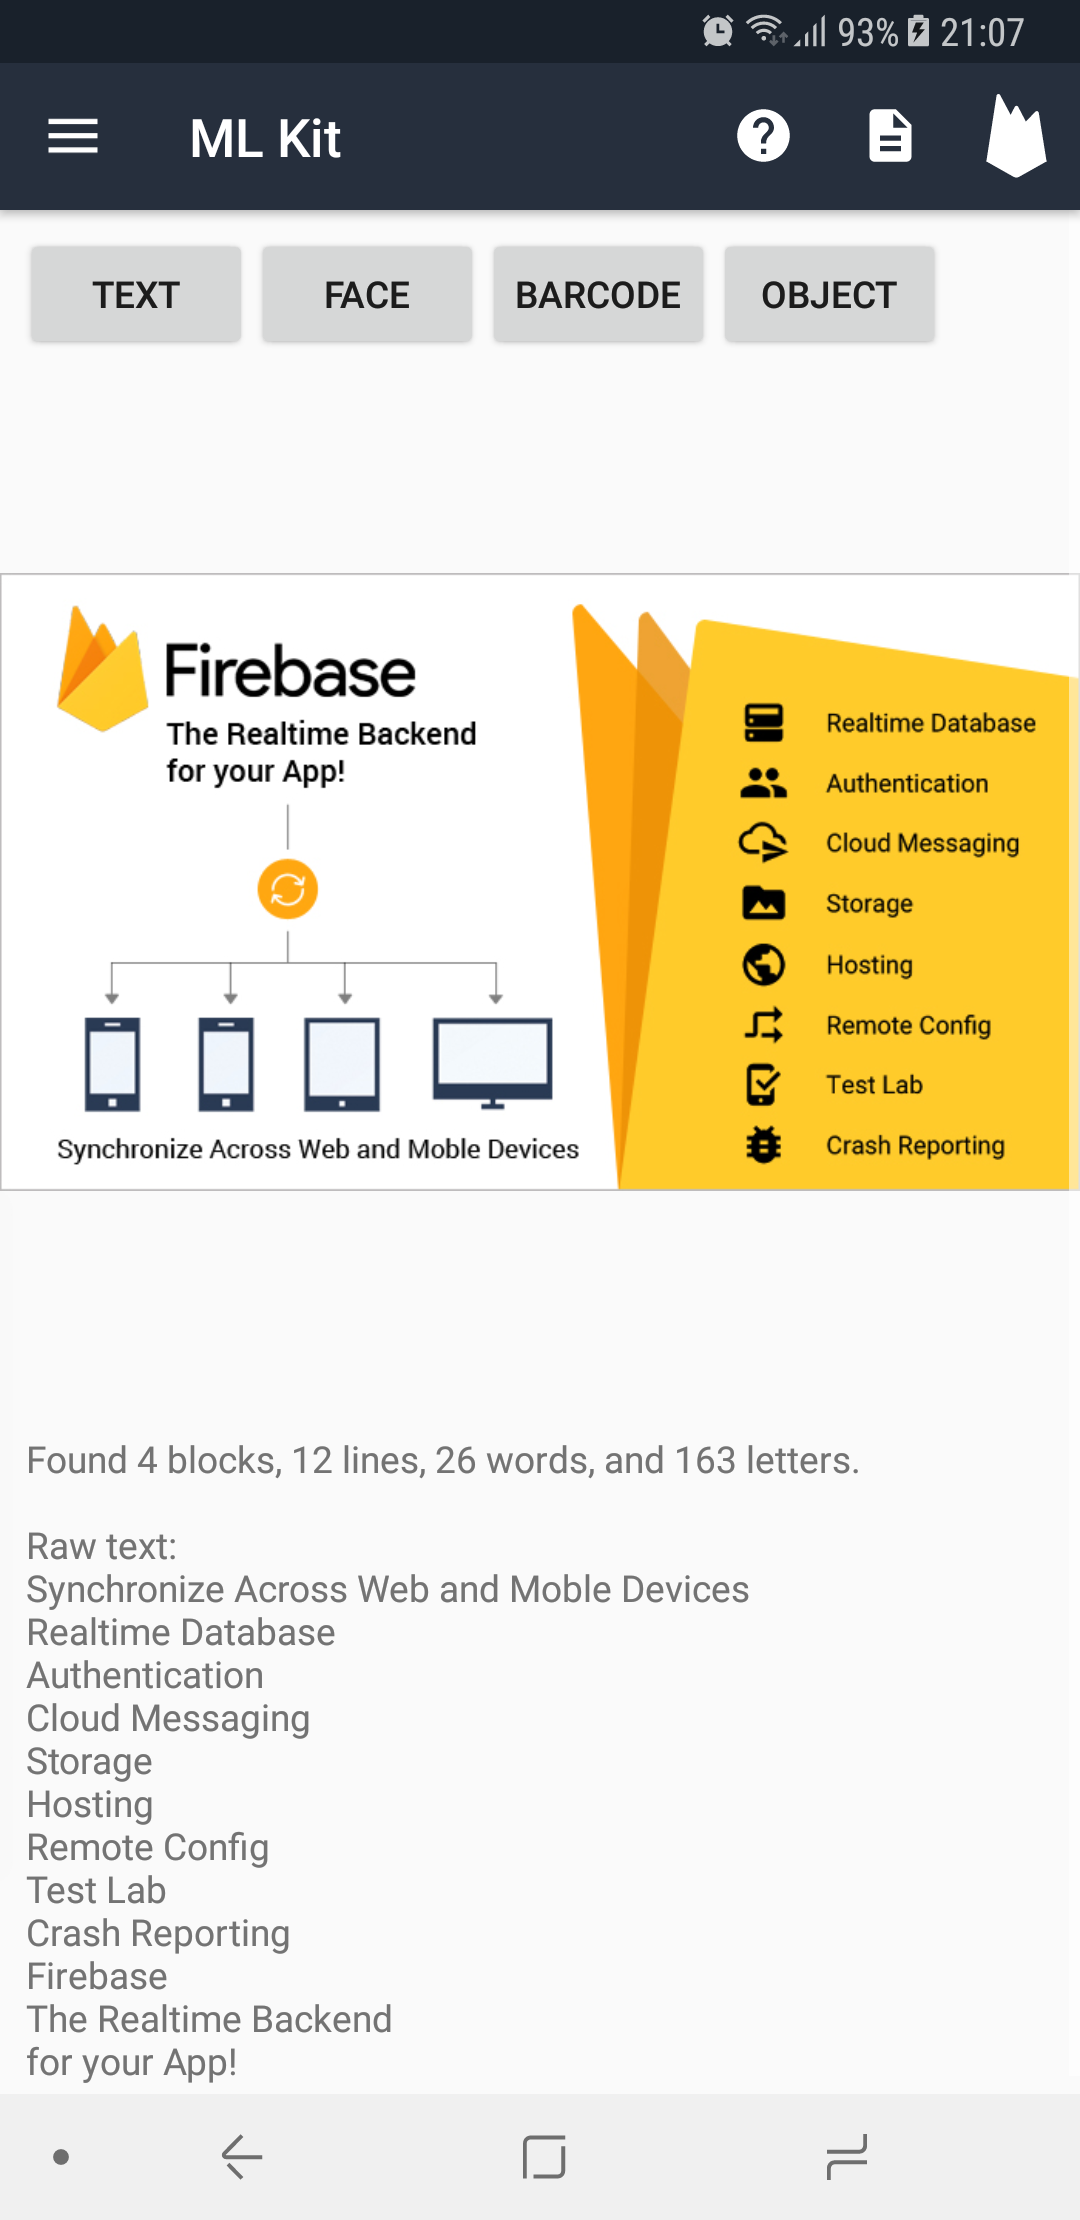 |
Detecting faces in an image
First, make sure face is included in your DEPENDENCIES meta-data inside AndroidManifest.xml and the face detection dependency has been added alongside core ML Kit:
implementation 'com.google.firebase:firebase-ml-vision:18.0.1'
implementation 'com.google.firebase:firebase-ml-vision-face-model:17.0.2'
Next, a FirebaseVisionFaceDetectorOptions needs to be built. There are 5 toggleable options within:
setPerformanceMode()can beFAST(default) orACCURATE. Accurate is useful for static image analysis.setLandmarkMode()can beNO_LANDMARKS(default) orALL_LANDMARKS. This feature is useful when the position of specific facial features are needed.setContourMode()can beNO_CONTOURS(default) orALL_CONTOURS. This feature is useful for getting the outlines of specific facial features.setClassificationMode()can beNO_CLASSIFICATIONS(default) orALL_CLASSIFICATIONS. This feature is useful when information such as likelihood of smiling / eyes being open is needed.enableTracking()enabled assigning IDs to faces. When enabled, this identifies users across multiple images.
Contours and face tracking cannot currently both be enabled at the same time. As such, for this example we’ll enable everything except contours:
val options = FirebaseVisionFaceDetectorOptions.Builder()
        .setPerformanceMode(FirebaseVisionFaceDetectorOptions.ACCURATE)
        .setLandmarkMode(FirebaseVisionFaceDetectorOptions.ALL_LANDMARKS)
        .setClassificationMode(FirebaseVisionFaceDetectorOptions.ALL_CLASSIFICATIONS)
        .enableTracking()
        .build()
These options are then passed to firebase.getVisionFaceDetector(options) and .detectInImage(image) is called. An (potentially empty) array of faces is returned, each of which contains information on the face’s ID, head rotation, body part positions, etc. Probabilities (eyes open, smiling) are given between 0 and 1, so multiply by 100 to get a confidence percentage. headEulerAngleY refers to the angle the head is looking left or right. 0 degrees is looking directly at the camera, negative values are looking to the left, positive values to the right (from the detected face’s perspective).
FirebaseVision.getInstance()
        .getVisionFaceDetector(options)
        .detectInImage(image)
        .addOnSuccessListener { faces ->
            if (faces.isEmpty()) {
                output.text = getString(R.string.mlkit_no_faces)
            } else {
                var text = ""
                faces.forEach {
                    text += String.format(getString(R.string.mlkit_face_data),
                            it.trackingId,
                            it.leftEyeOpenProbability * 100,
                            it.rightEyeOpenProbability * 100,
                            it.smilingProbability * 100,
                            it.headEulerAngleY,
                            it.headEulerAngleZ)
                }
                output.text = text
            }
        }
        .addOnFailureListener { output.text = it.localizedMessage }
| Input | Output |
|---|---|
 |
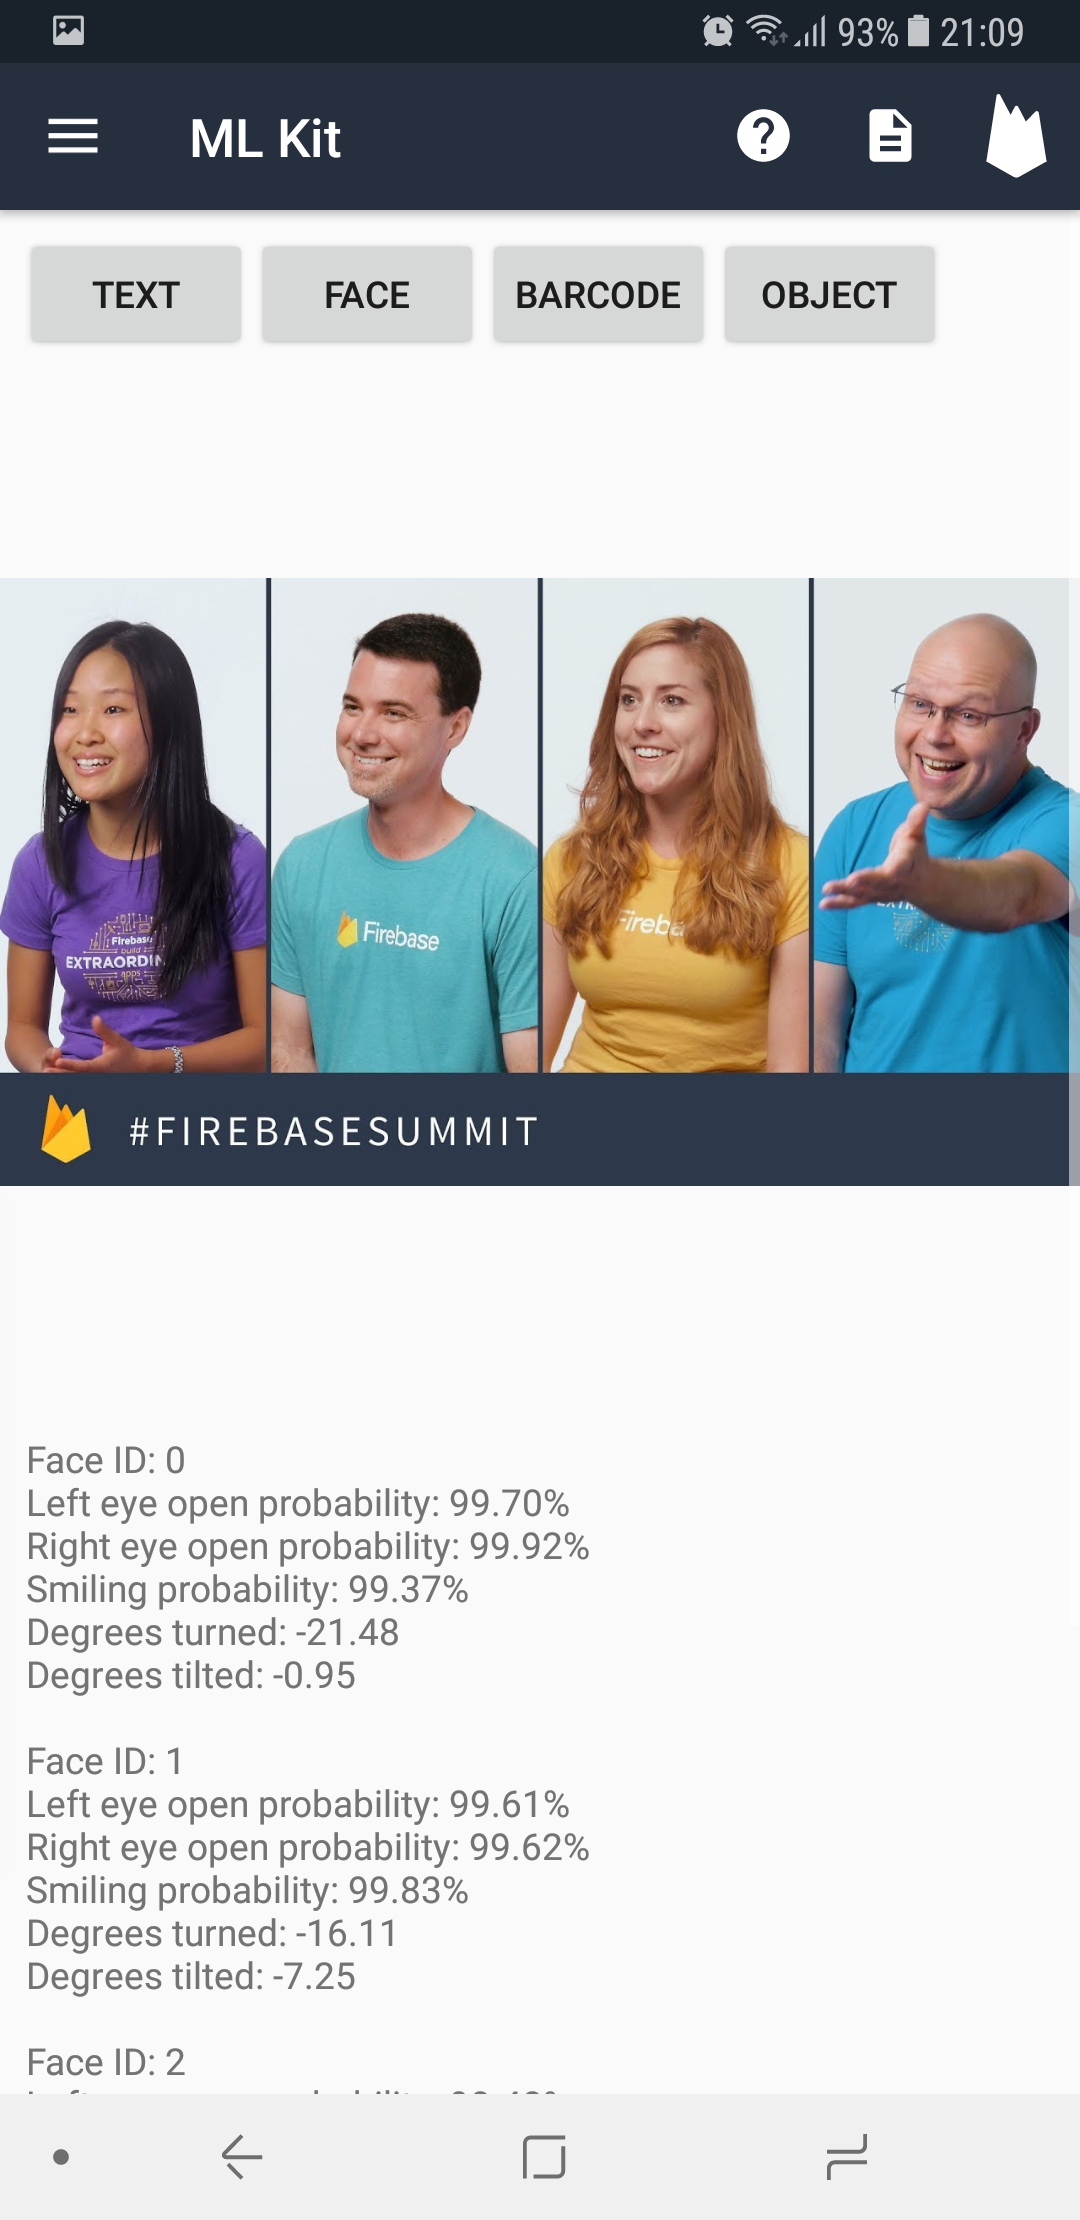 |
Identifying barcodes in an image
As usual, make sure barcode is in the android:value of your DEPENDENCIES in Android.Manifest.xml:
<meta-data
    android:name="com.google.firebase.ml.vision.DEPENDENCIES"
    android:value="barcode" />
Then, create a FirebaseVisionBarcodeDetectorOptions object with all the barcode types wanted. QR Code, UPC, and EAN are the 3 most common formats.
val options = FirebaseVisionBarcodeDetectorOptions.Builder()
        .setBarcodeFormats(
                FirebaseVisionBarcode.FORMAT_QR_CODE,
                FirebaseVisionBarcode.FORMAT_AZTEC,
                FirebaseVisionBarcode.FORMAT_UPC_A,
                FirebaseVisionBarcode.FORMAT_UPC_E,
                FirebaseVisionBarcode.FORMAT_EAN_13)
        .build()
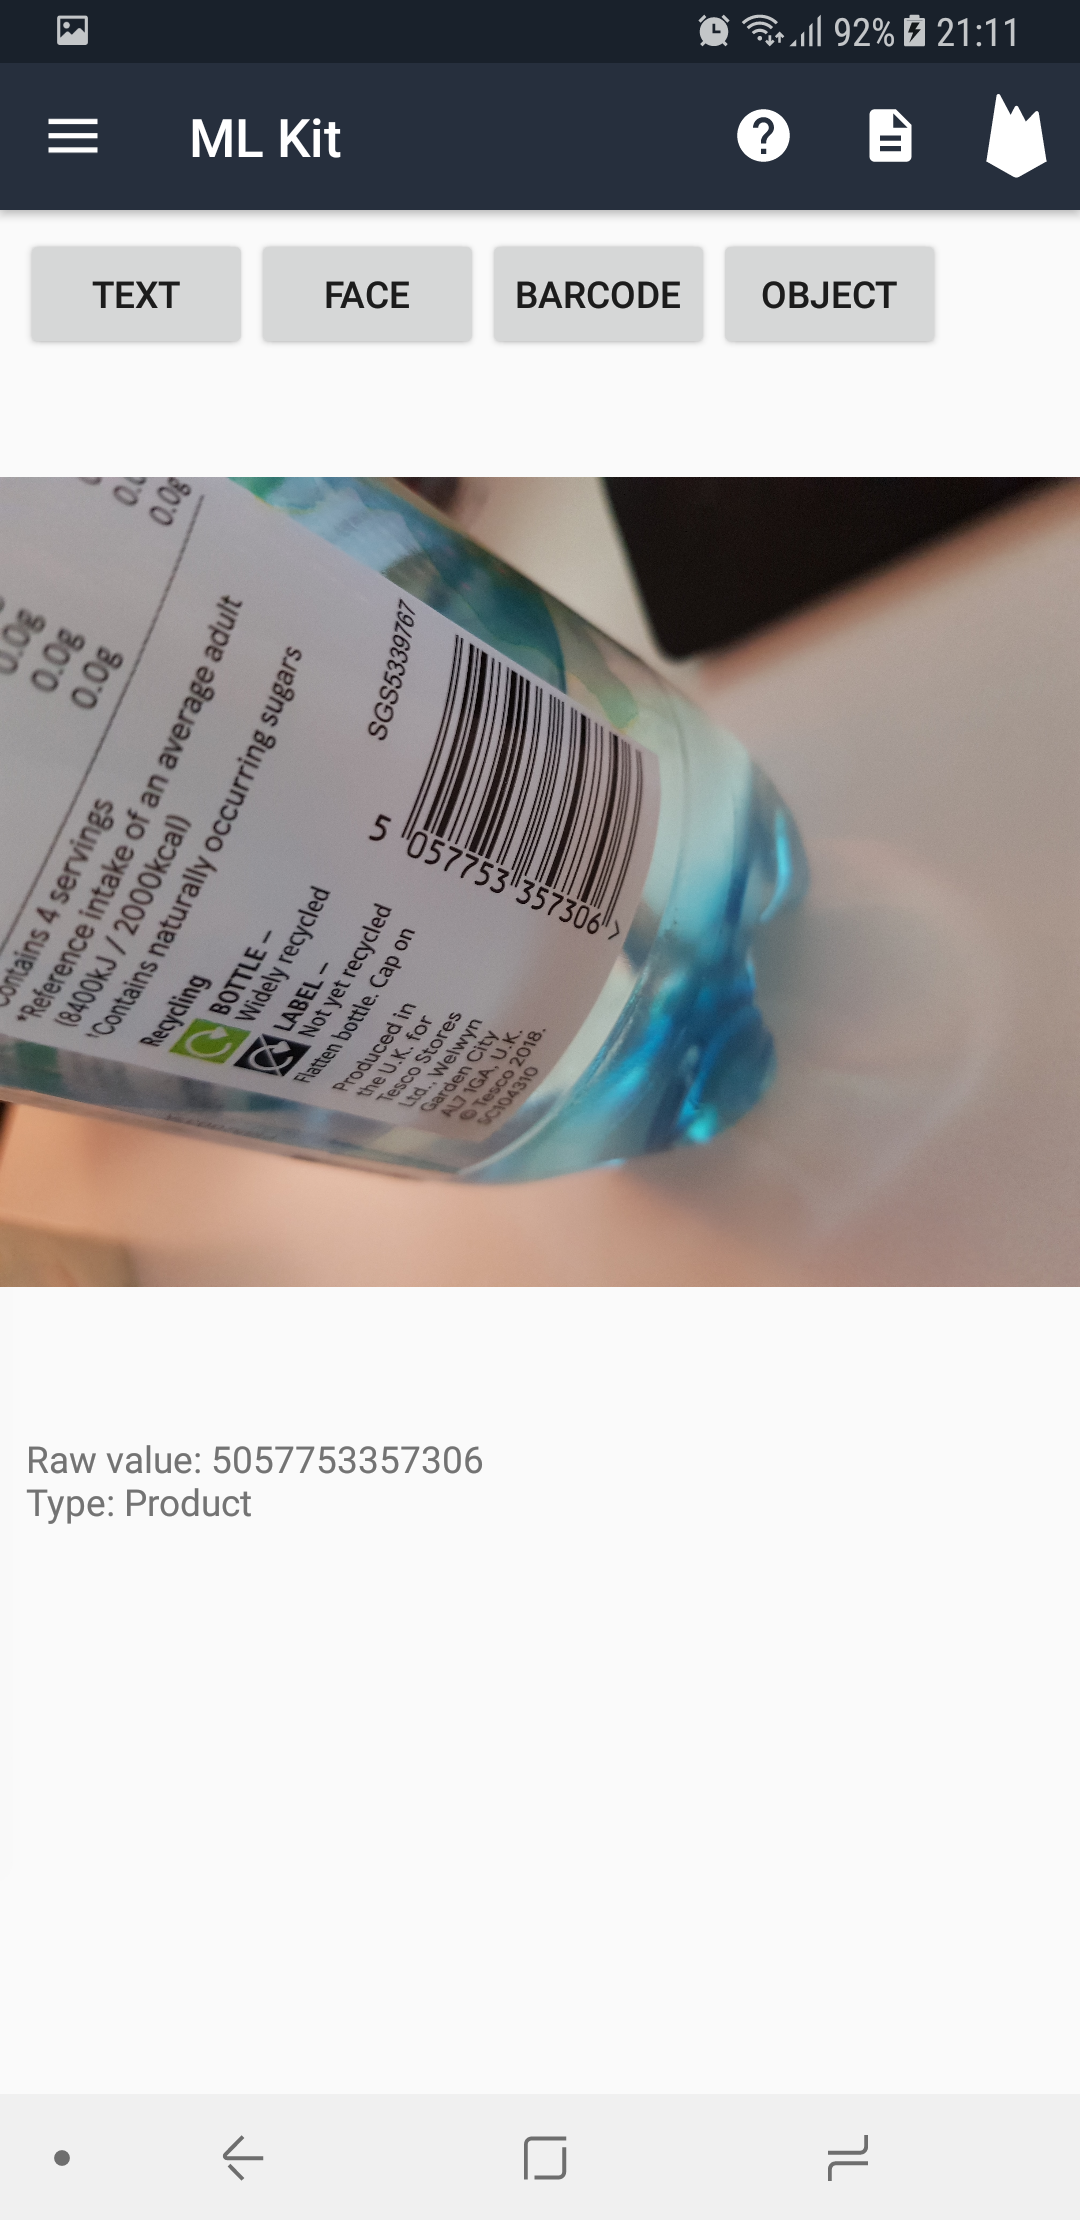
Next, pass this to firebase.getVisionBarcodeDetector(options) and call detectInImage(image). This will return a list of barcodes detected, each of which contains the raw text, the computed value, and the type. For example, a TYPE\_GEO QR code will have a rawText of geo:40.1234,75.1234,100, a type of TYPE_GEO, and a geoPoint object with lat and lng doubles. Using the raw text is generally safest, as all data types resolve to a sensible plain text.
FirebaseVision.getInstance()
        .getVisionBarcodeDetector(options)
        .detectInImage(image)
        .addOnSuccessListener { barcodes ->
            if (barcodes.isEmpty()) {
                output.text = getString(R.string.mlkit_no_barcode)
            } else {
                var string = ""
                barcodes.forEach {
                    string += String.format(getString(R.string.mlkit_barcode_data),
                            it.rawValue,
                            getBarcodeType(it.valueType))
                }
                output.text = string
            }
        }
        .addOnFailureListener { output.text = it.localizedMessage }
| Input | Output |
|---|---|
 |
 |
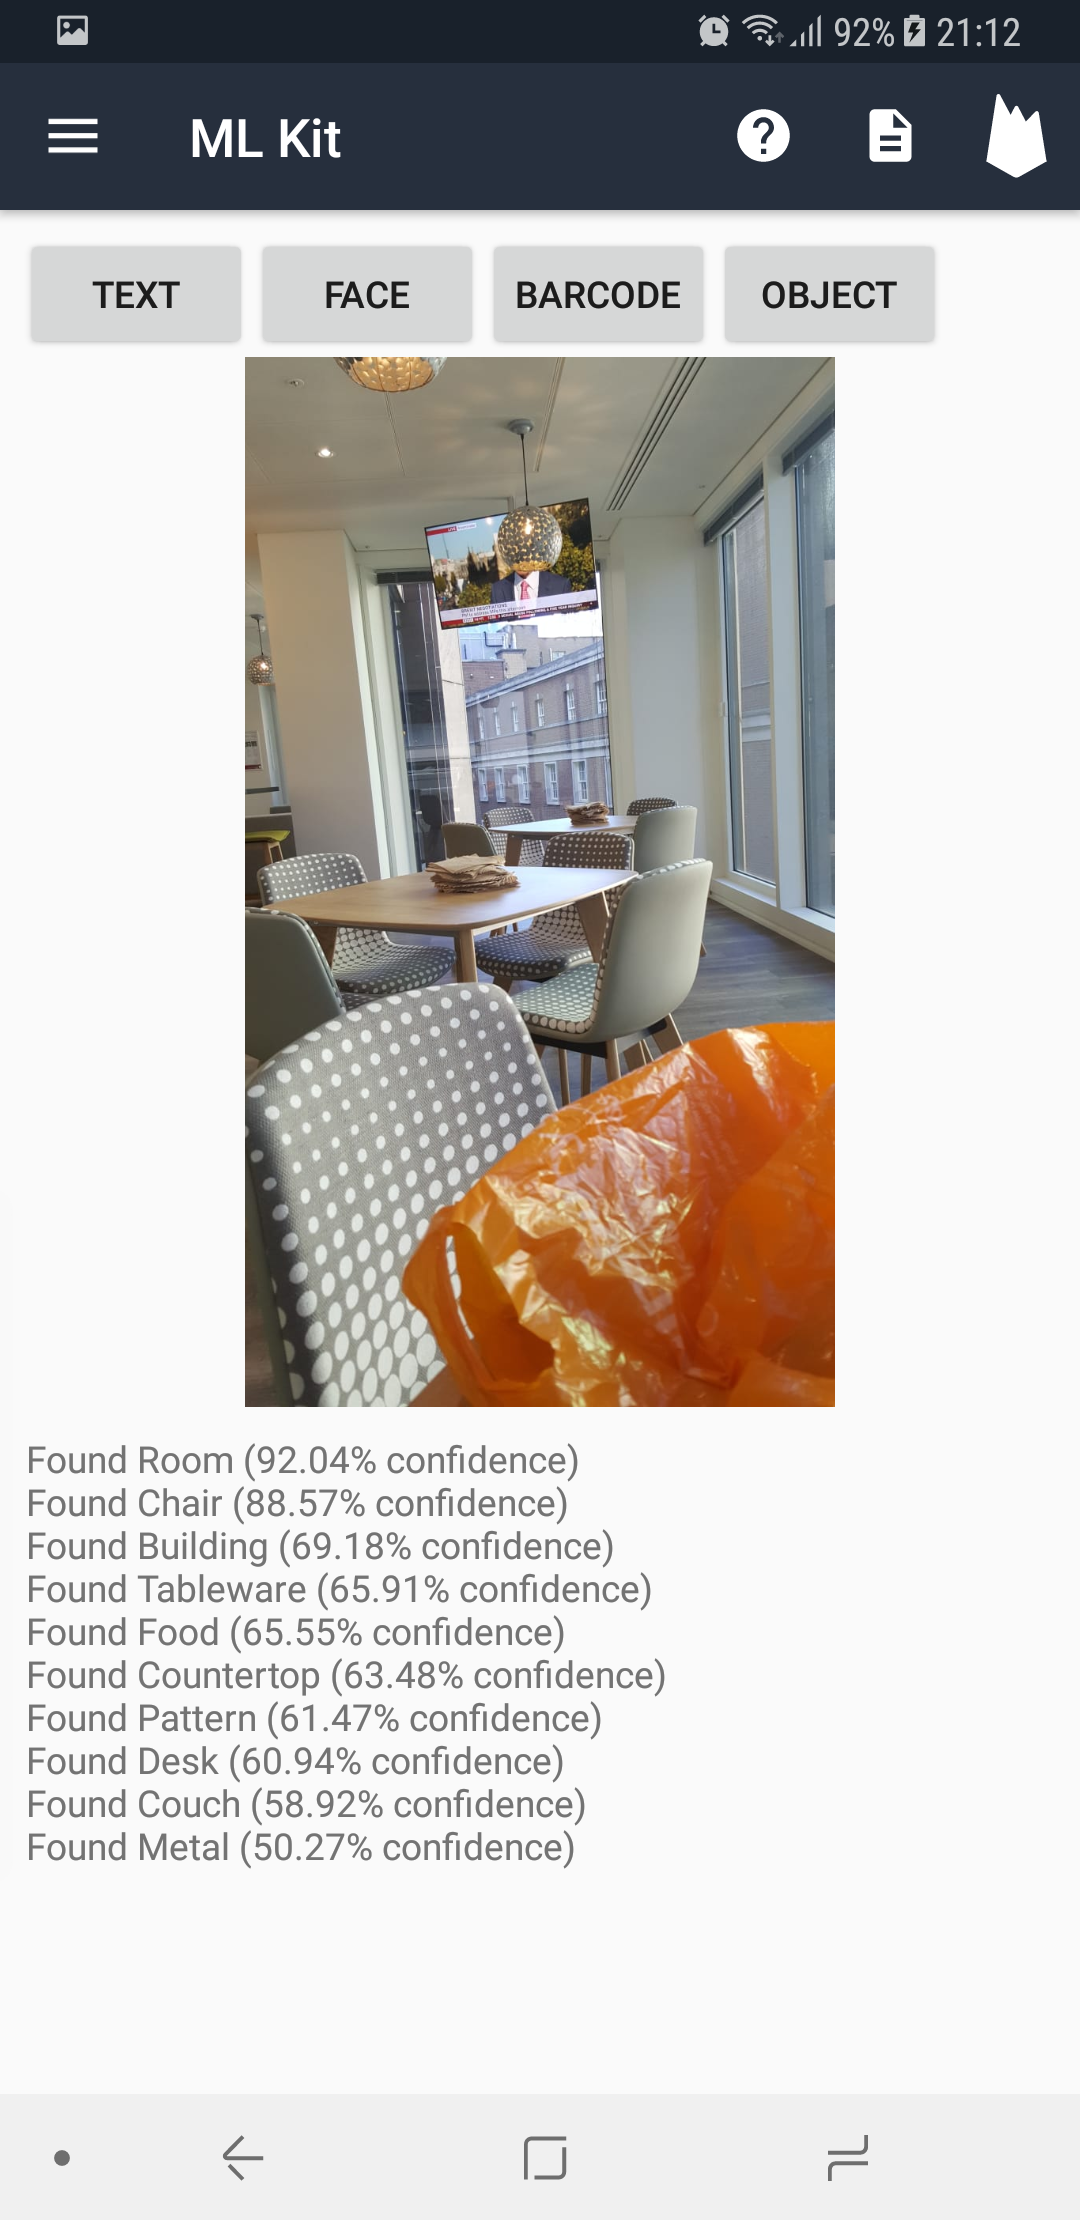
Labelling all objects in an image
The on-device version of this API returns the most common 400+ items, whereas the paid cloud API uses 10,000+ items. However, the local API is still very powerful, and easily detects surroundings and objects.
As always, first add label to your DEPENDENCIES inside your AndroidManifest.xml. Then add the image labelling library to your app-level build.gradle:
implementation 'com.google.firebase:firebase-ml-vision:18.0.1'
implementation 'com.google.firebase:firebase-ml-vision-image-label-model:17.0.2'
The only option for FirebaseVisionLabelDetector is the minimum confidence (0 to 1) threshold to display a result, and won’t be used in this example. Calling firebase.visionLabelDetector.detectInImage(image) will return a list of FirebaseVisionLabel. Each of these contains a label (the detected object’s name), confidence (the confidence that the object has been detected), and an entityId (a unique ID of the object).
private fun retrieveLabels(image: FirebaseVisionImage) {
    FirebaseVision.getInstance()
            .visionLabelDetector
            .detectInImage(image)
            .addOnSuccessListener { labels ->
                if (labels.isEmpty()) {
                    output.text = getString(R.string.mlkit_no_label)
                } else {
                    var string = ""
                    labels.forEach {
                        string += String.format(getString(R.string.mlkit_label_data),
                                it.label, it.confidence * 100)
                    }
                    output.text = string
                }
            }
            .addOnFailureListener { output.text = it.localizedMessage }
}
| Input | Output |
|---|---|
 |
 |
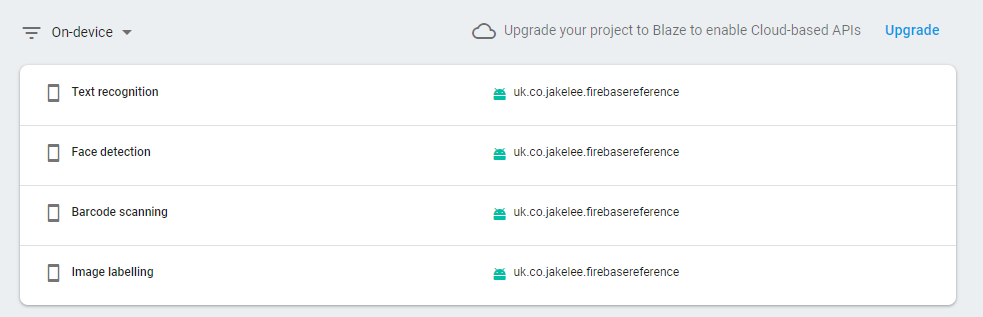
Web interface
The APIs tab of the web interface shows all APIs currently in use by your apps, as well as which package name is utilising it.
Conclusion
Firebase’s ML Kit provides an excellent introduction to the power of machine learning assisted image analysis. Whilst the OCR, object identification, barcode reading, and facial recognition are just examples, the models are extremely powerful already. Considering the free and offline nature of these models, they are perfect for almost any implementation.
However, the very nature of the image analysis technique means that there is no debug information available. The high success rate of the models should prevent this being an issue, but the lack of information is worth keeping in mind.
From my own experimentation, the facial analysing performed amazingly well, as did the object recognition. However, somewhat surprisingly, the text identification was much less successful. This is likely due to the large number of fonts available, as well as the similarity between many letters, but it’s still unusual that the most common use case is the least accurate!
Previous: Developing Android Apps With Firebase Cloud Storage
Next: Ensuring Your Android App’s Quality With Firebase Crashlytics