Developing Android Apps With Firebase Cloud Functions
Firebase Cloud Functions provide an easy way to execute JavaScript on Google’s servers, and call this code from your own apps. It removes the need to manually manage any sort of server, and can be up and running very quickly. Firebase’s free plan is somewhat limited, and cannot make network requests to other servers, but it can do plenty of processing.
This post is part of The Complete Guide to Firebase. Throughout this tutorial, you’ll need access to the Firebase Cloud Functions dashboard, and the official documentation may be useful too.
Implementation
As always, the entire Firebase Reference Project is open source, and there is a pull request for adding Firebase Cloud Functions if you just want to see the code changes required. Additionally, the hosted functions code is available as a repository.
This tutorial assumes you already have Firebase added to your project.
Setting up Firebase Cloud Functions environment
- First install npm & node.js, used to handle the Firebase installation process.
- Next, open a Command Prompt and enter
npm install -g firebase-tools, after a few minutes you should see something similar to the following image: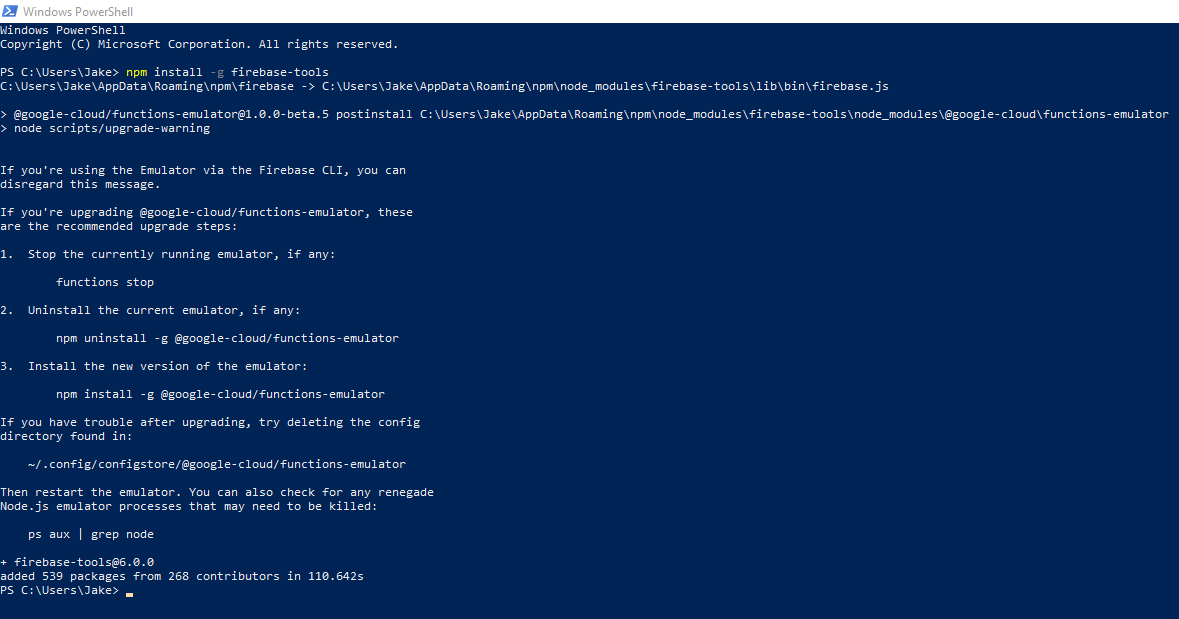
- Next, login to your Firebase account using
firebase login. This will open a browser with a login request. Once logged in, the Command Prompt will report success.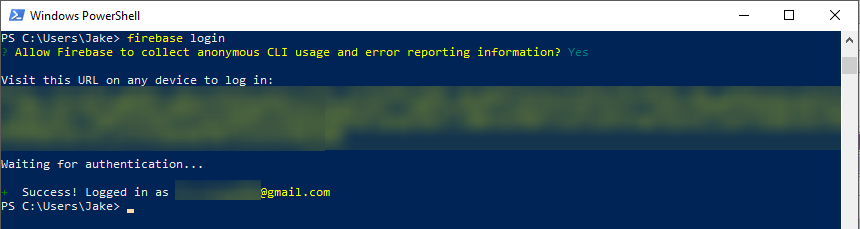
- Next run
firebase init functions, which will ask you a few questions about your setup. Click any of the following items to view a screenshot of the installation at that point.- The project to use, I chose my Firebase Reference Project.
- The language to use, I chose JavaScript.
- Whether style checker ESLint should be used & dependencies should be installed, I chose “Yes” to both.
- You should now have a project folder containing a few files and folders.
functions/index.jsis the most important file, as it contains your functions’ actual code. Open this file up and uncomment the lines relating toexport.helloWorld.
That’s it, your local environment is now fully setup, and you’ve got a “Hello World” function ready to deploy!
Deploying Firebase Cloud Functions
To deploy or update your functions, enter firebase deploy –only functions to your Command Prompt whilst inside your project directory. On Windows machines, this will fail by default due to a slightly faulty configuration (this error specifically):
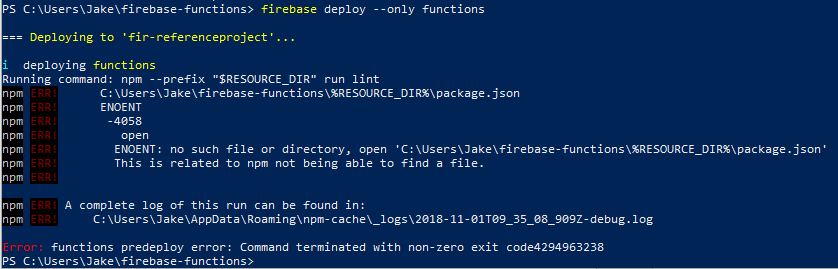
Luckily, fixing this is just a case of opening your firebase.json and replacing \\"$RESOURCE\_DIR\\" with ./functions/. Save the changes, enter firebase deploy –only functions again, and it should now successfully deploy:
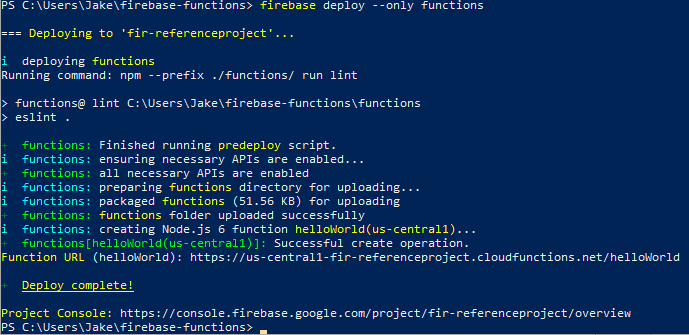
Our Hello World function is now ready to call! Visiting the URL outputted (https://us-central1-fir-referenceproject.cloudfunctions.net/helloWorld) will display whatever message our Cloud Function in index.js was set to output. You now have a cloud-hosted function, congratulations! Time to make your own…
Creating a Cloud Function
You may have noticed the existing Hello World functions inside index.js uses functions.https.onRequest. This means it can be visited / called like a normal webpage, and has Content-Type headers etc. Whilst you can get URL parameters from these methods (using request.query.text), it’s safer to provide actual functions that can be called remotely. There’s a reason it’s called Cloud Functions!
We’re going to create a function that receives a phone’s manufacturer’s name from the app, converts it to uppercase, and then returns it to be shown in the app. This is obviously a pretty useless function that would usually be handled entirely inside the app, but it’s a simple way to show passing data back and forth.
To do this, use functions.https.onCall instead, which can also receive a data object with any additional parameters you’ve chosen to send. We’re going to receive a manufacturer parameter, so first check it has a length, then convert whatever it contains to uppercase and return it. Add the following into your index.js:
exports.uppercaseDeviceName = functions.https.onCall((data) => {
    if (data.manufacturer.length > 0) {
        return data.manufacturer.toUpperCase();
    }
    return "Unknown";
});
Save and redeploy the functions, and your custom function is now ready to be called. Note that to return data we just used return x, instead of the response.send(x) required by onRequest functions. Google’s example index.js> contains more complex examples that may be useful for further work.
Time to programmatically call our new function from inside an app!
Calling Cloud Functions from an Android app
First, add the Firebase Cloud Functions dependency in your app-level build.gradle file and perform a sync:
implementation 'com.google.firebase:firebase-functions:16.1.2'
Next, use the following to make a call to your new uppercaseDeviceName function, passing it a HashMap containing your device’s manufacturer (as the manufacturer key), and displaying a Toast of the result:
FirebaseFunctions.getInstance()
		.getHttpsCallable("uppercaseDeviceName")
		.call(hashMapOf("manufacturer" to Build.MANUFACTURER))
		.continueWith { task ->
			if (task.isSuccessful) {
				Toast.makeText(activity, "Uppercase manufacturer is: ${task.result!!.data}", Toast.LENGTH_SHORT).show()
			} else {
				Toast.makeText(activity, task.exception.toString(), Toast.LENGTH_SHORT).show()
			}
		}
In the example app, this is triggered inside an onClick().
Due to Firebase already knowing which project you’re calling (due to the google-services.json), just passing the function’s name is enough to call the function. Pretty cool, right? If you encounter problems in getting a response from the server, the “Web interface” part of this post covers how to view server logs containing any runtime errors. ESLint should also alert you on deployment if your code contains incorrect syntax, helpful if JavaScript isn’t one of your core languages.
Automatically triggering Cloud Functions
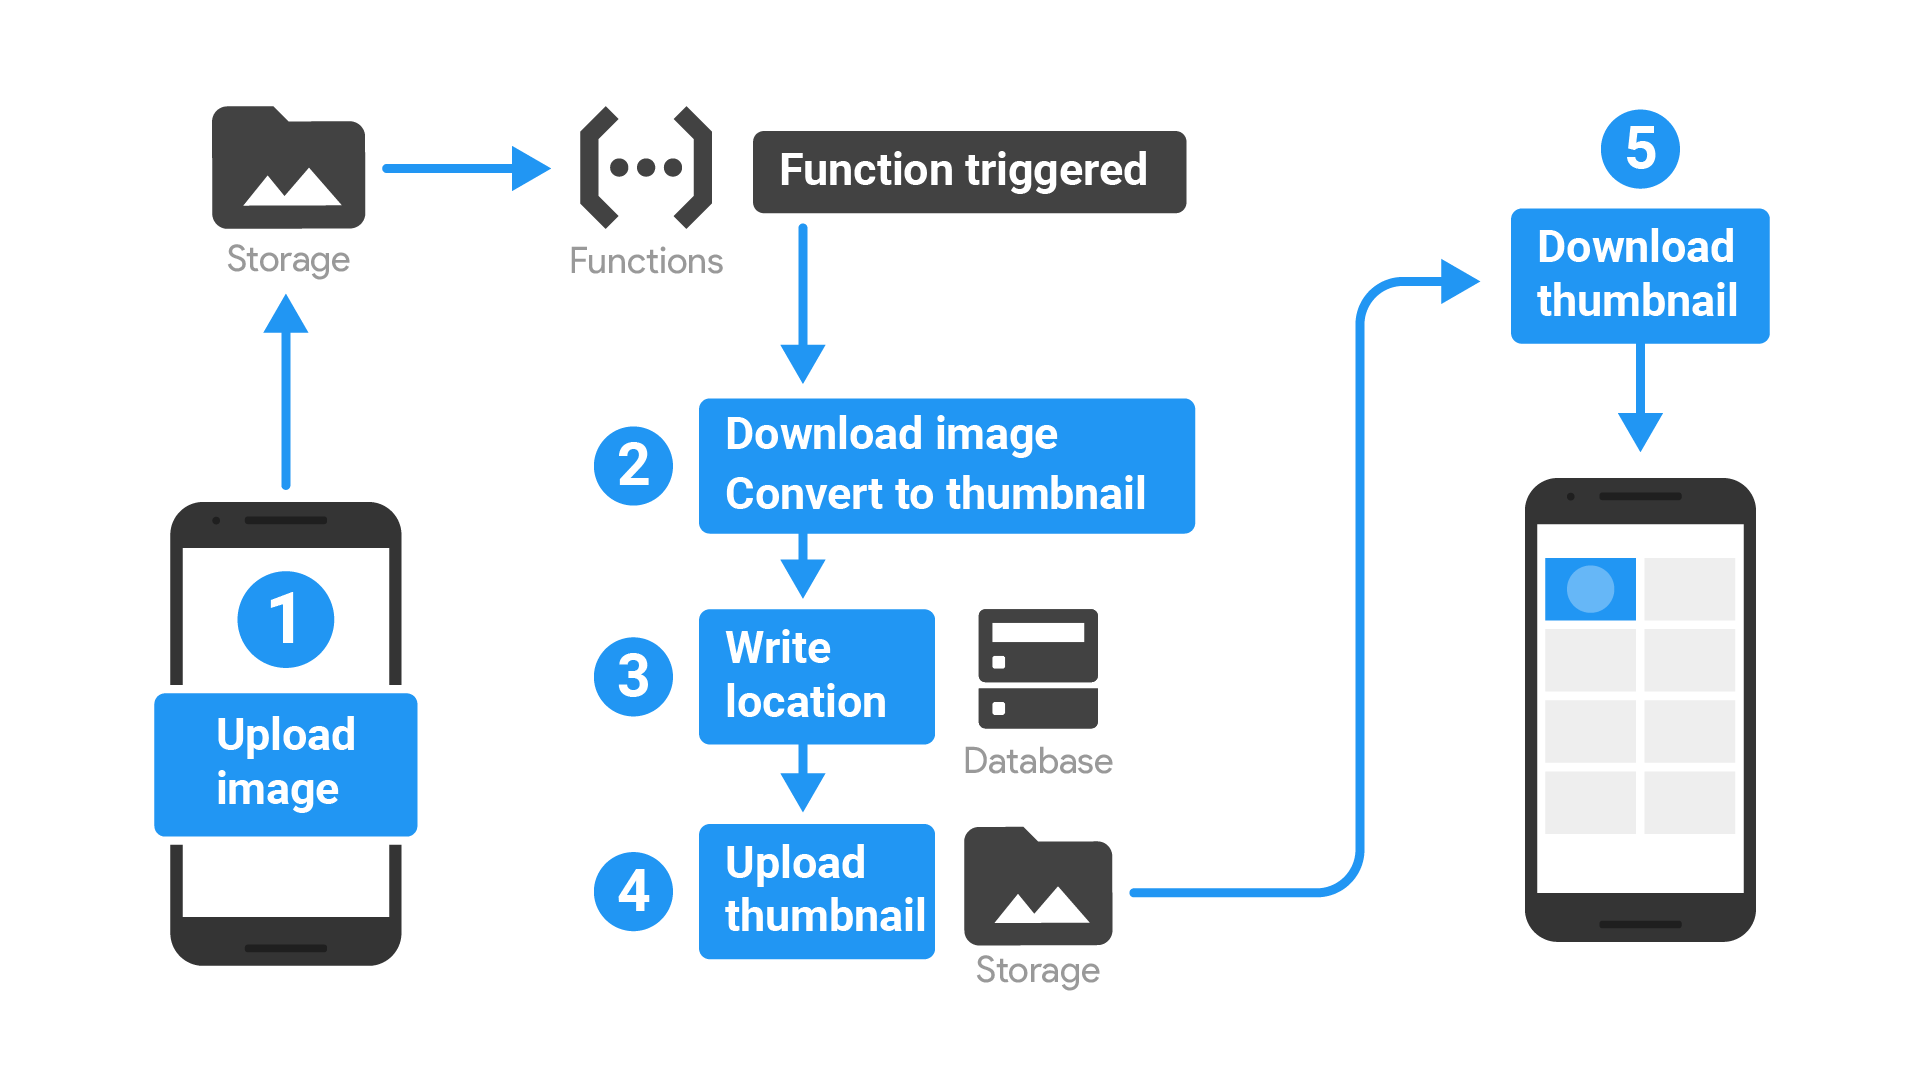
Whilst both the Hello World and Uppercase Manufacturer Name functions in this tutorial were triggered on demand, it’s also possible to automatically call cloud functions when an event happens. Using Google’s example, you could trigger functions when a new image is uploaded to Firebase Storage to store the location in Firebase Database, and create a thumbnail of the image using an external API.
To set up these triggers, define your function as a listener instead of an onCall or onRequest. For example, Cloud Firestore has onCreate, onUpdate, onDelete, and onWrite listeners. Set these up in your index.js as if they were a normal function:
exports.yourFunctionName = functions.firestore
    .document('sampledata').onWrite((change, context) => {
      // All changes will be inside `change`
    });
Many Firebase services provide these listeners that your Cloud Functions can subscribe to. To see which listeners are available, please see the live documentation as all of these services are currently in Beta and subject to change:
- Analytics
- Authentication
- Firestore
- Cloud Pub/Sub
- Cloud Storage
- Crashlytics
- Realtime Database
- Remote Config
Web interface
The majority of Cloud Functions’ interface is in Firebase, but certain actions (e.g. deleting a function) can only be performed in Google Cloud Platform, so both will be covered.
Firebase
Dashboard
The dashboard shows an overview of all of your current cloud functions, with basic information like region, node version, and memory allocation.

Health
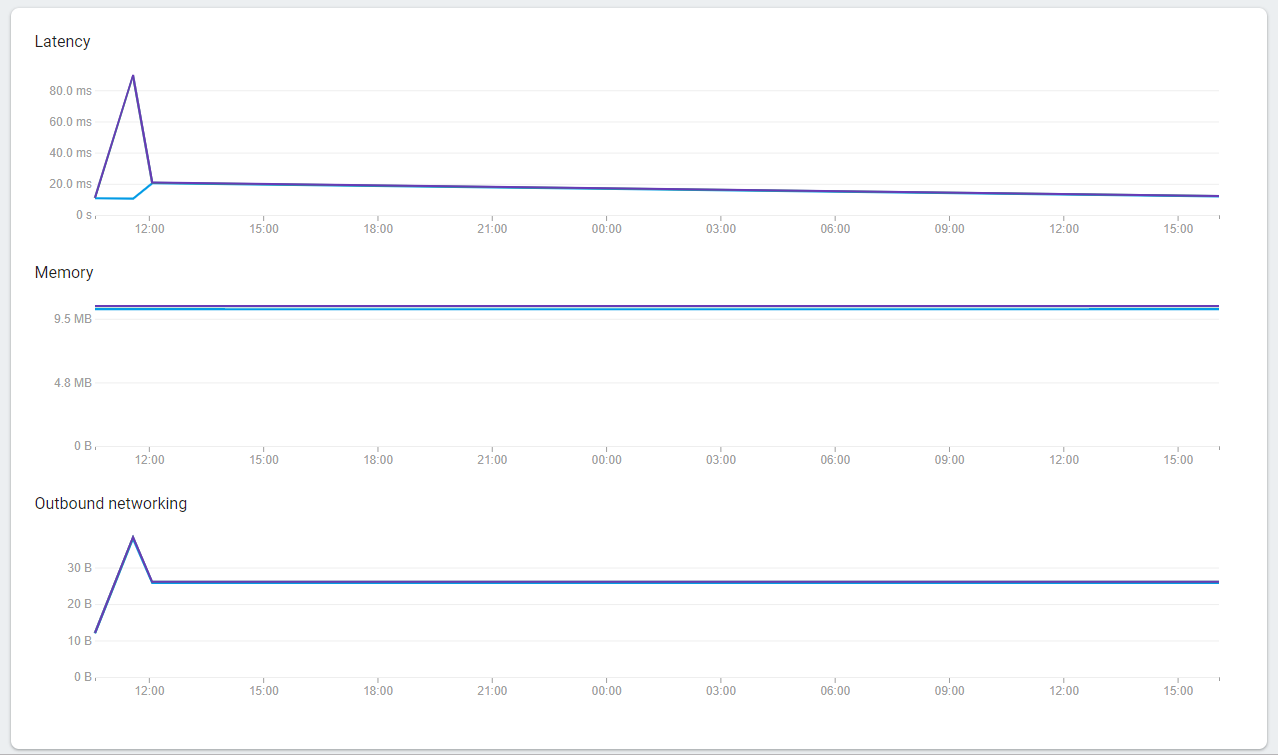
The Health tab shows an overview of your functions’ error rates and overall performance (times invoked, latency, memory usage, network usage). Checking this regularly can help you stay on track of any errors, and provide a quick health check of your functions.
Logs
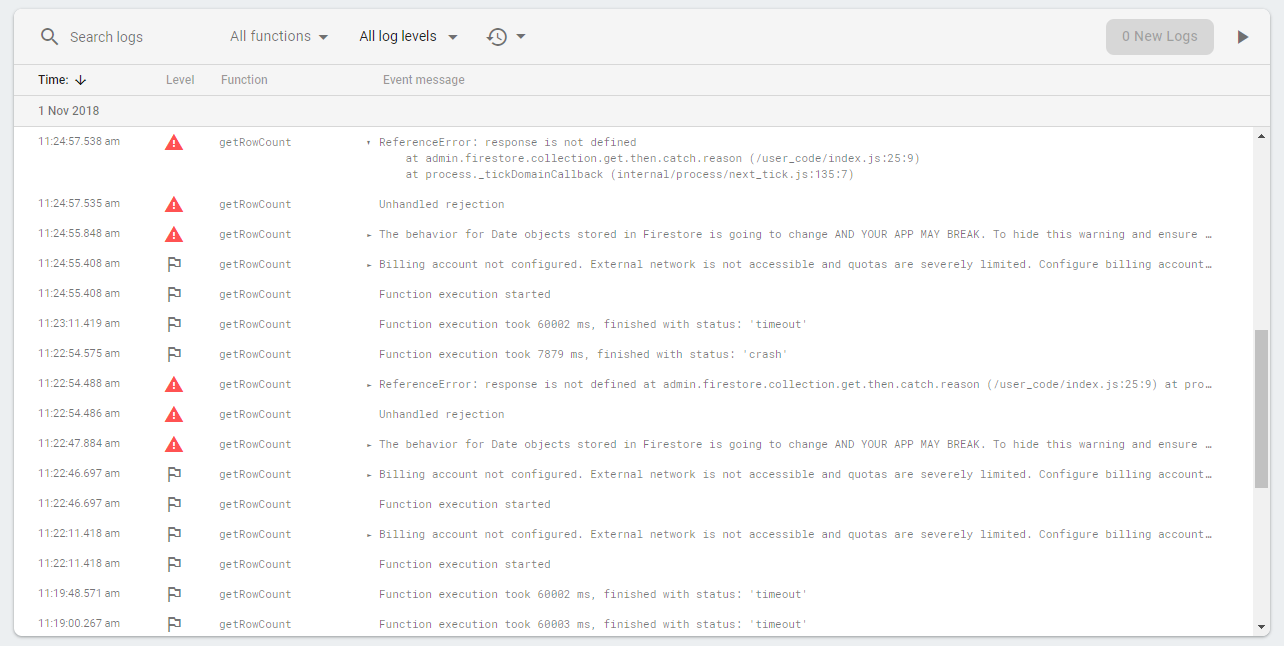
The Logs tab provides a simple log viewer, that can be used for basic analysis of any runtime issues encountered. Logs can be searched, and filtered by function, log level, and time period. These are very useful when experiencing issues with your functions, as a full stack trace will appear here.
Usage
This tab displays a simple chart of total invocations in a selected date range, and a link to your current quota. As it is essentially a repeat of the Health tab, it’s not included here!
Google Cloud Platform
As Cloud Functions technically run on Google Cloud, some statistics can only be viewed there. After visiting the links, make sure to select the correct project using the dropdown at the top of the page.
Dashboard
The dashboard page shows a more comprehensive overview of all your Google Cloud services, and their recent performance.

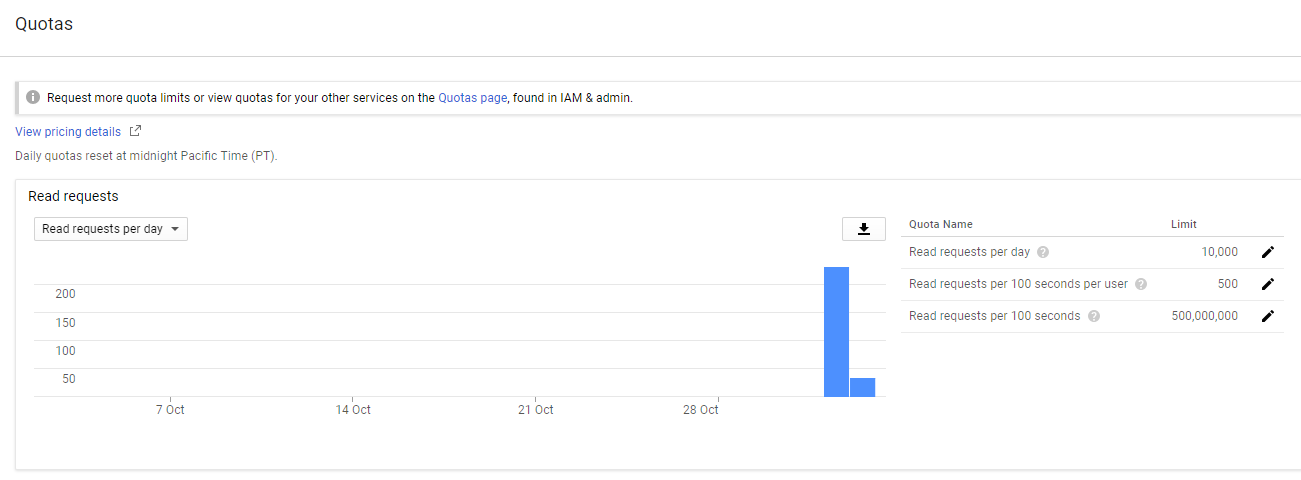
Quotas
The quotas page shows your functions’ usage against all applicable resource limits. For example, your plan is subject to read limits, write limits, CPU limits, traffic limits, DNS limits, build time limits, etc. You should occasionally check the graphs on this page to make sure no functions are misbehaving.
Functions
The Cloud Platform functions overview tab looks and functions almost exactly the same as the Firebase functions overview tab, but it has one key feature: The ability to delete functions!

Conclusion
Firebase’s Cloud Functions service is extremely powerful, and should definitely be investigated if looking into server side processing or considering managing a server yourself.
However, for many use cases it can be simpler to perform basic functionality client-side. Afterwards, this data can then be passed straight to Firestore or Database instead of handling it with a function. Additionally, the ability to only write code in JavaScript (or TypeScript, a slightly extended variant) severely limits the usefulness. Many Android developers will have little to no JavaScript experience, so learning a whole new language with a whole host of unique quirks can be a daunting experience.
Before rashly converting all of your node.js servers to cloud functions, consider running a test run. From this, you can see if the response times and quota fit your requirements. You may find that the ability to distribute the load over multiple regions causes unacceptable performance in some regions.
Previous: Developing Android Apps With Firebase Realtime Database