Associate Android app links with your subdomain using GitHub Pages & Cloudflare
As part of my APOD wallpaper rewrite, I wanted to support universal links / app links. These allow users with the app installed to click a link like apod.jakelee.co.uk/day/2020-01-01 and be taken directly to that APOD within the app!
However, to complicate matters slightly my domain is behind Cloudflare, I wanted to use a subdomain, and I wanted to use GitHub pages for free hosting. This introduced a few problems, hopefully this post helps others solve them!
As a very brief overview of the process, we’ll be hosting a config file that tells Google / Android our app is allowed to automatically handle our links.
Starting resources
Before we get started, I’d like to mention this extremely helpful URL I found whilst implementing app links. The response shows what Google uses when they try to validate your links, along with any errors encountered. To check your site, just replace apod.jakelee.co.uk with your URL (you can also look at Facebook’s or Google’s!).
Throughout this tutorial we’ll also be using the “App Links Assistant”, available under “Tools” in Android Studio. There’s a very detailed companion guide, containing excellent information on handling the links and generating the asset linking file.
I’d also recommend reading through the App Links training, specifically verifying links.
Preparing your JSON linking file
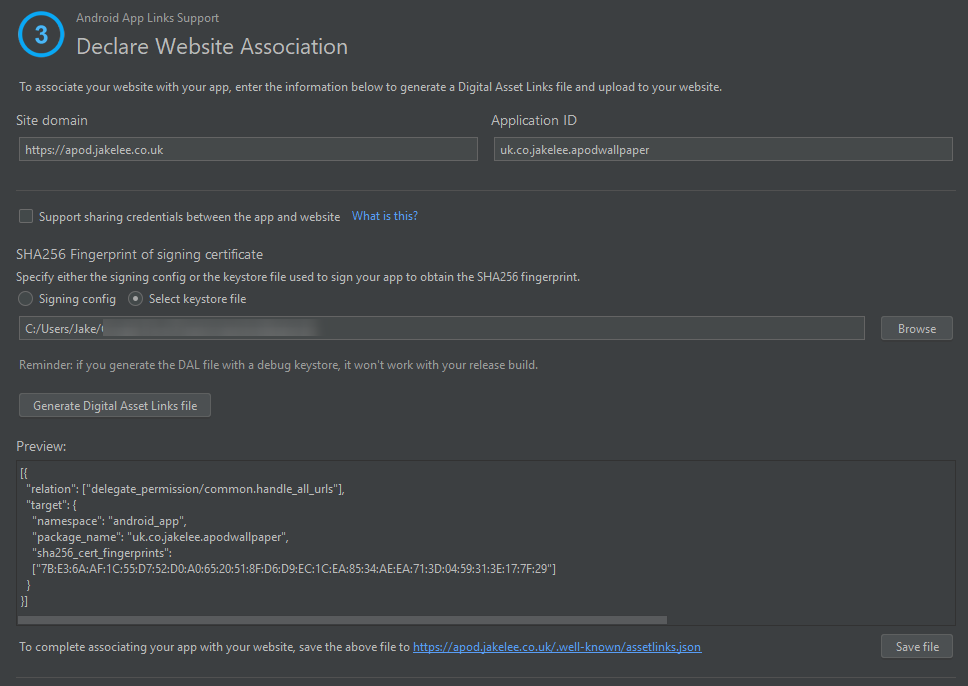
First, to tell Android that our app is allowed to handle certain URLs, we need to host an assetlinks.json file. This essentially lists our URL, our app’s package, and our app’s signature.
This can be made manually, but Android Studio’s wizard (Tools -> App Links Assistant -> Associate website) is much easier.
Simply enter your domain and package, along with your signing information (to retrieve the certificate), and the file will be made for you. Save it somewhere, and we’ll move on to hosting it.
Making a GitHub pages repository
Next, we need to make and configure a repository to host our file (free hosting!). Here’s my repository as an example.
- Create a new public GitHub repository, and clone it locally.
- Put your newly generated
assetlinks.jsonfile in/.well-known/, commit & push. - In the repository’s settings, set a “Source” for GitHub pages (probably master / main branch).
- Enter your custom domain’s information.
Your settings should look like this, note that “Enforce HTTPS” won’t be available yet, and your site won’t be published yet.

Setting up DNS in Cloudflare
Now our file is hosted, we need to actually make it available at our URL!
Configuring the DNS records to properly display the GitHub pages repository was perhaps the trickiest bit of this process. There is an official GitHub walkthrough, but the process simply didn’t work for me, perhaps because I use Cloudflare.
Here’s how I got it working:
- In Cloudflare, turn on “Development Mode” under “Quick Actions” on the overview of your domain. This makes sure all changes are visible immediately.
- On GitHub’s walkthrough, scroll to Step 4 of “Configuring an apex domain”. This contains the IP addresses we need.
- Using at least 2 of those IPs, add proxied “A” records for your subdomain. It will end up looking like this:

When you visit your subdomain’s URL, you should now see some information about your GitHub repository. Whilst it can take up to 24 hours for these changes to propagate, for me it was just a few seconds!
Final changes on GitHub
Now your subdomain is configured, enable the “Enforce HTTPS” option now available in your GitHub repo’s settings. This needs to be enabled for app linking to work, but can take a few minutes to appear.
I got stuck here for quite a while, as it turns out GitHub treats folders in Pages repositories differently to how I expected. Essentially, you can’t navigate directly to your asset linking file without telling GitHub the folder should be included:
- Create the file
_config.ymlin the root of your project. - Put
include: [".well-known"]inside, and save.
Visit your asset links URL (https://yourdomain/.well-known/assetlinks.json), and you should finally see your file!
Finally, check your domain on Google’s asset linking API. You should see your json, followed by **** ERRORS ****\nNone!\n, this means it’s all sorted!
It can take a while for Cloudflare and GitHub changes to propagate, so be prepared to wait a few hours. In the meantime, we can make the necessary changes to the app.
Adding URLs to Android manifest
The only change we need to make to the manifest is specifying which activity our URL should open. We also want to use autoVerify to automatically verify we own the domain.
This can be done automatically in Android Studio’s Tools -> App Links Assistant -> URL Mapping Editor:
- Click the add button (+)
- Enter your URL
- Pick an activity (probably
MainActivity) - Press OK
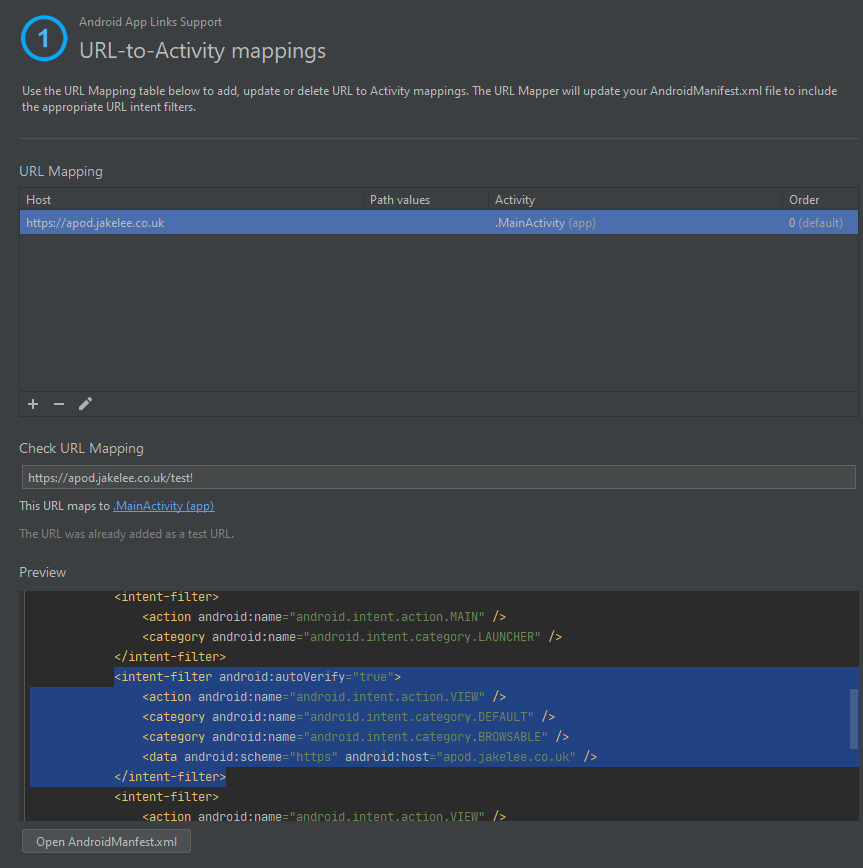
An intent filter will then be added to your AndroidManifest.xml looking something like:
<intent-filter android:autoVerify="true">
    <action android:name="android.intent.action.VIEW" />
    <category android:name="android.intent.category.DEFAULT" />
    <category android:name="android.intent.category.BROWSABLE" />
    <data android:scheme="https" android:host="apod.jakelee.co.uk" />
</intent-filter>
Your screen will end up looking like this, you can click a URL to see it in the manifest:
Conclusion
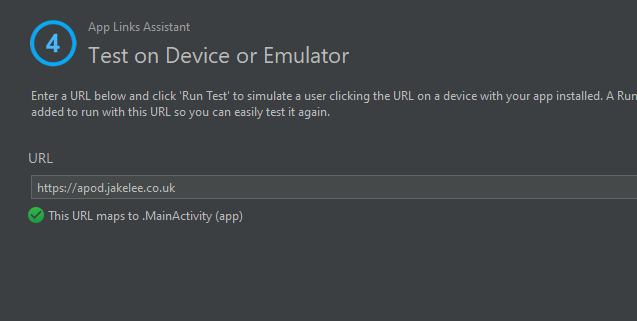
That’s it, your app is linked to your domain!
Now, when you try to open links to your domain, your app should automatically open. If this isn’t the case, make sure:
- You’re signing your app with the same certificate / key you used to create your
assetlinks.json. - You don’t see any errors when checking your URL on the API.
- You’ve tried completely reinstalling your app, to force the verification process.
- You’re using HTTPS (not HTTP) everywhere.
- You’ve read through the official tutorial, and there’s no edge cases there that apply to you.
The next steps are actually handling the intent that a universal link will send to your Activity. There’s some starting information in the official App Links tutorial, I’ll also be making a follow up post about supporting universal links and (outdated) custom schema links (e.g. apod://x).
Further resources
- App links guide: https://developer.android.com/training/app-links
- Verifying app links guide: https://developer.android.com/training/app-links/verify-site-associations
- Official app links tutorial: https://developer.android.com/studio/write/app-link-indexing
- My GitHub pages repository: https://github.com/JakeSteam/APODWallpaperSubdomain
- Technical info on app links: https://chris.orr.me.uk/android-app-linking-how-it-works/
- GitHub pages custom domain tutorial: https://docs.github.com/en/free-pro-team@latest/github/working-with-github-pages/managing-a-custom-domain-for-your-github-pages-site
- API to check your app linking file: https://digitalassetlinks.googleapis.com/v1/statements:list?source.web.site=https://apod.jakelee.co.uk&relation=delegate_permission/common.handle_all_urls